Wood Burning Paste, Heat Guns, and a Lesson in Patience (for Finch HQ 🐦)
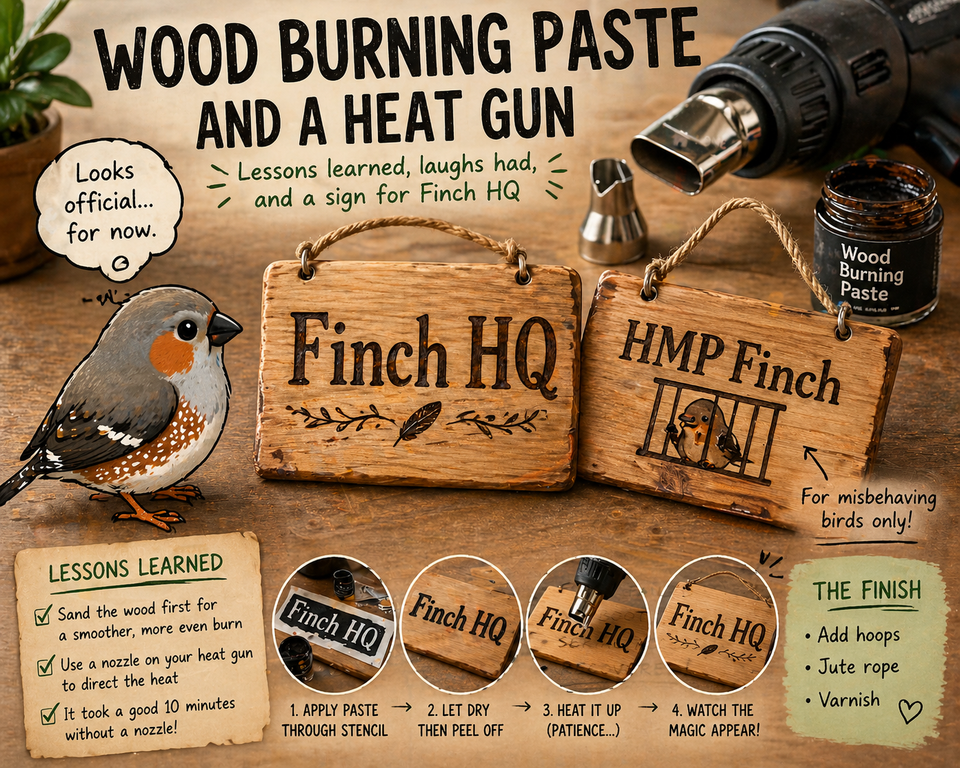
I recently took on a small craft project with a bit of personality behind it - creating a wooden sign for a finch rescue I support, lovingly called “Finch HQ”. Of course, no proper organisation is complete without a tongue-in-cheek counterpart, so the reverse side reads “HMP Finch”… reserved, naturally, for the more enthusiastic residents. For more information, have a look at their Facebook and Instagram pages.
facebook.com/tweetretreatsbirdieboarding
instagram.com/tweetretreatsbirdieboarding
The goal was to burn both phrases into a wooden plaque using wood burning paste and a heat gun. Simple in theory. Slightly more chaotic in practice, just like Finch HQ.
Tools You'll Need
To get started with this type of wood burning, you will need:
- A heat gun
- Scorch Wood Burning Paste
- Something to burn - I used this pine circle from Hobby Craft
- A Stencil - I made my own using a Cricut Joy Vinyl Cutter.
- A brush
- Something to scrape the paster across - like an old business card or loyalty card.
The Setup
I started with a ready-to-go wooden piece from Hobbycraft, some wood burning paste, a stencil for the lettering using my Cricut joy, and a standard heat gun.
Application of the paste was straightforward:
- Apply through the stencil
- Peel carefully
- Try not to smudge anything (easier said than done)
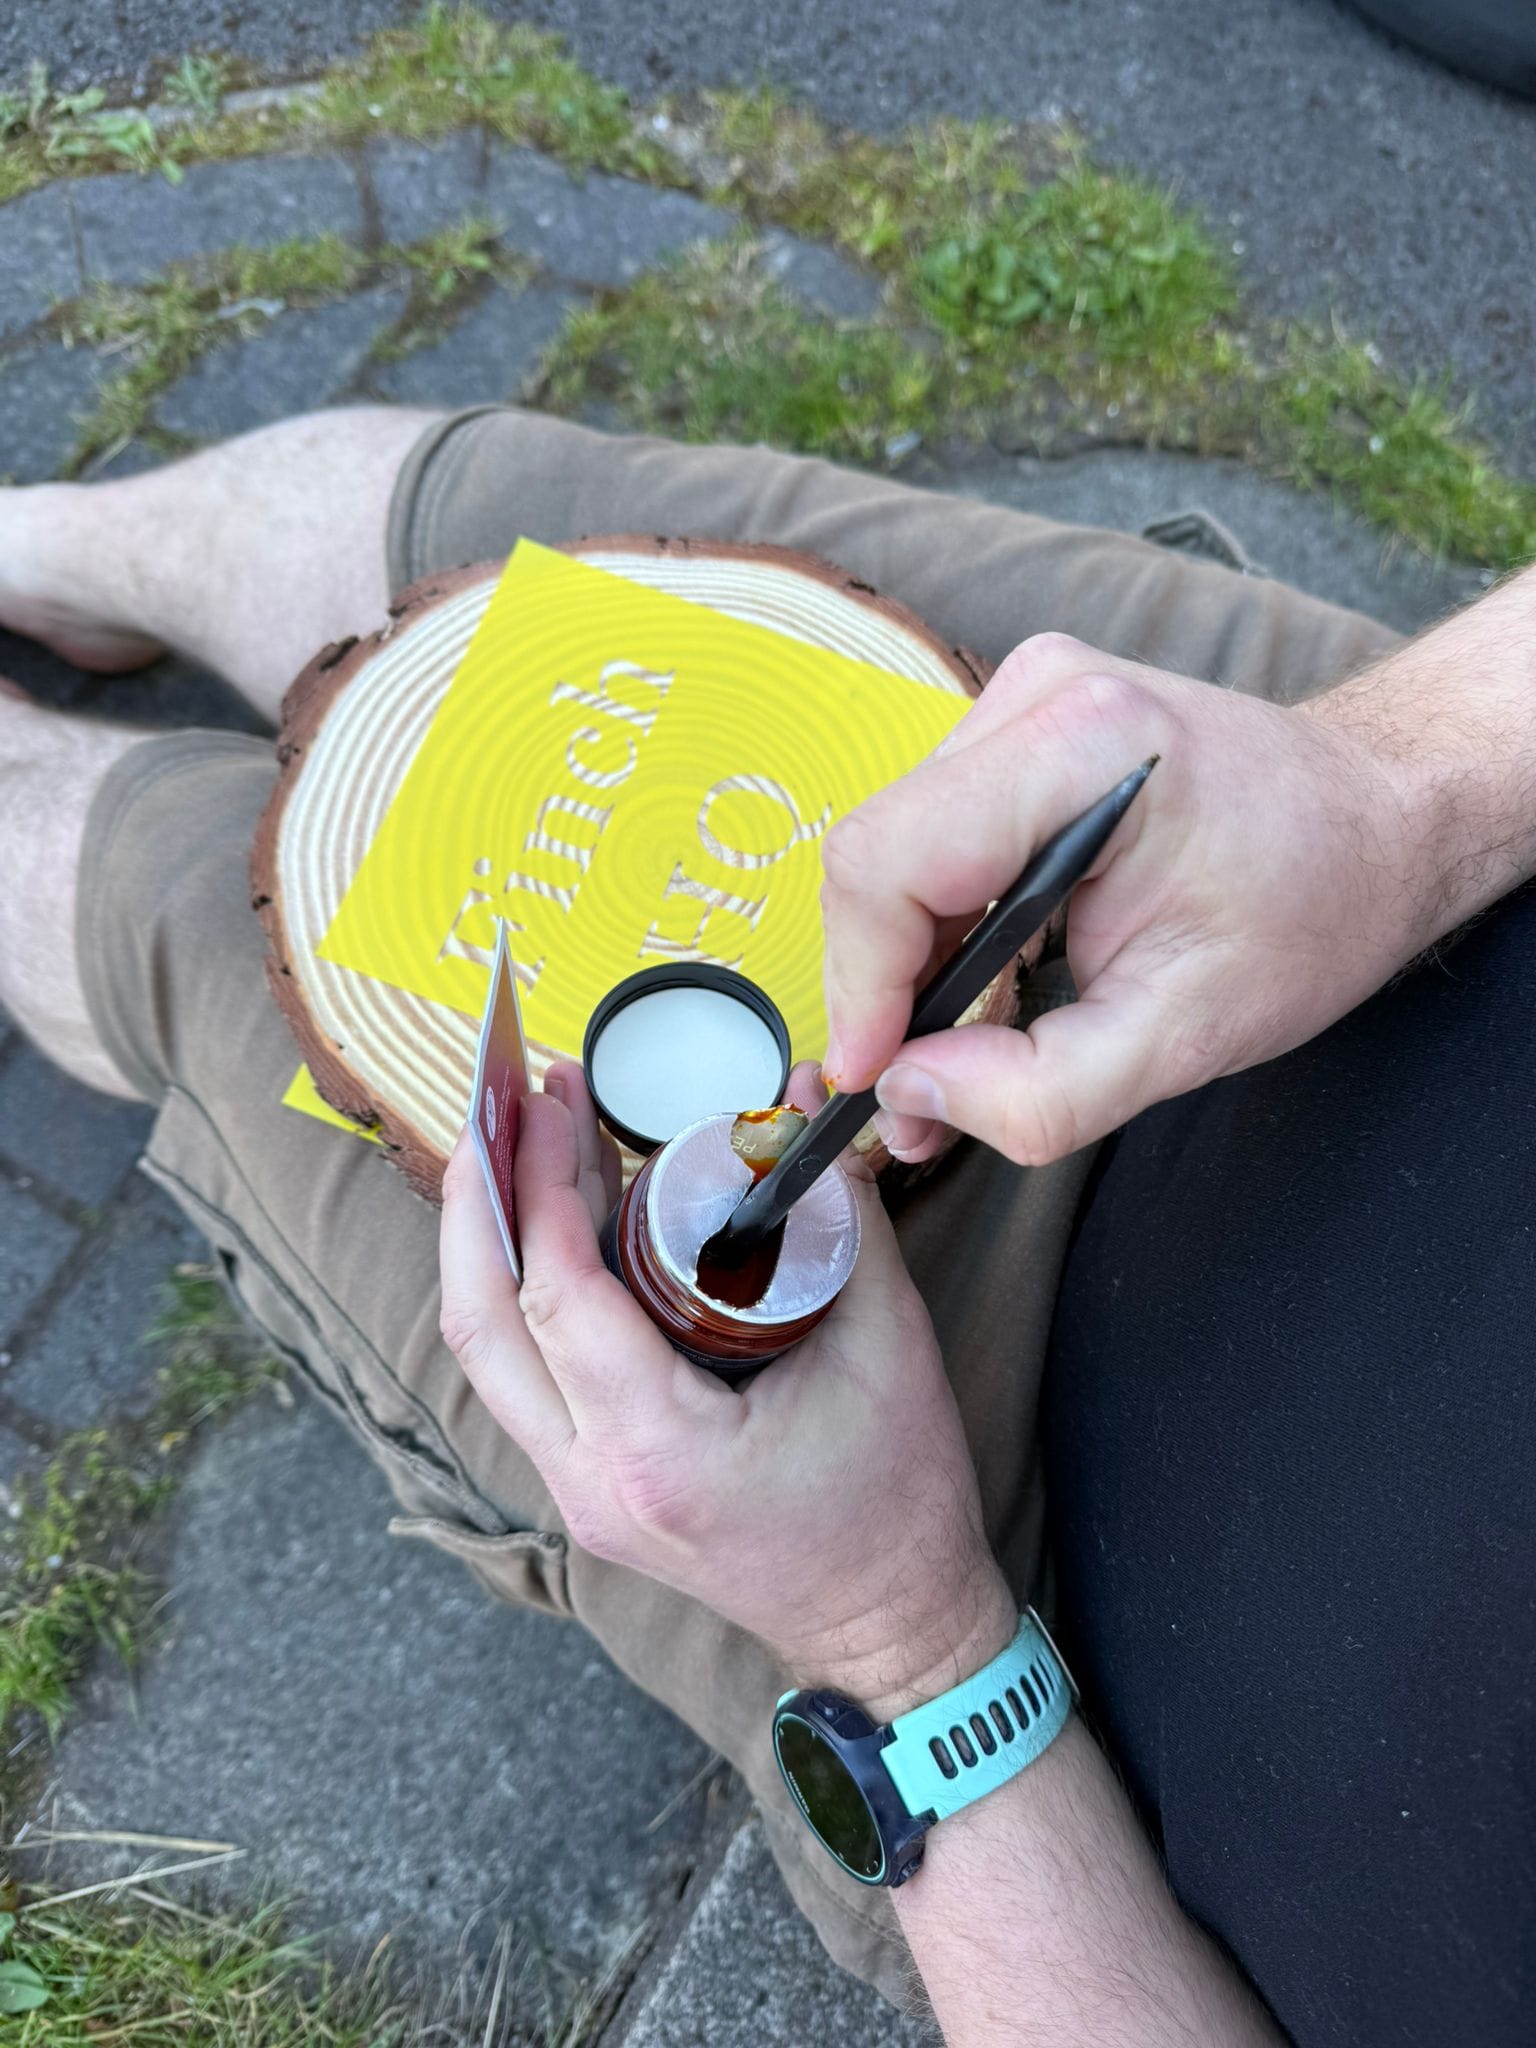
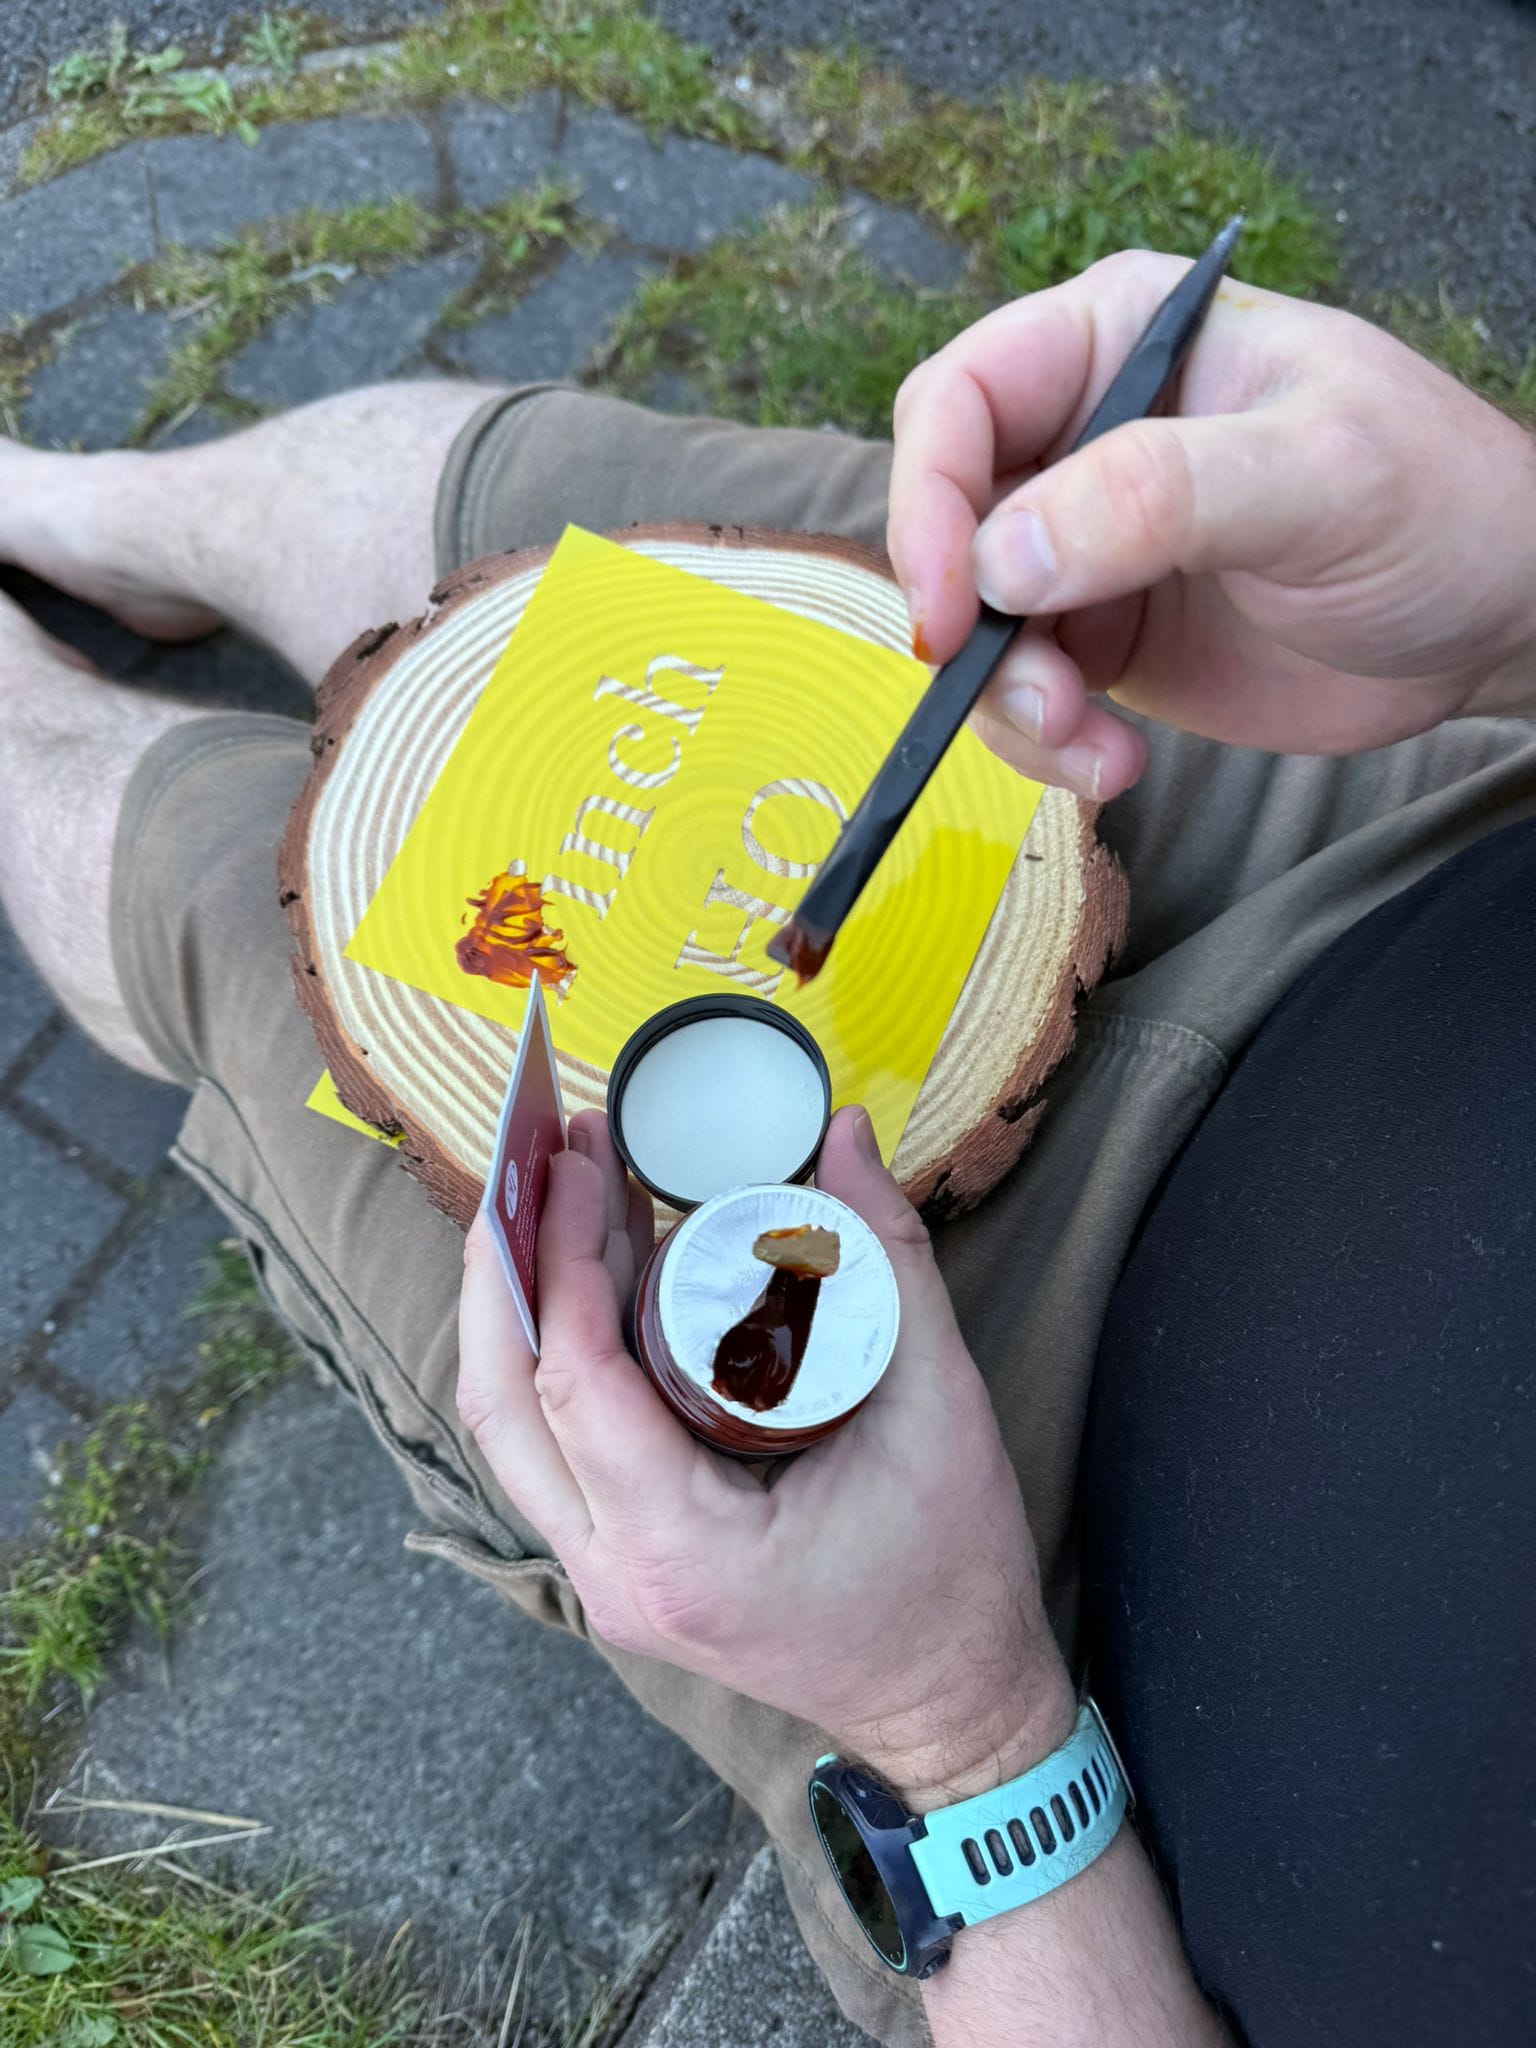
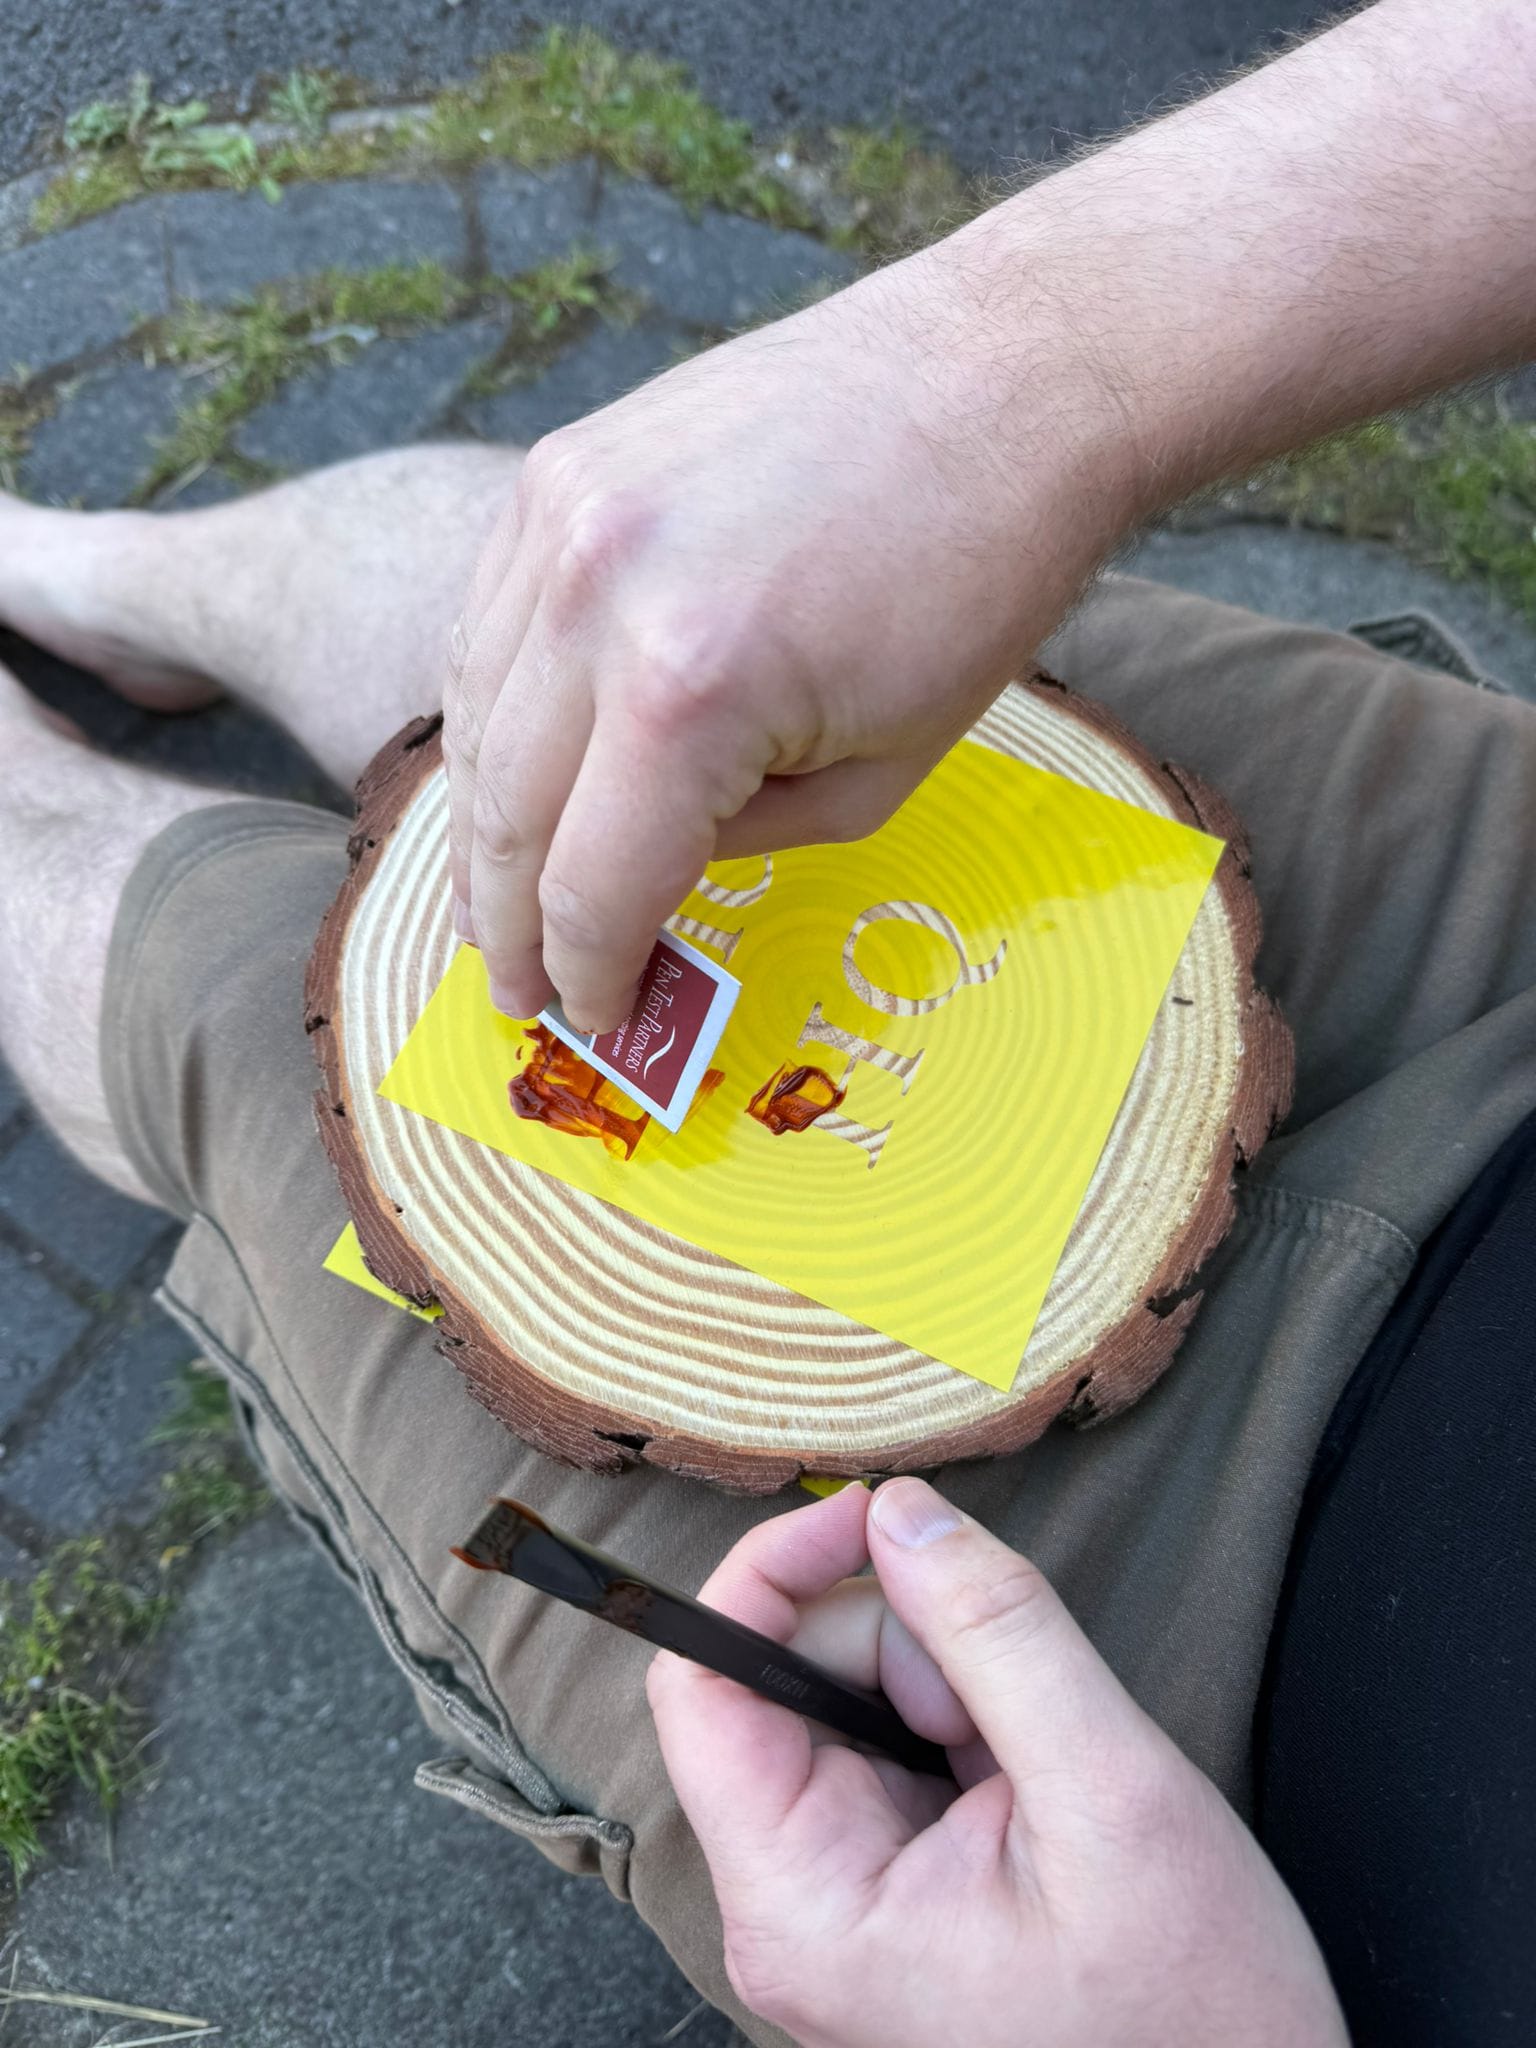
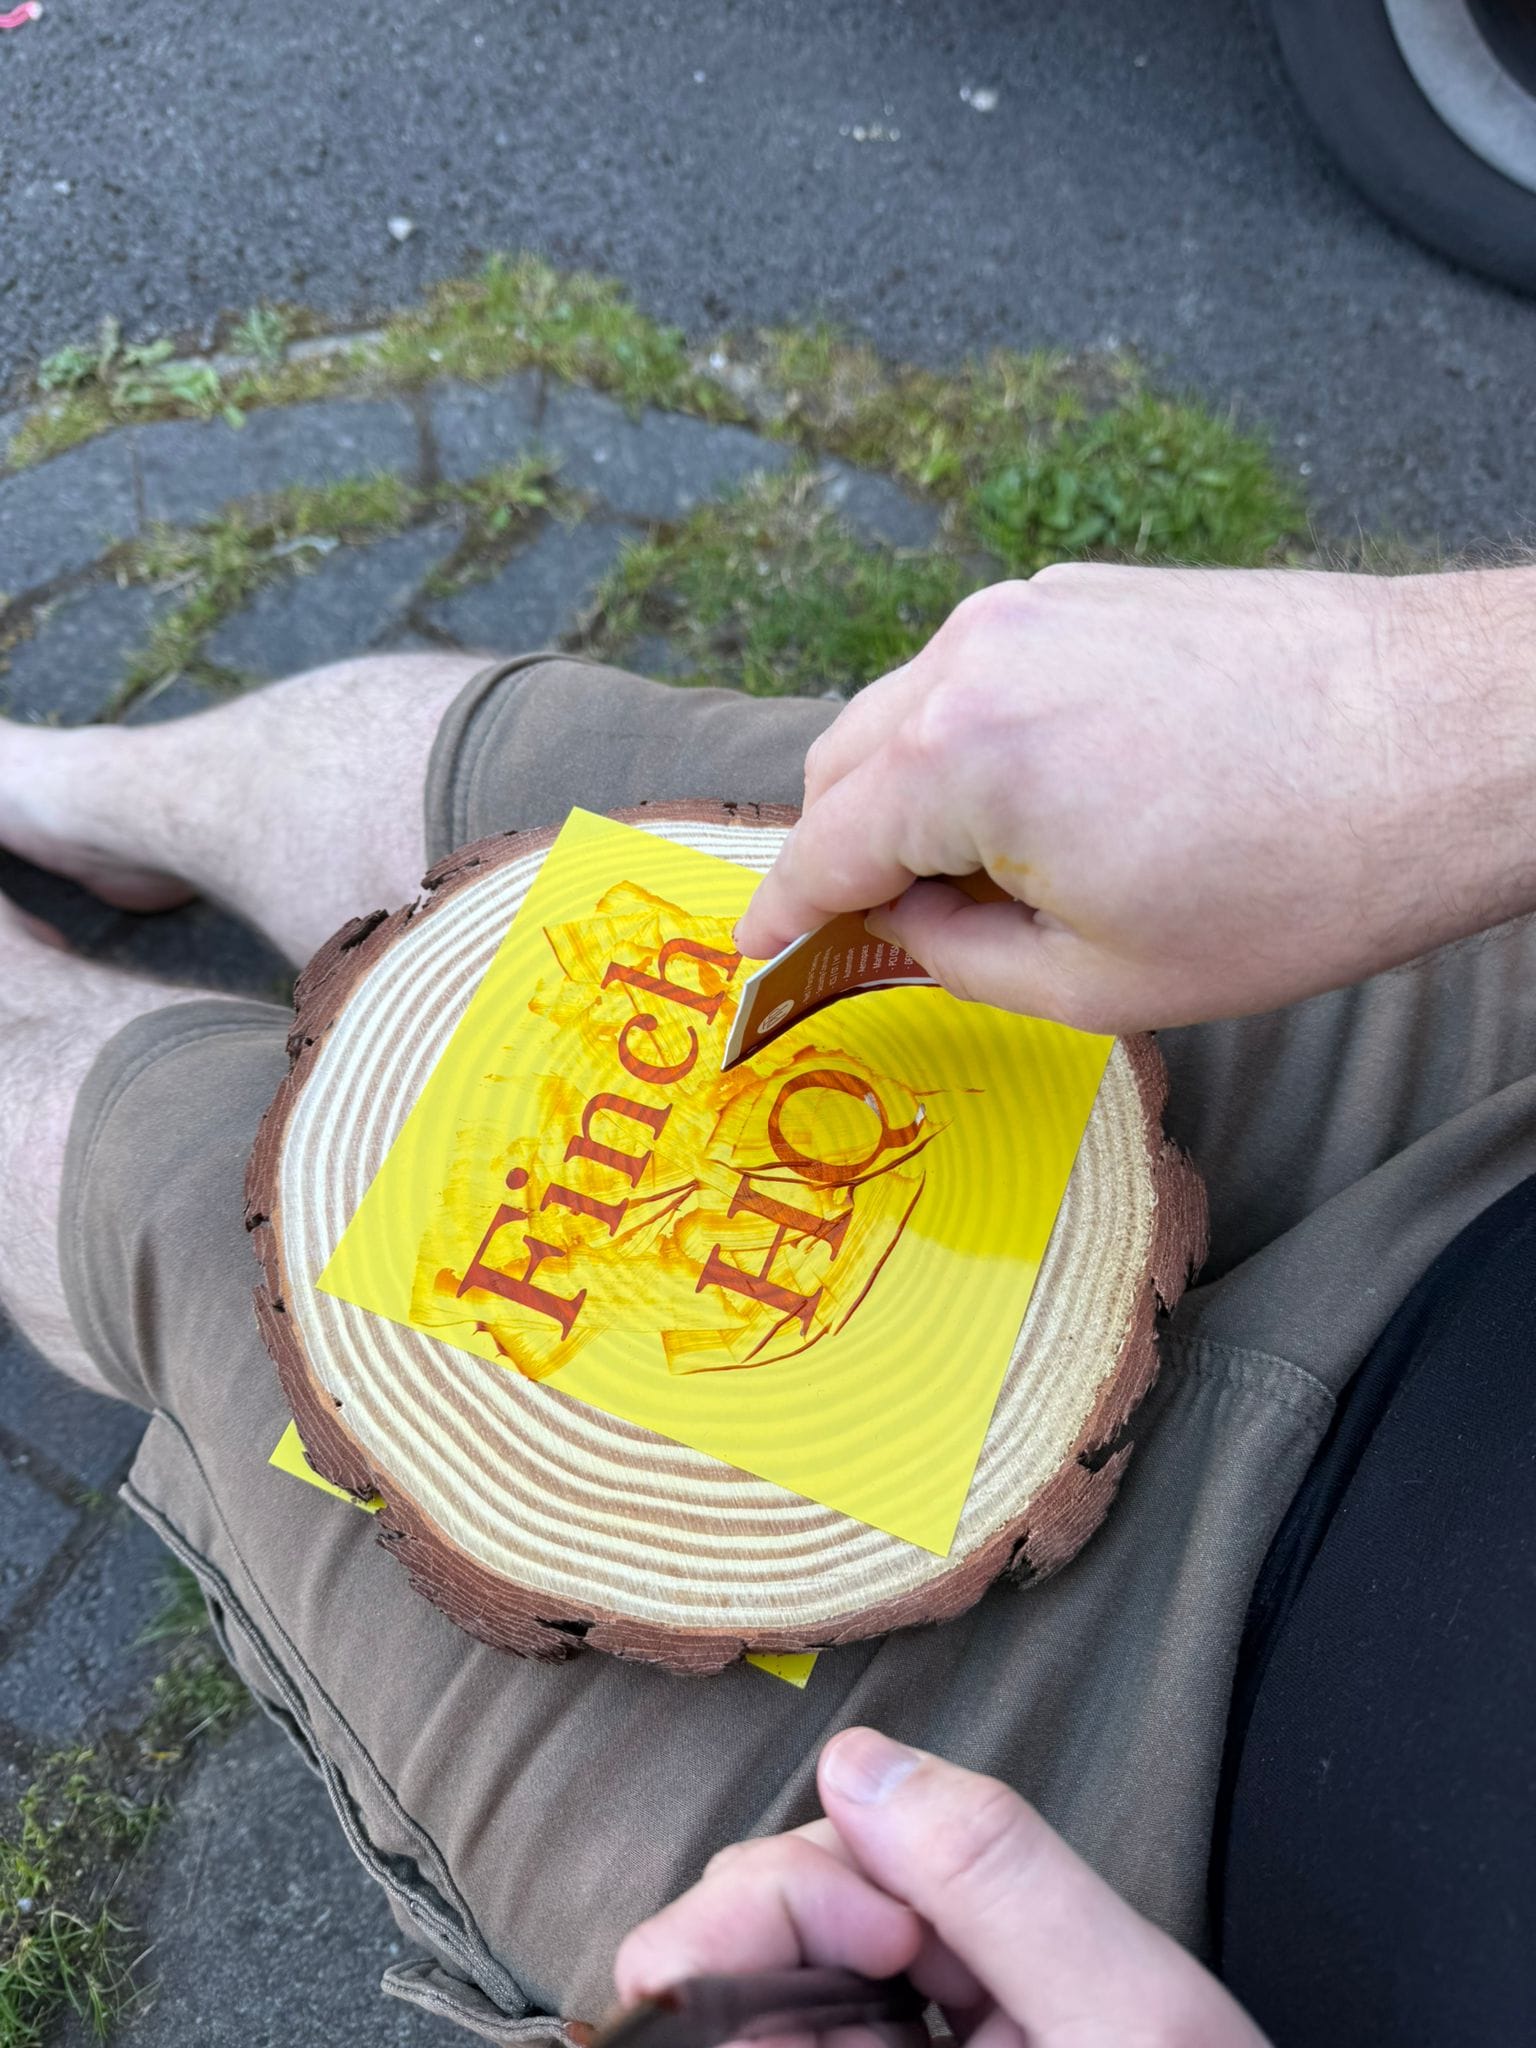

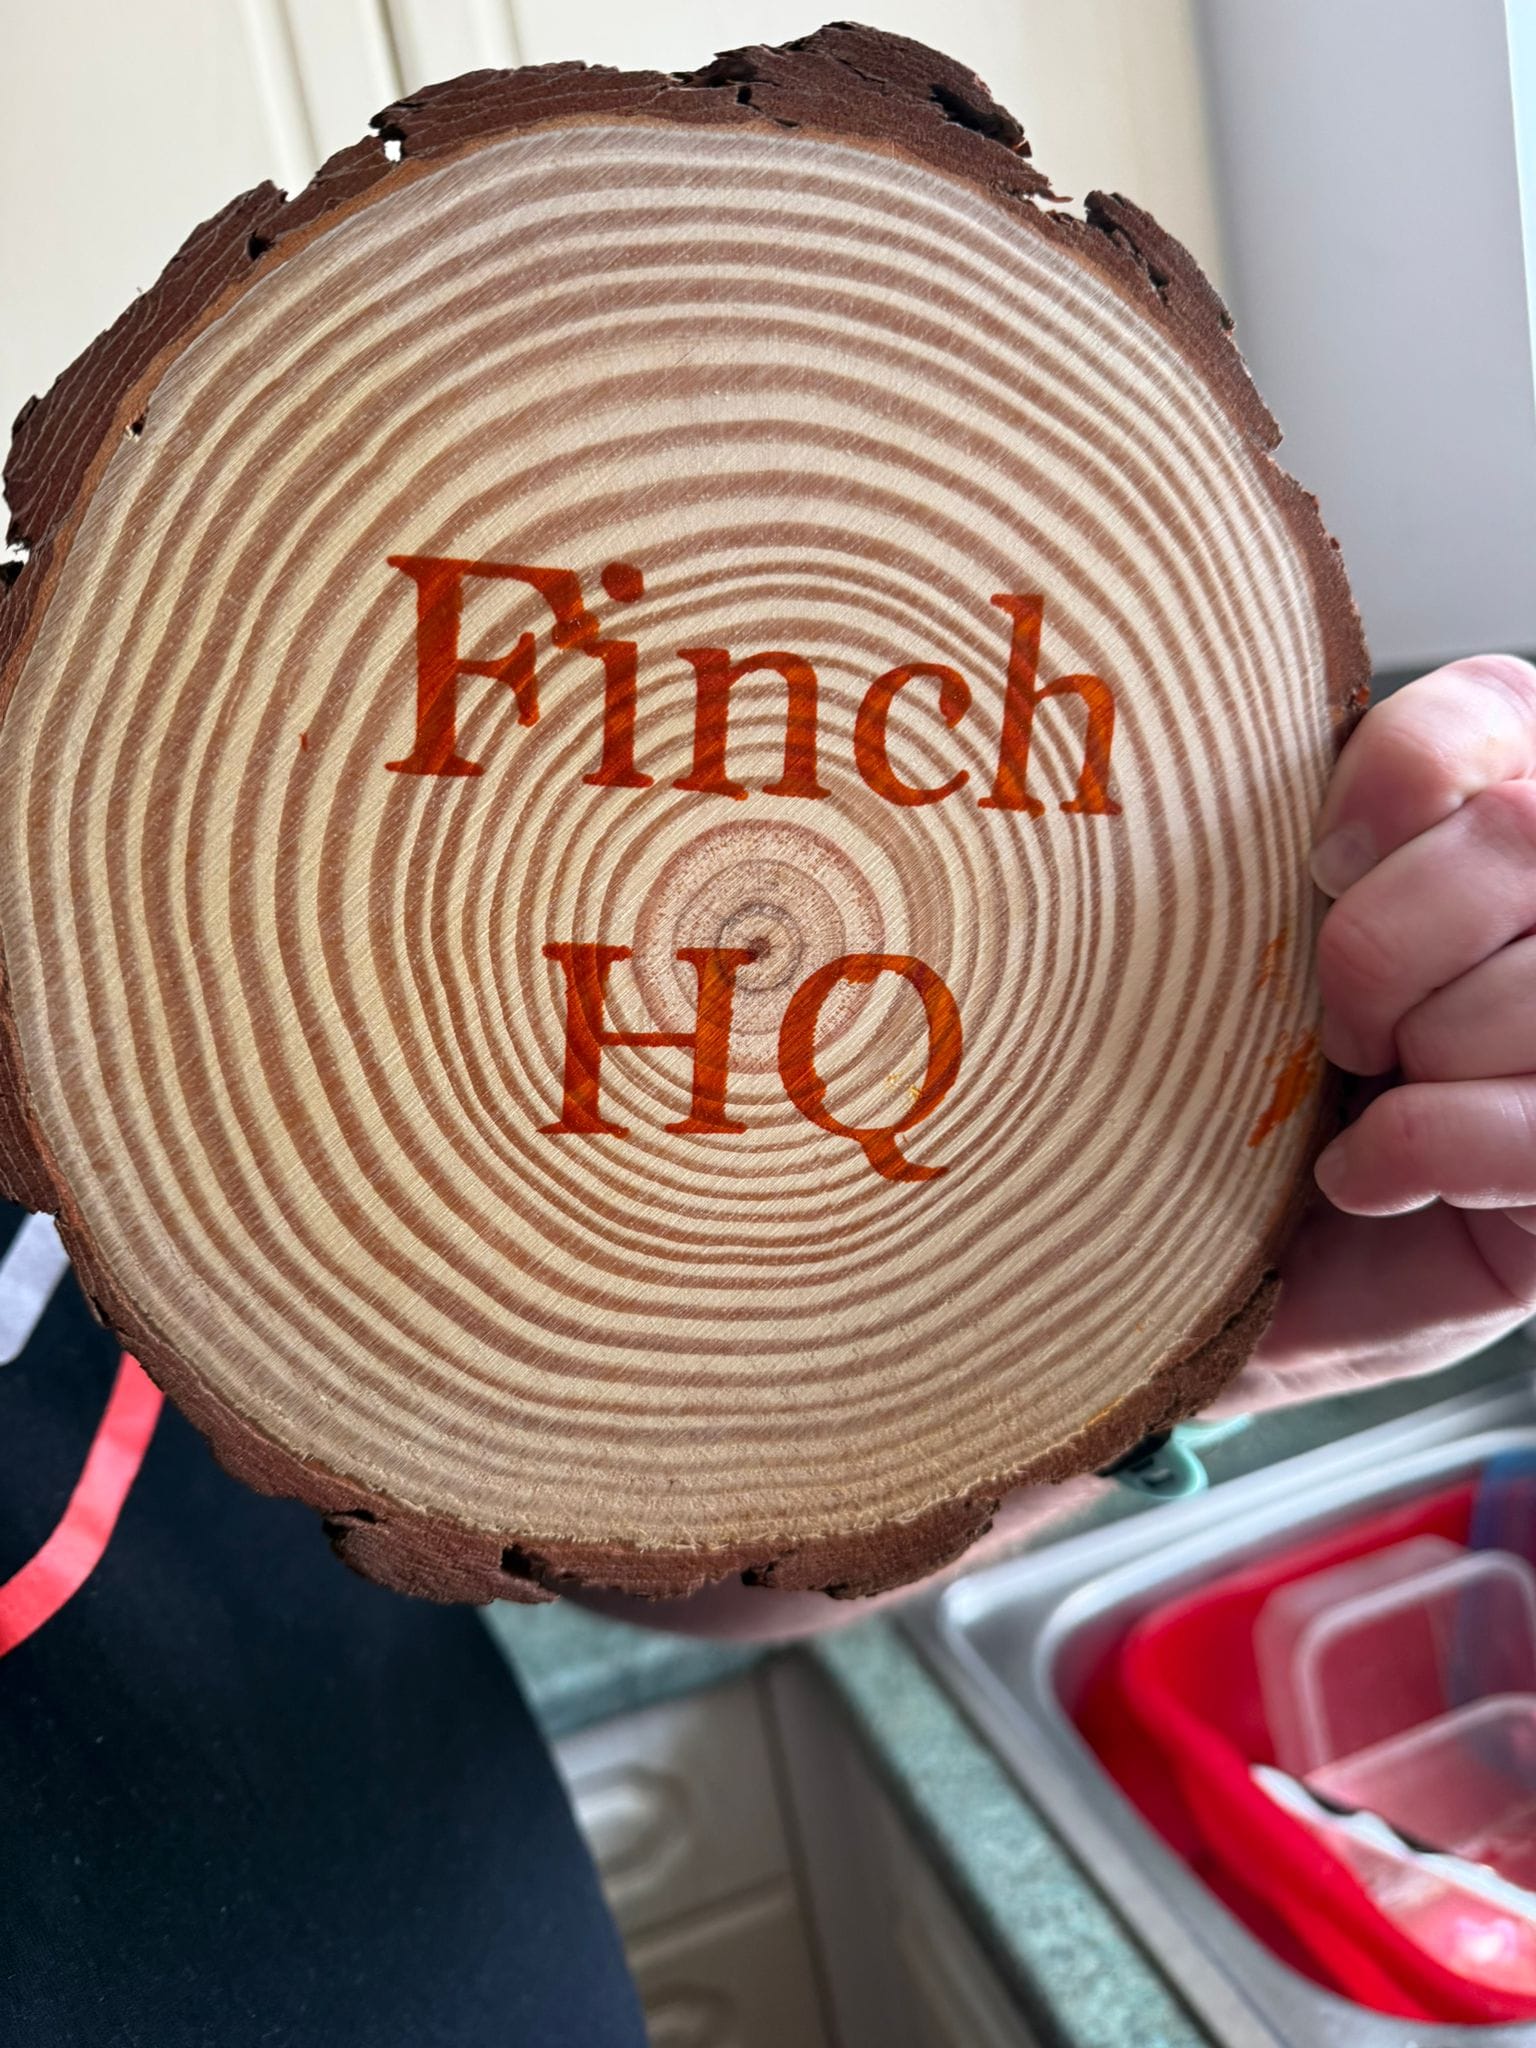
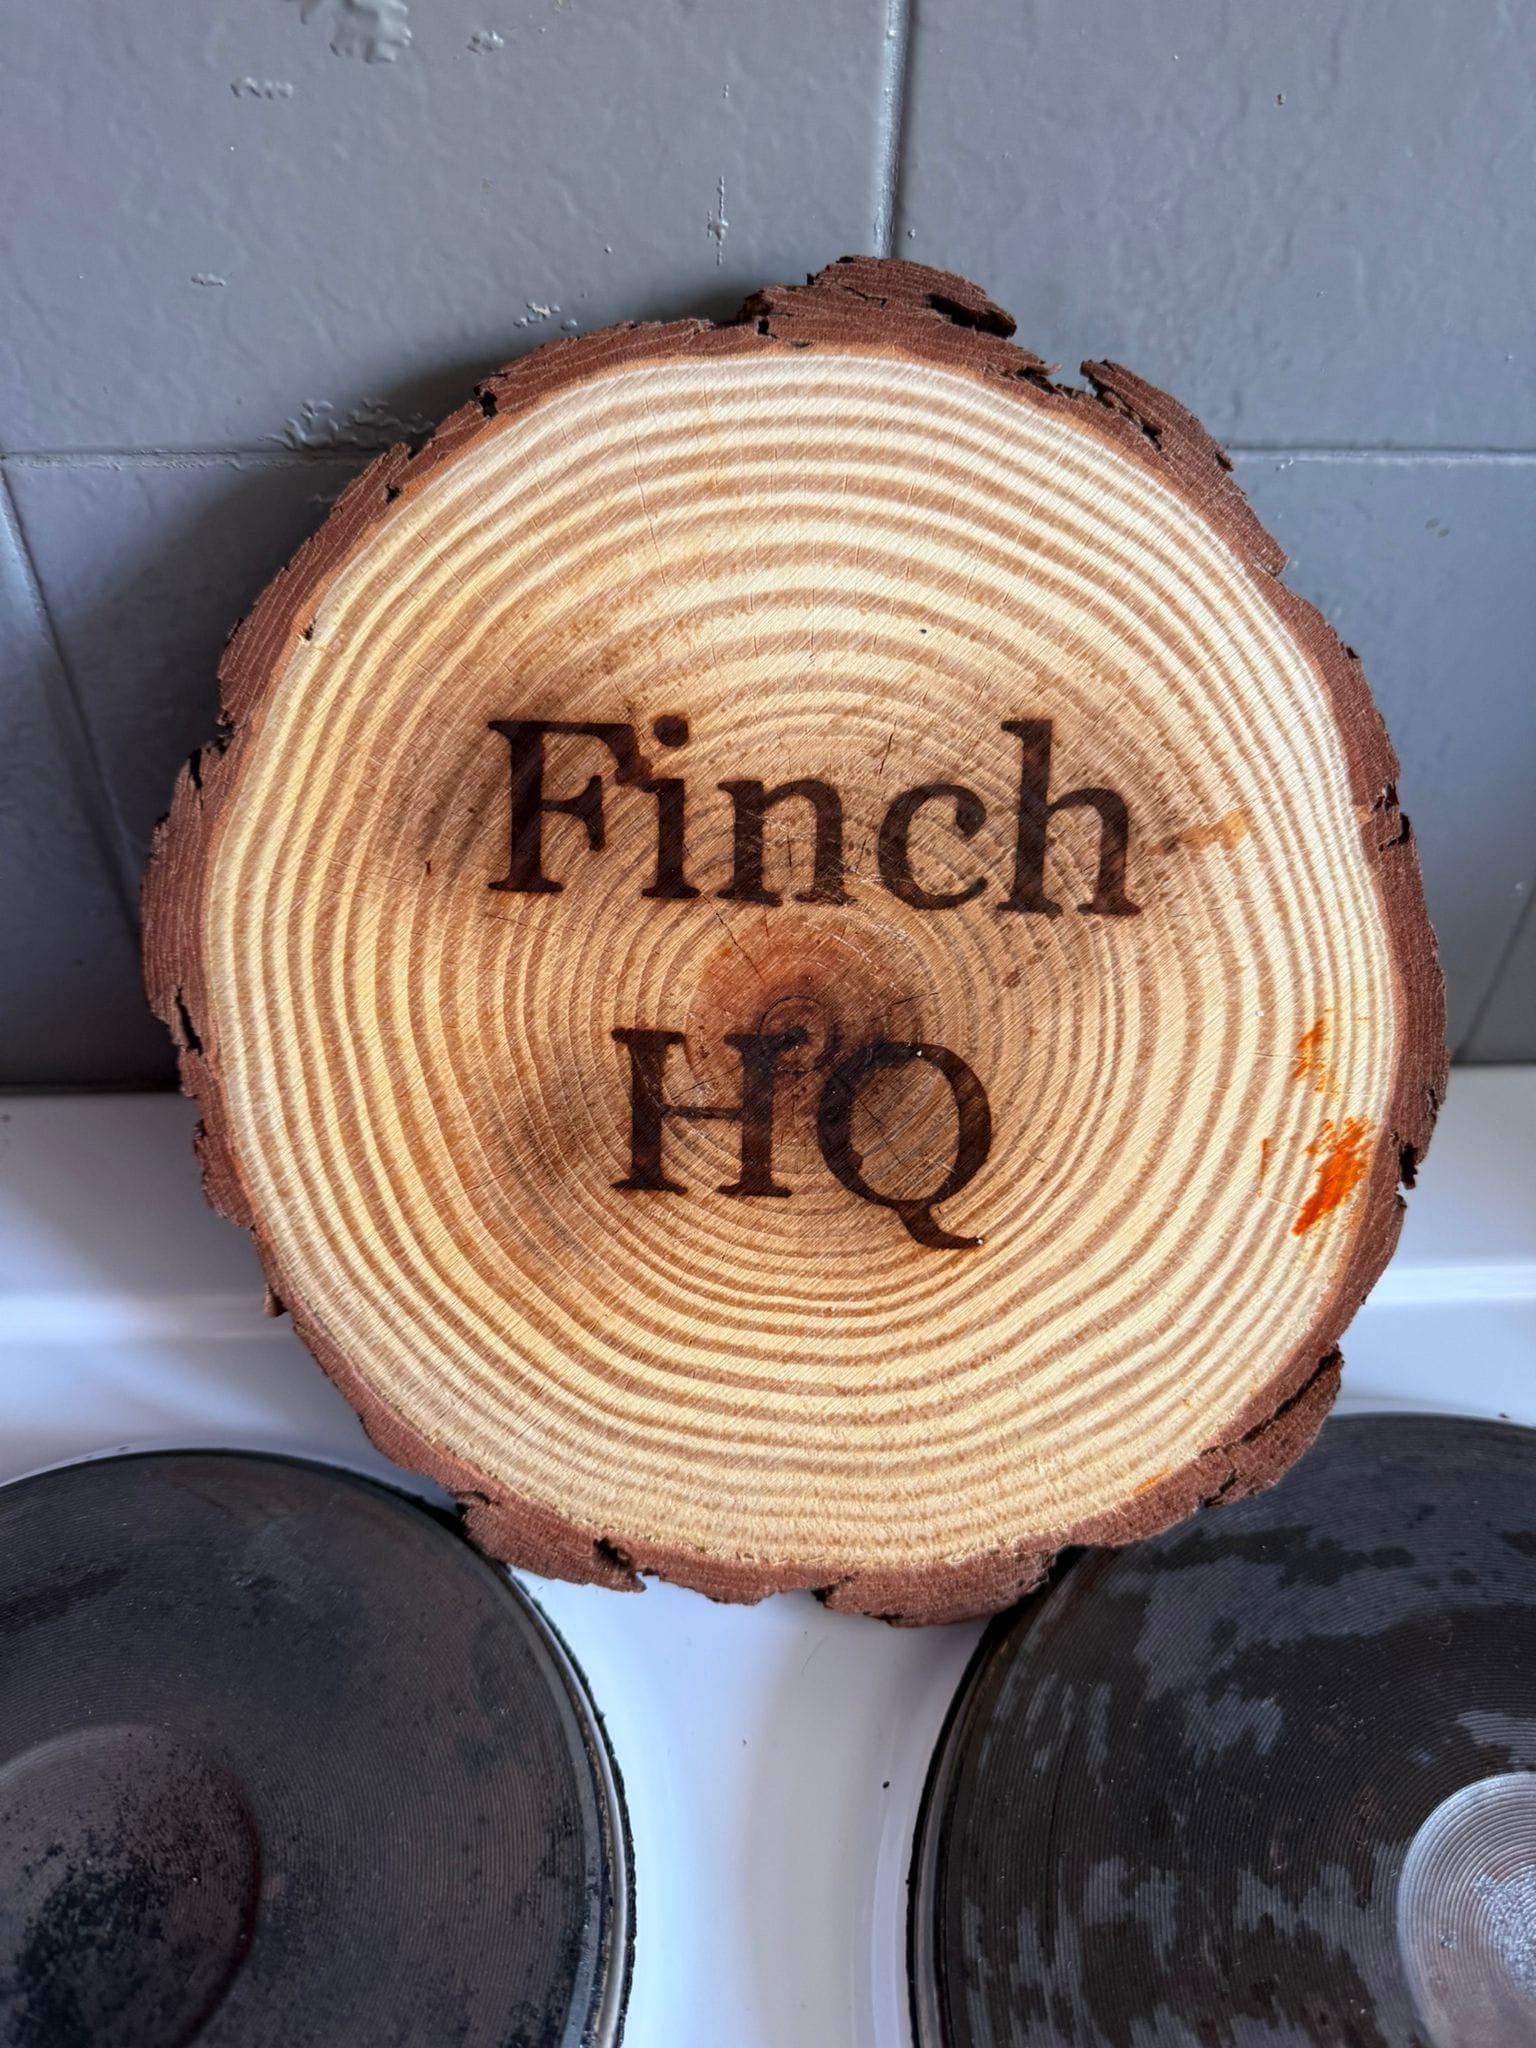
At this point, everything looked promising. The paste was cleanly applied, and the text - “Finch HQ” on one side and “HMP Finch” on the other - was nicely defined. You don't need a lot of paste, just a thin layer.
Where It Went Wrong (and What I’d Do Differently)
1. I Skipped Sanding the Wood
This was my first mistake.
The surface looked smooth enough out of the shop, so I didn’t bother sanding it down beforehand. Big miss. The uneven grain affected how the paste reacted to heat, leading to slightly inconsistent burning.
Lesson learned:
Always sand the wood first. Even a quick pass makes a noticeable difference in how clean and even the burn turns out.
2. No Nozzle = Slow Burn
The second issue was heat application.
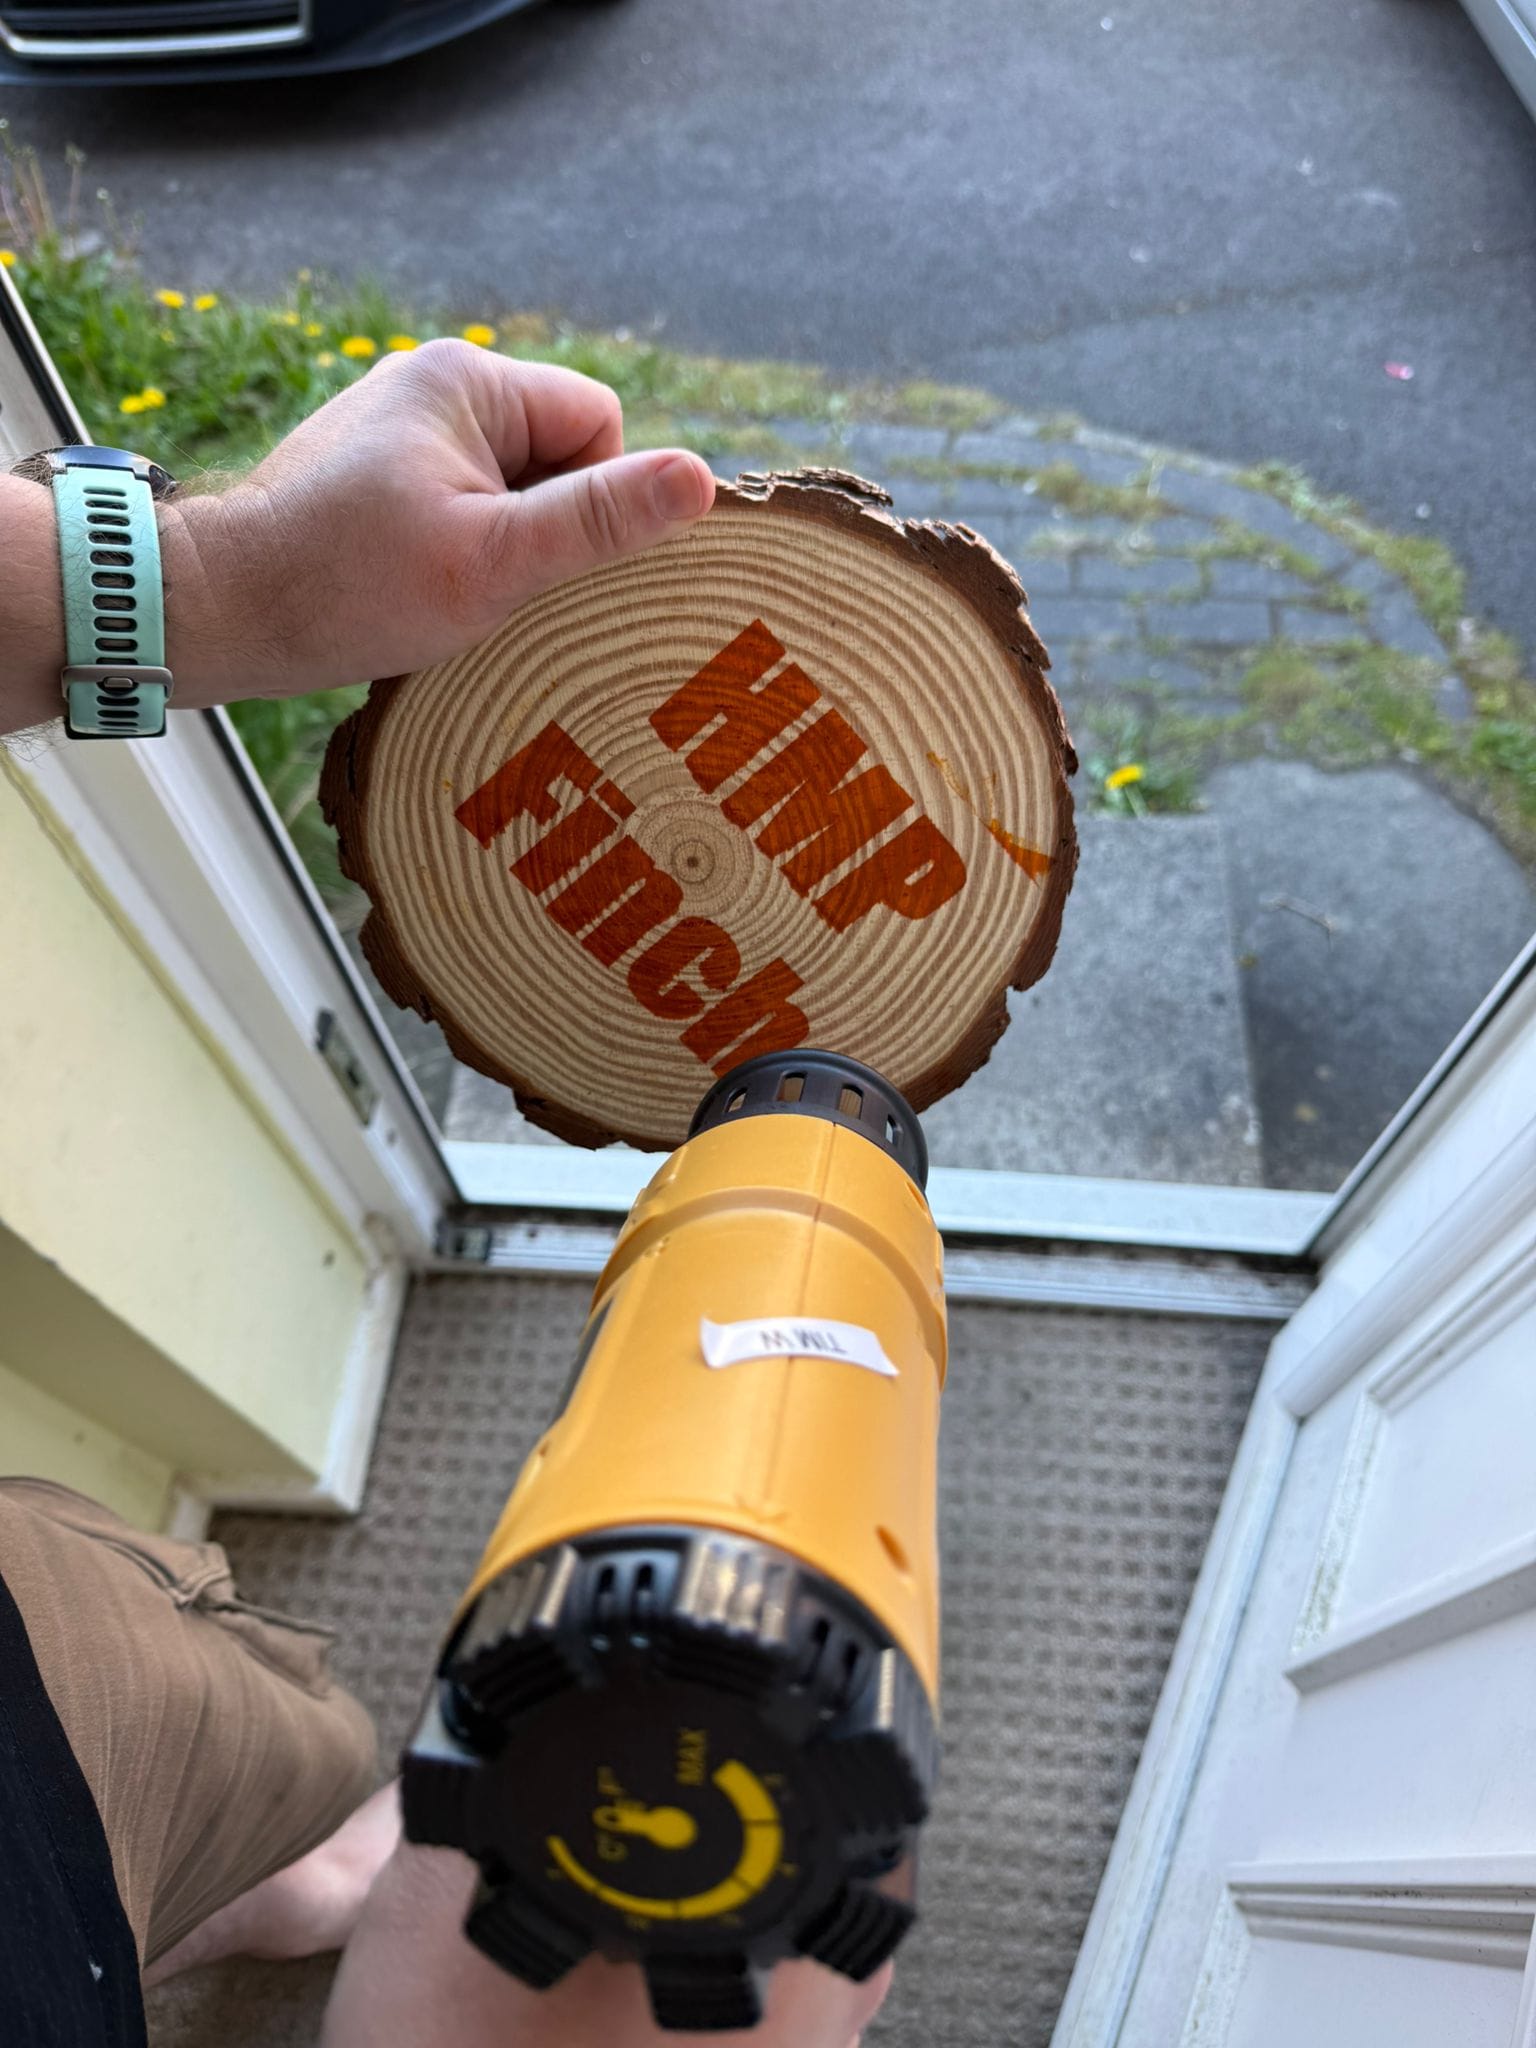
I used a heat gun without a nozzle attachment, which meant the hot air was dispersed over a wider area instead of being focused directly on the paste.
The result?
It took a solid 10 minutes of heating before the burn effect properly appeared.
Not only was that longer than expected, but it also made it harder to control the intensity of the burn. The wood also got hot too.
Lesson learned:
Use a nozzle. Directing the heat speeds things up significantly and gives you far more control over the final look.
The Payoff
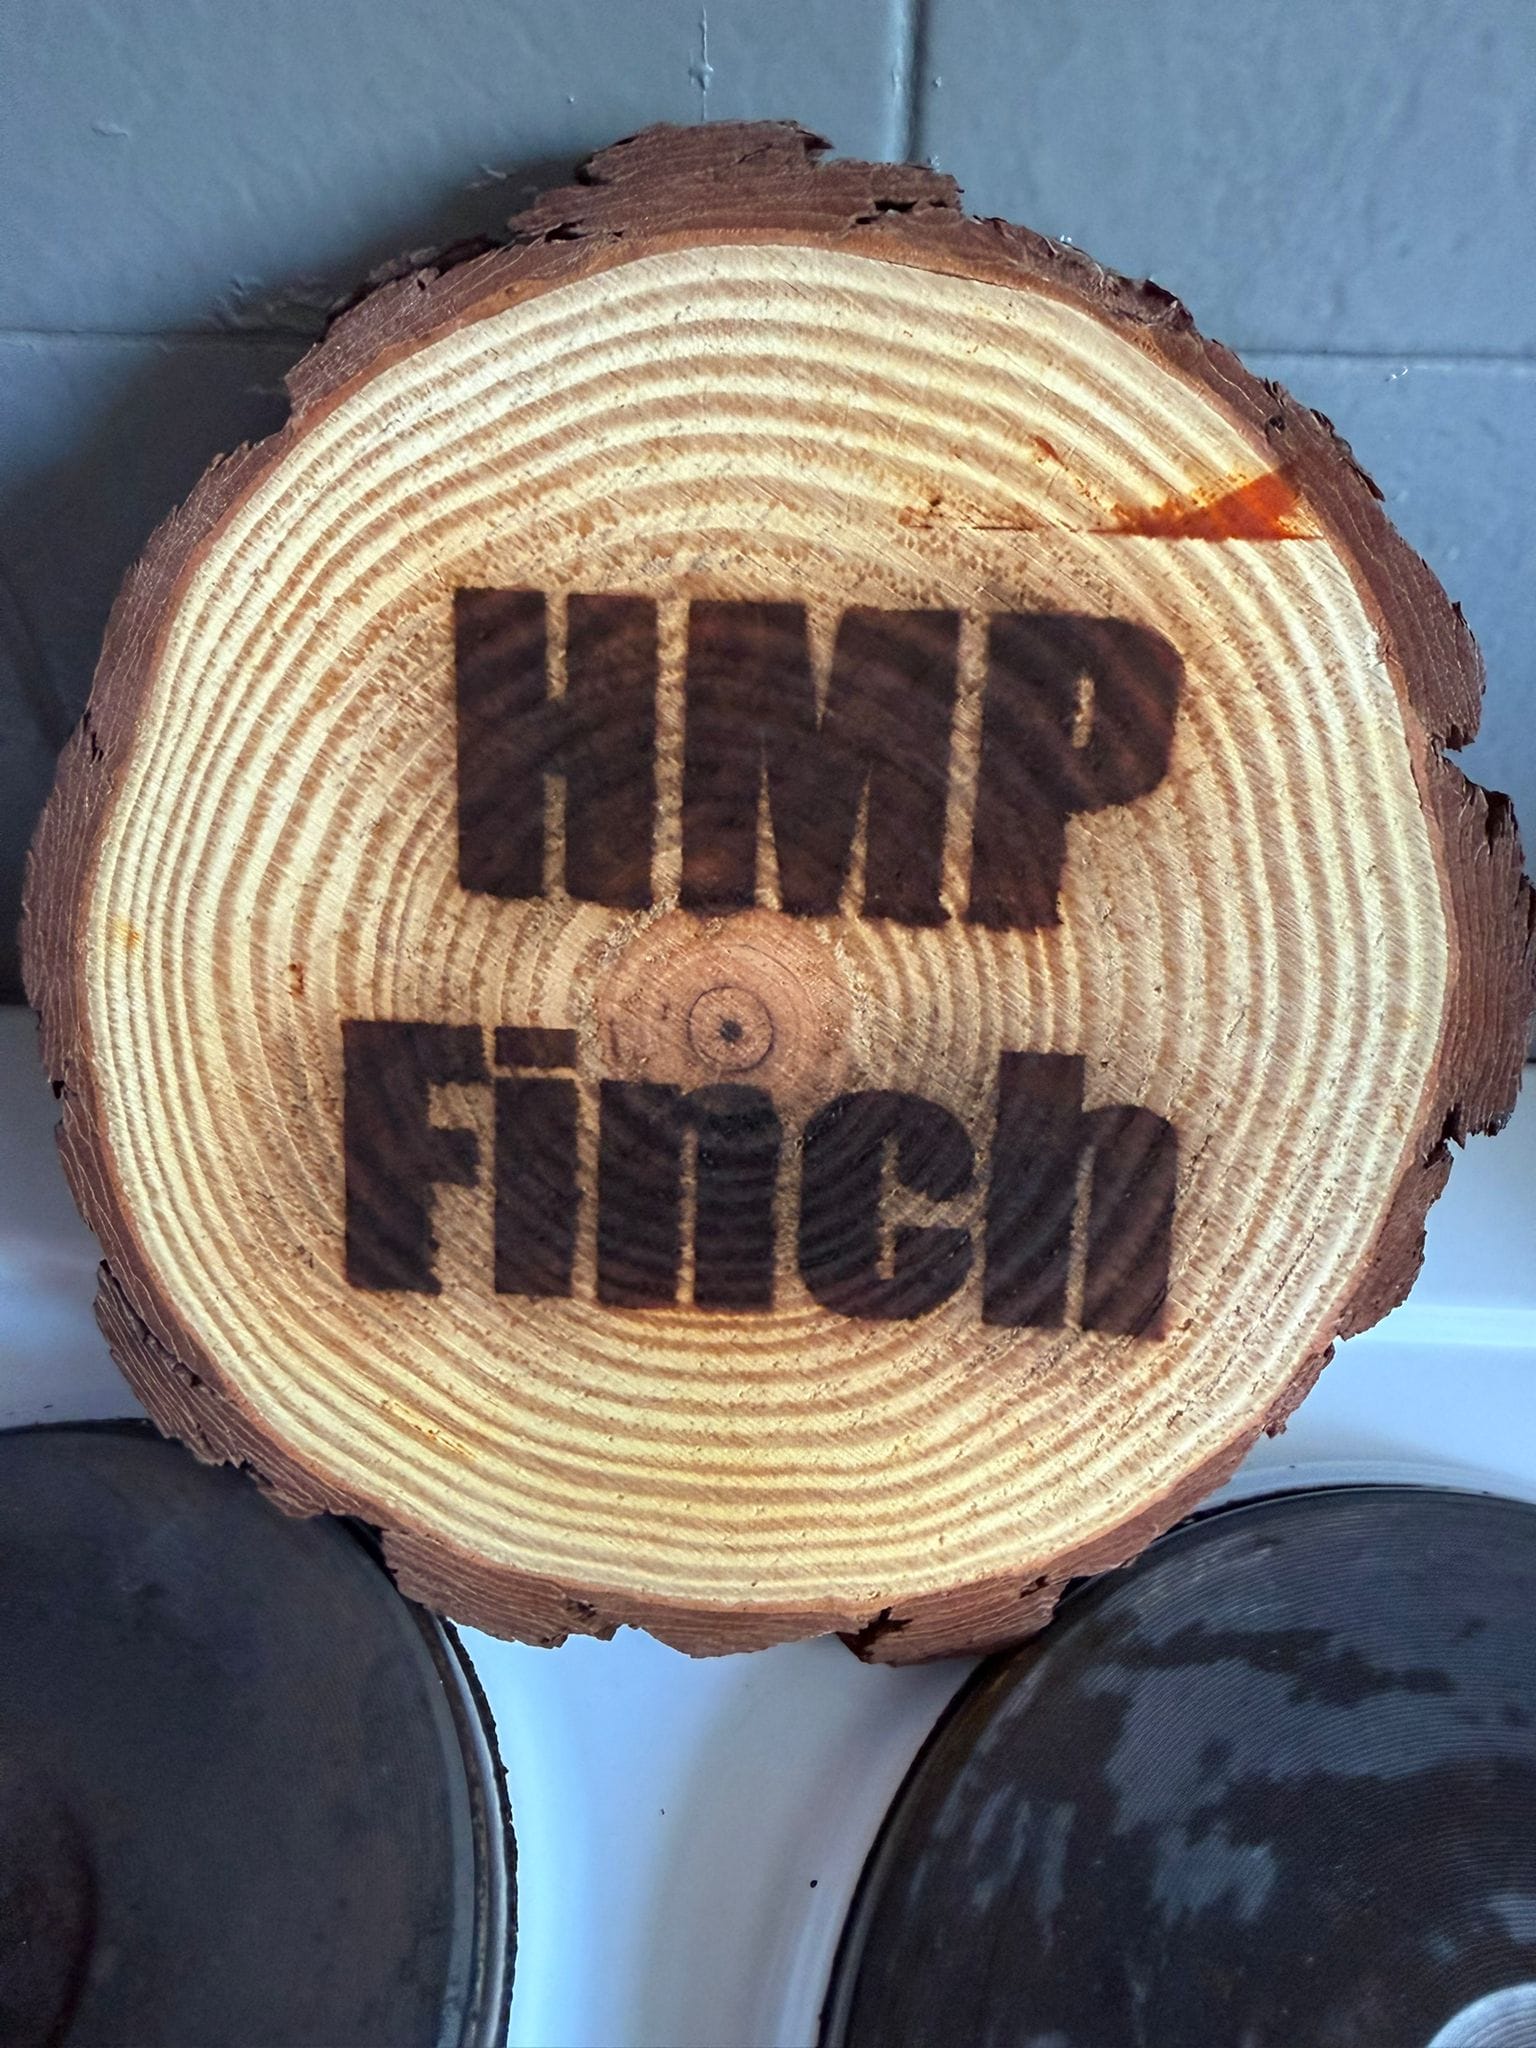
Despite the hiccups, the burn effect did eventually come through - and it looked great.
The contrast between the darkened lettering and the natural wood gave both “Finch HQ” and “HMP Finch” a rustic, slightly cheeky finish that suits the project perfectly.
Finishing Touches
Once the burning was complete, I moved on to assembly and protection:
- Hoops added to the top for hanging
- Jute rope threaded through for that rustic, handmade look
- A coat of varnish to seal everything and bring out the grain
The varnish step really helped unify the piece and gave it a more polished (but still natural) finish.
Final Thoughts
Wood burning paste is a fantastic way to get that pyrography look without specialized tools - but it does reward a bit of preparation and the right setup.
If you’re trying this yourself:
- Sand first (seriously)
- Use a heat gun nozzle
- Be patient - but maybe not 10 minutes patient
And if your project happens to involve a rescue full of chaotic finches, I can confirm: having both an official sign and a joking “prison wing” version feels entirely appropriate.
Next time, I’ll spend less time fighting the heat gun and more time enjoying the process - but for now, Finch HQ (and HMP Finch) are officially open for business. You can follow them here:
About the author
Tim Wilkes is a UK-based security architect with over 15 years of experience in electronics, Linux, and Unix systems administration. Since 2021, he's been designing secure systems for a telecom company while indulging his passions for programming, automation, and 3D printing. Tim shares his projects, tinkering adventures, and tech insights here - partly as a personal log, and partly in the hopes that others will find them useful.
Want to connect or follow along?
LinkedIn: [phpsytems]
Twitter / X: [@timmehwimmy]
Mastodon: [@timmehwimmy@infosec.exchange]
If you've found a post helpful, consider supporting the blog - it's a part-time passion that your support helps keep alive.
⚠️ Disclaimer
This post may contain affiliate links. If you choose to purchase through them, I may earn a small commission at no extra cost to you. I only recommend items and services I’ve personally read or used and found valuable.
As an Amazon Associate I earn from qualifying purchases.