🎄 Transforming the IKEA ENRUM Lantern into a Snowy Christmas Decoration with a Cricut Joy
Last Halloween, we turned a simple IKEA lantern into a spooky glowing decoration with the Cricut Joy. This year, we’re doing the same - but with a festive, wintery twist.
Using the IKEA ENRUM Lantern and your Cricut Joy or Explore machine, we’ll create a frosted snowflake effect and cozy Christmas glow that works beautifully indoors or out.
🕯️ What You’ll Need
- 🏮 IKEA ENRUM Lantern – White (Outdoor/Indoor)
- ✂️ Cricut Joy Machine (Amazon)
- 📜 Frosted window vinyl or etched-glass adhesive film
- 🌨️ Snowflake & Winter Scene Files
- 🕯️ Battery-powered tealight or small LED candle
- 📏 Standard Cricut tools: scraper, transfer tape, weeder
- OR
- Stencil material Acetate Sheet
- Low tack adhesive
❄️ Step 1 - Design Your Frosted Snow Scene
Open Cricut Design Space and load your snowflake or snowy forest SVG files.
I used the snowflake svg files from here:
➡️ Download Christmas Snow Scene files
Resize them to fit the ENRUM lantern’s glass panels (roughly 52 mm wide by 120 mm tall - don't forget to leave some space around the edges).
Mix and match snowflakes, trees, or reindeer silhouettes for a layered look.
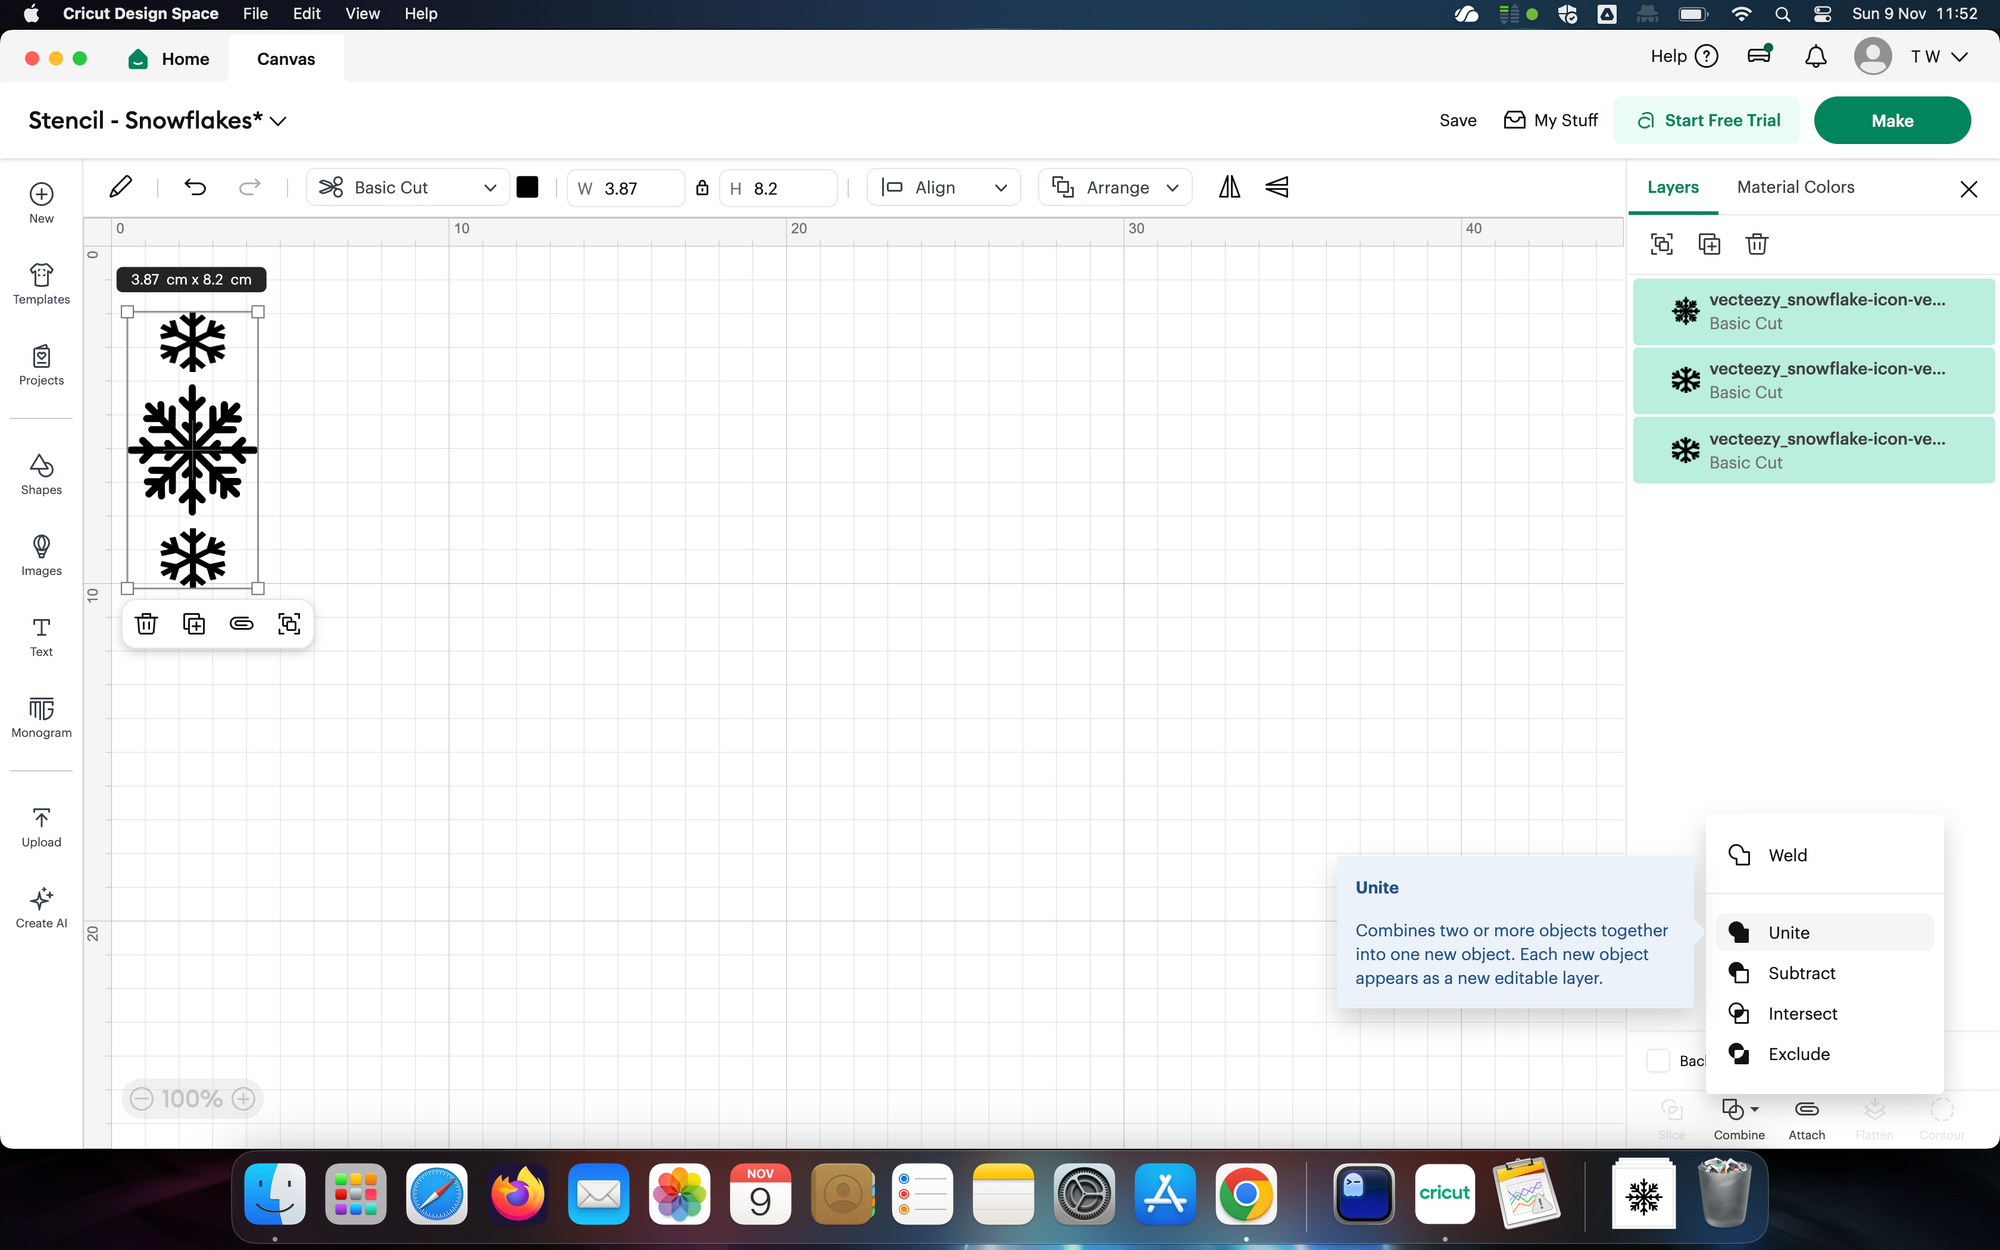
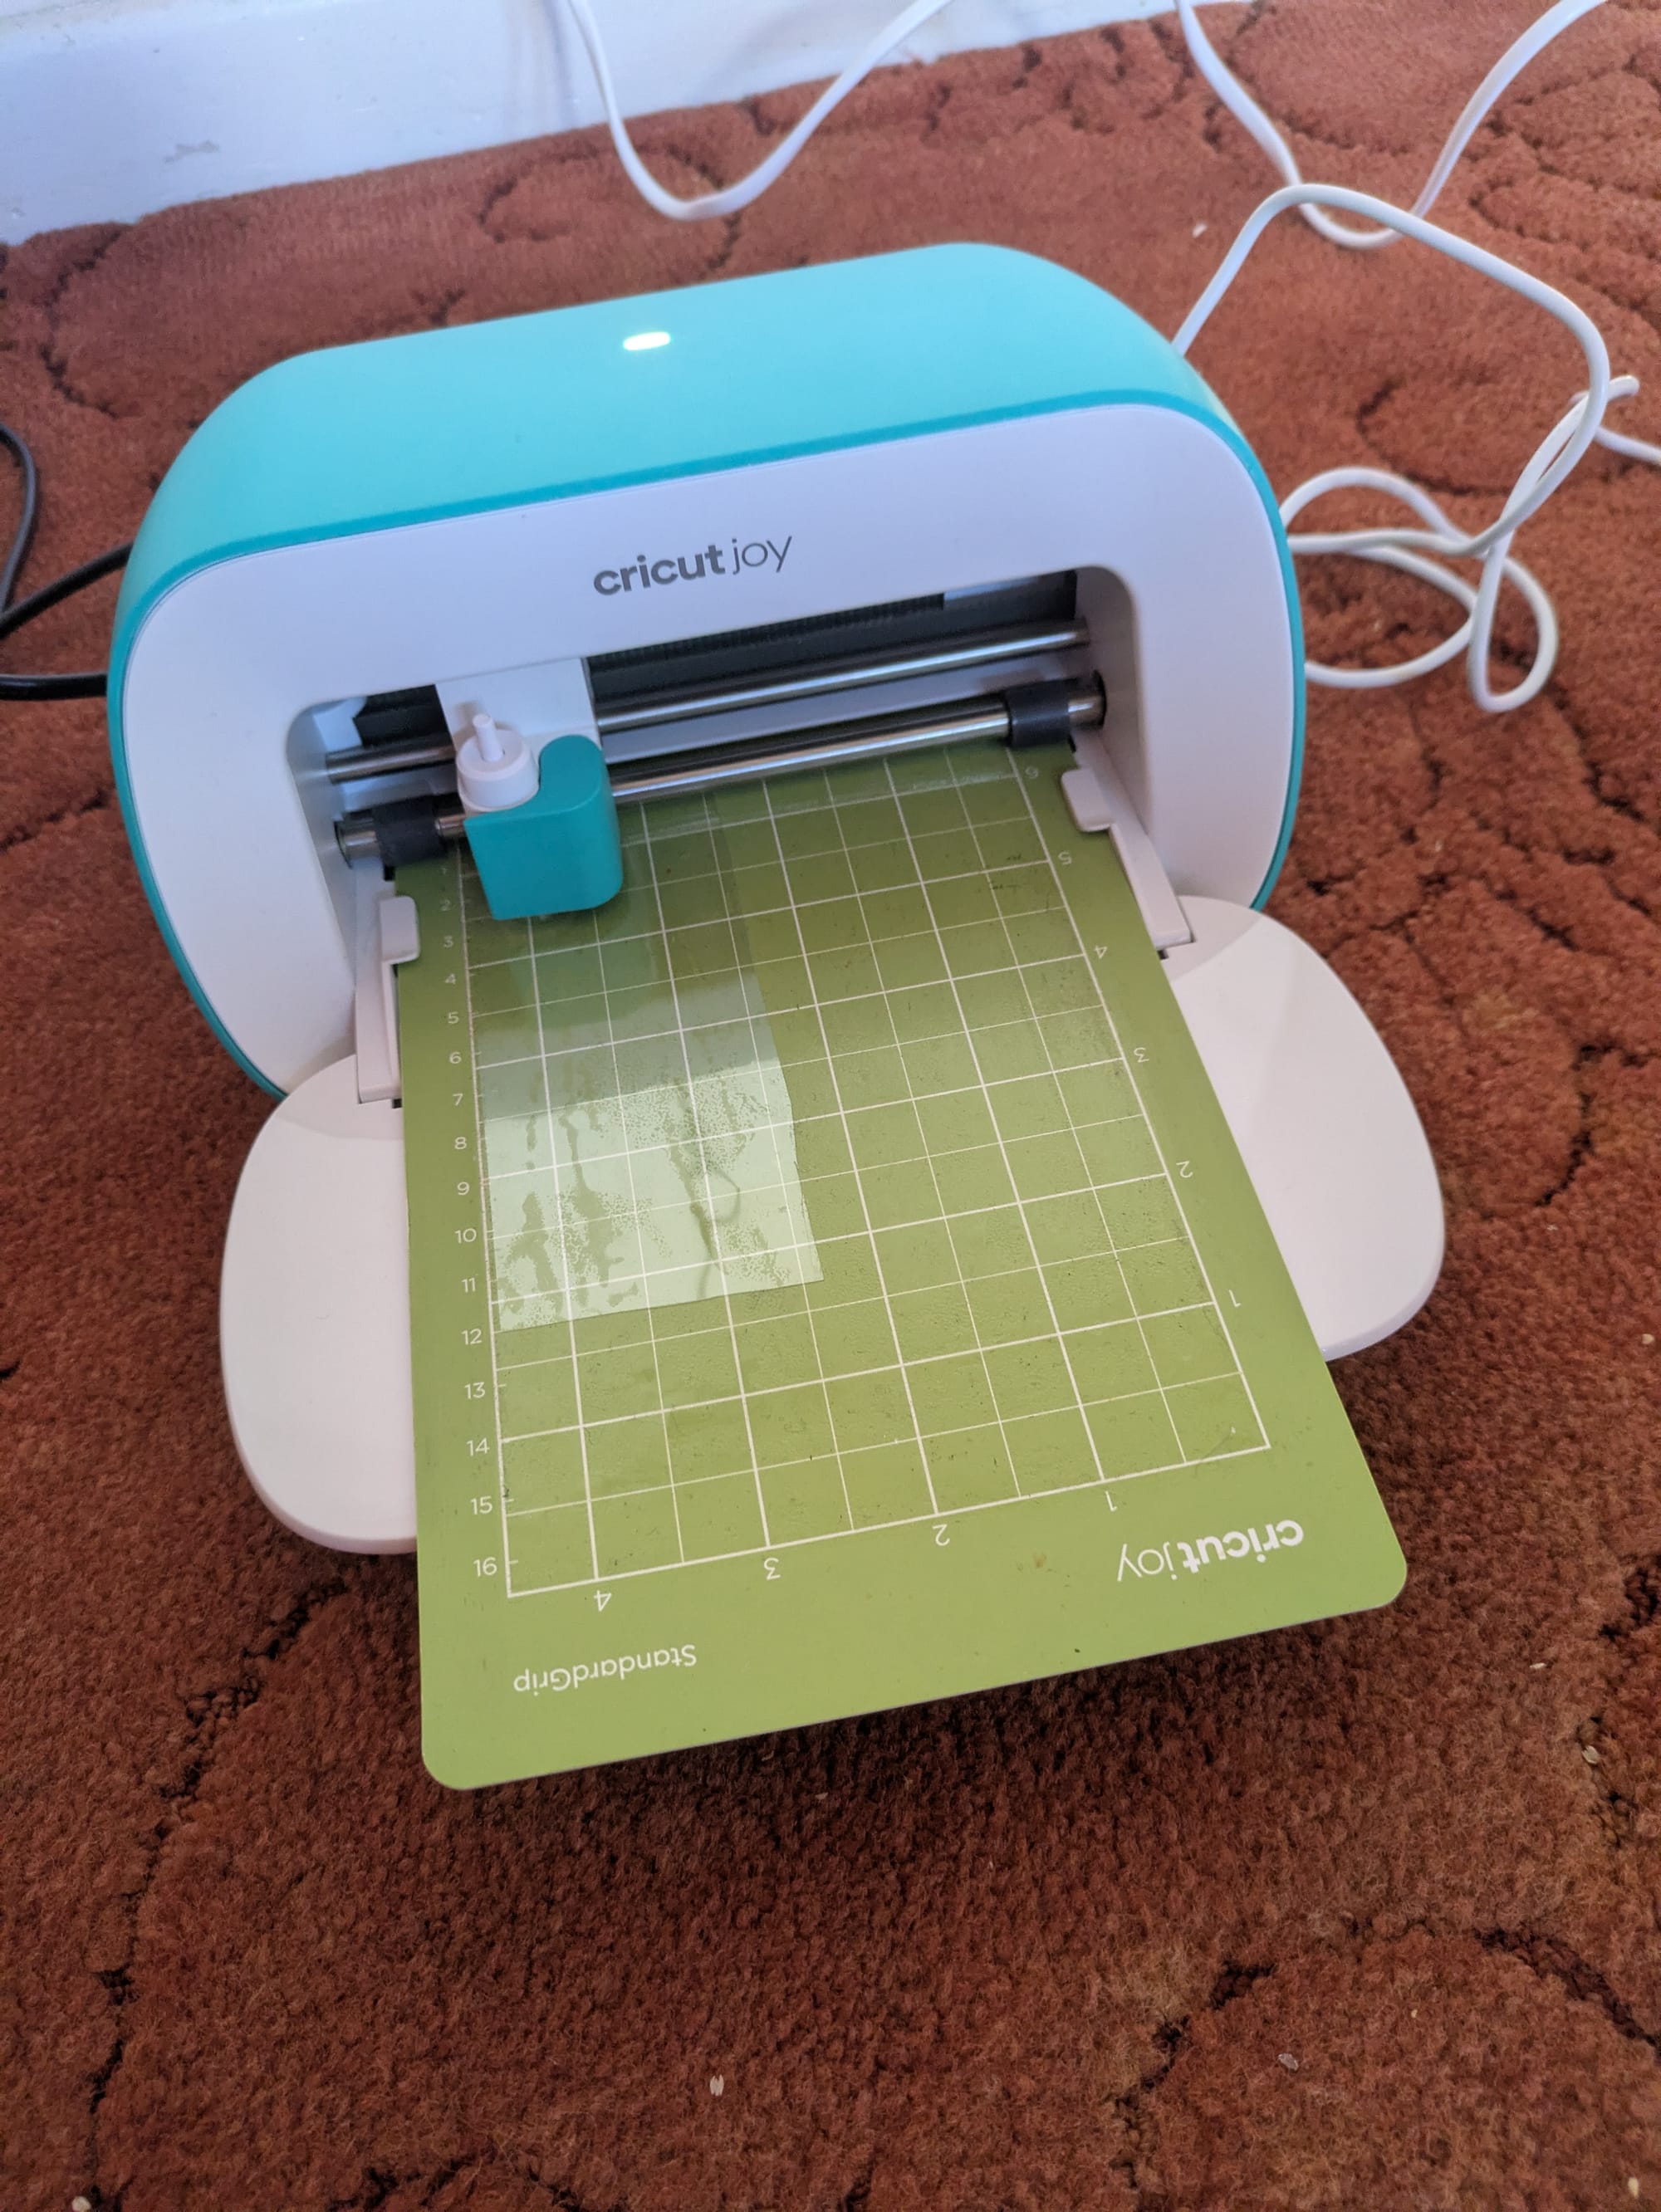
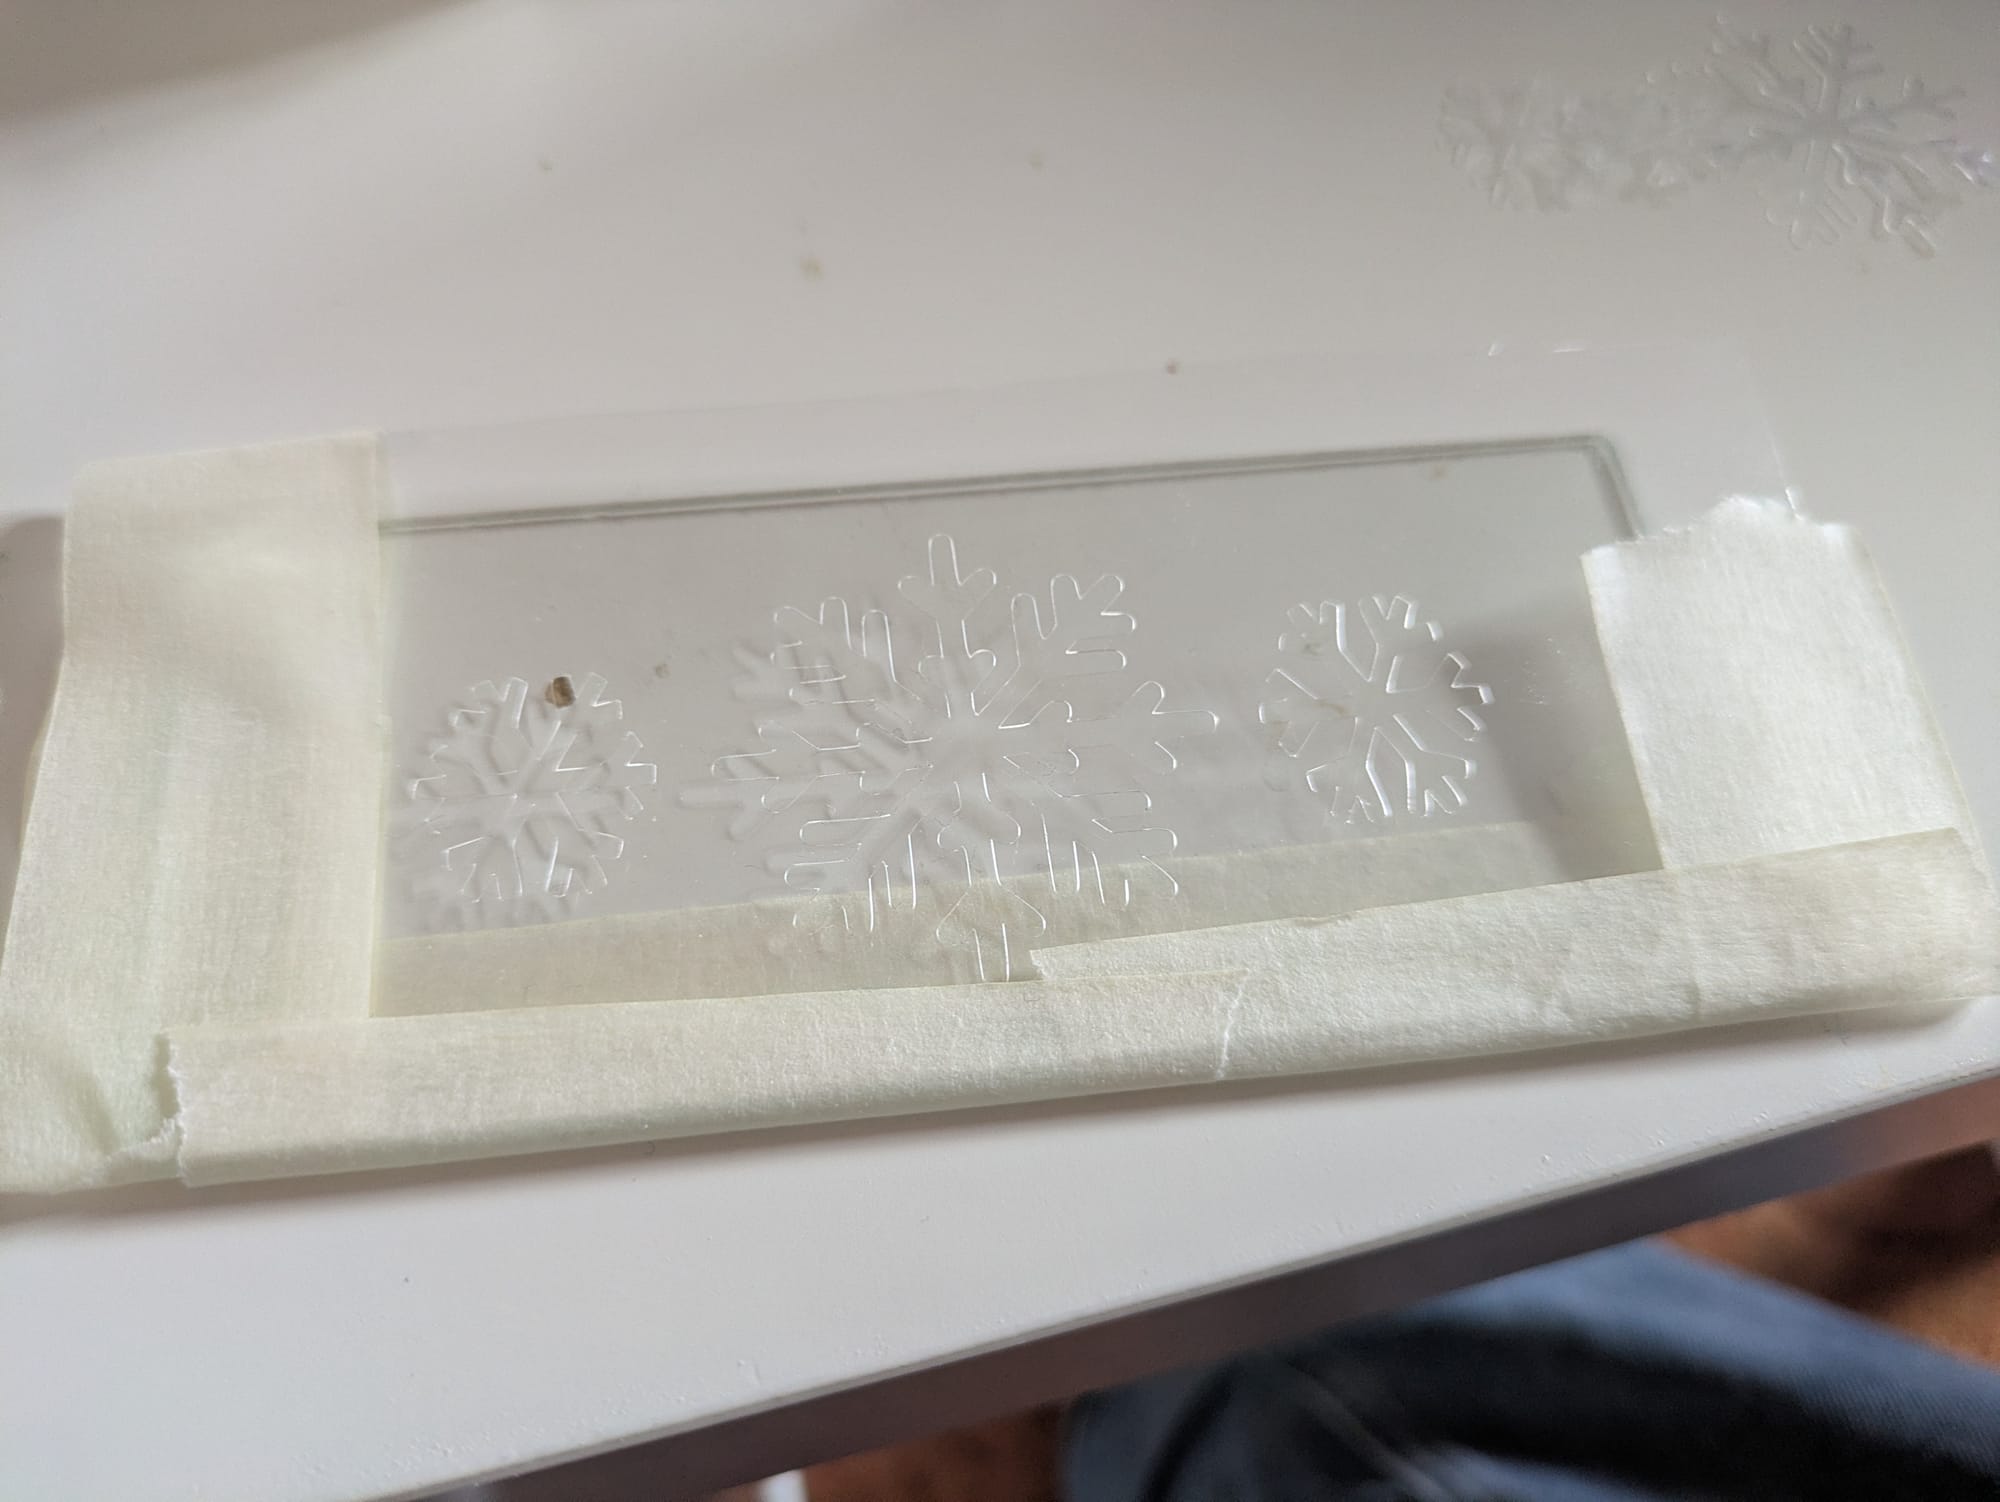
🪞 Step 2 - Cut the Frosted Vinyl
Load your frosted or etched vinyl into your Cricut Joy and let it do its thing — this little machine makes clean, precise cuts that look so professional!
If you’re using stencil sheets, place them on your Cricut cutting mat first. Make sure the stencil design stays connected in one piece so it’s easy to lift and use later. Since stencil sheets aren’t sticky like vinyl, keeping everything linked together helps you get a perfect result when it’s time to apply your design.
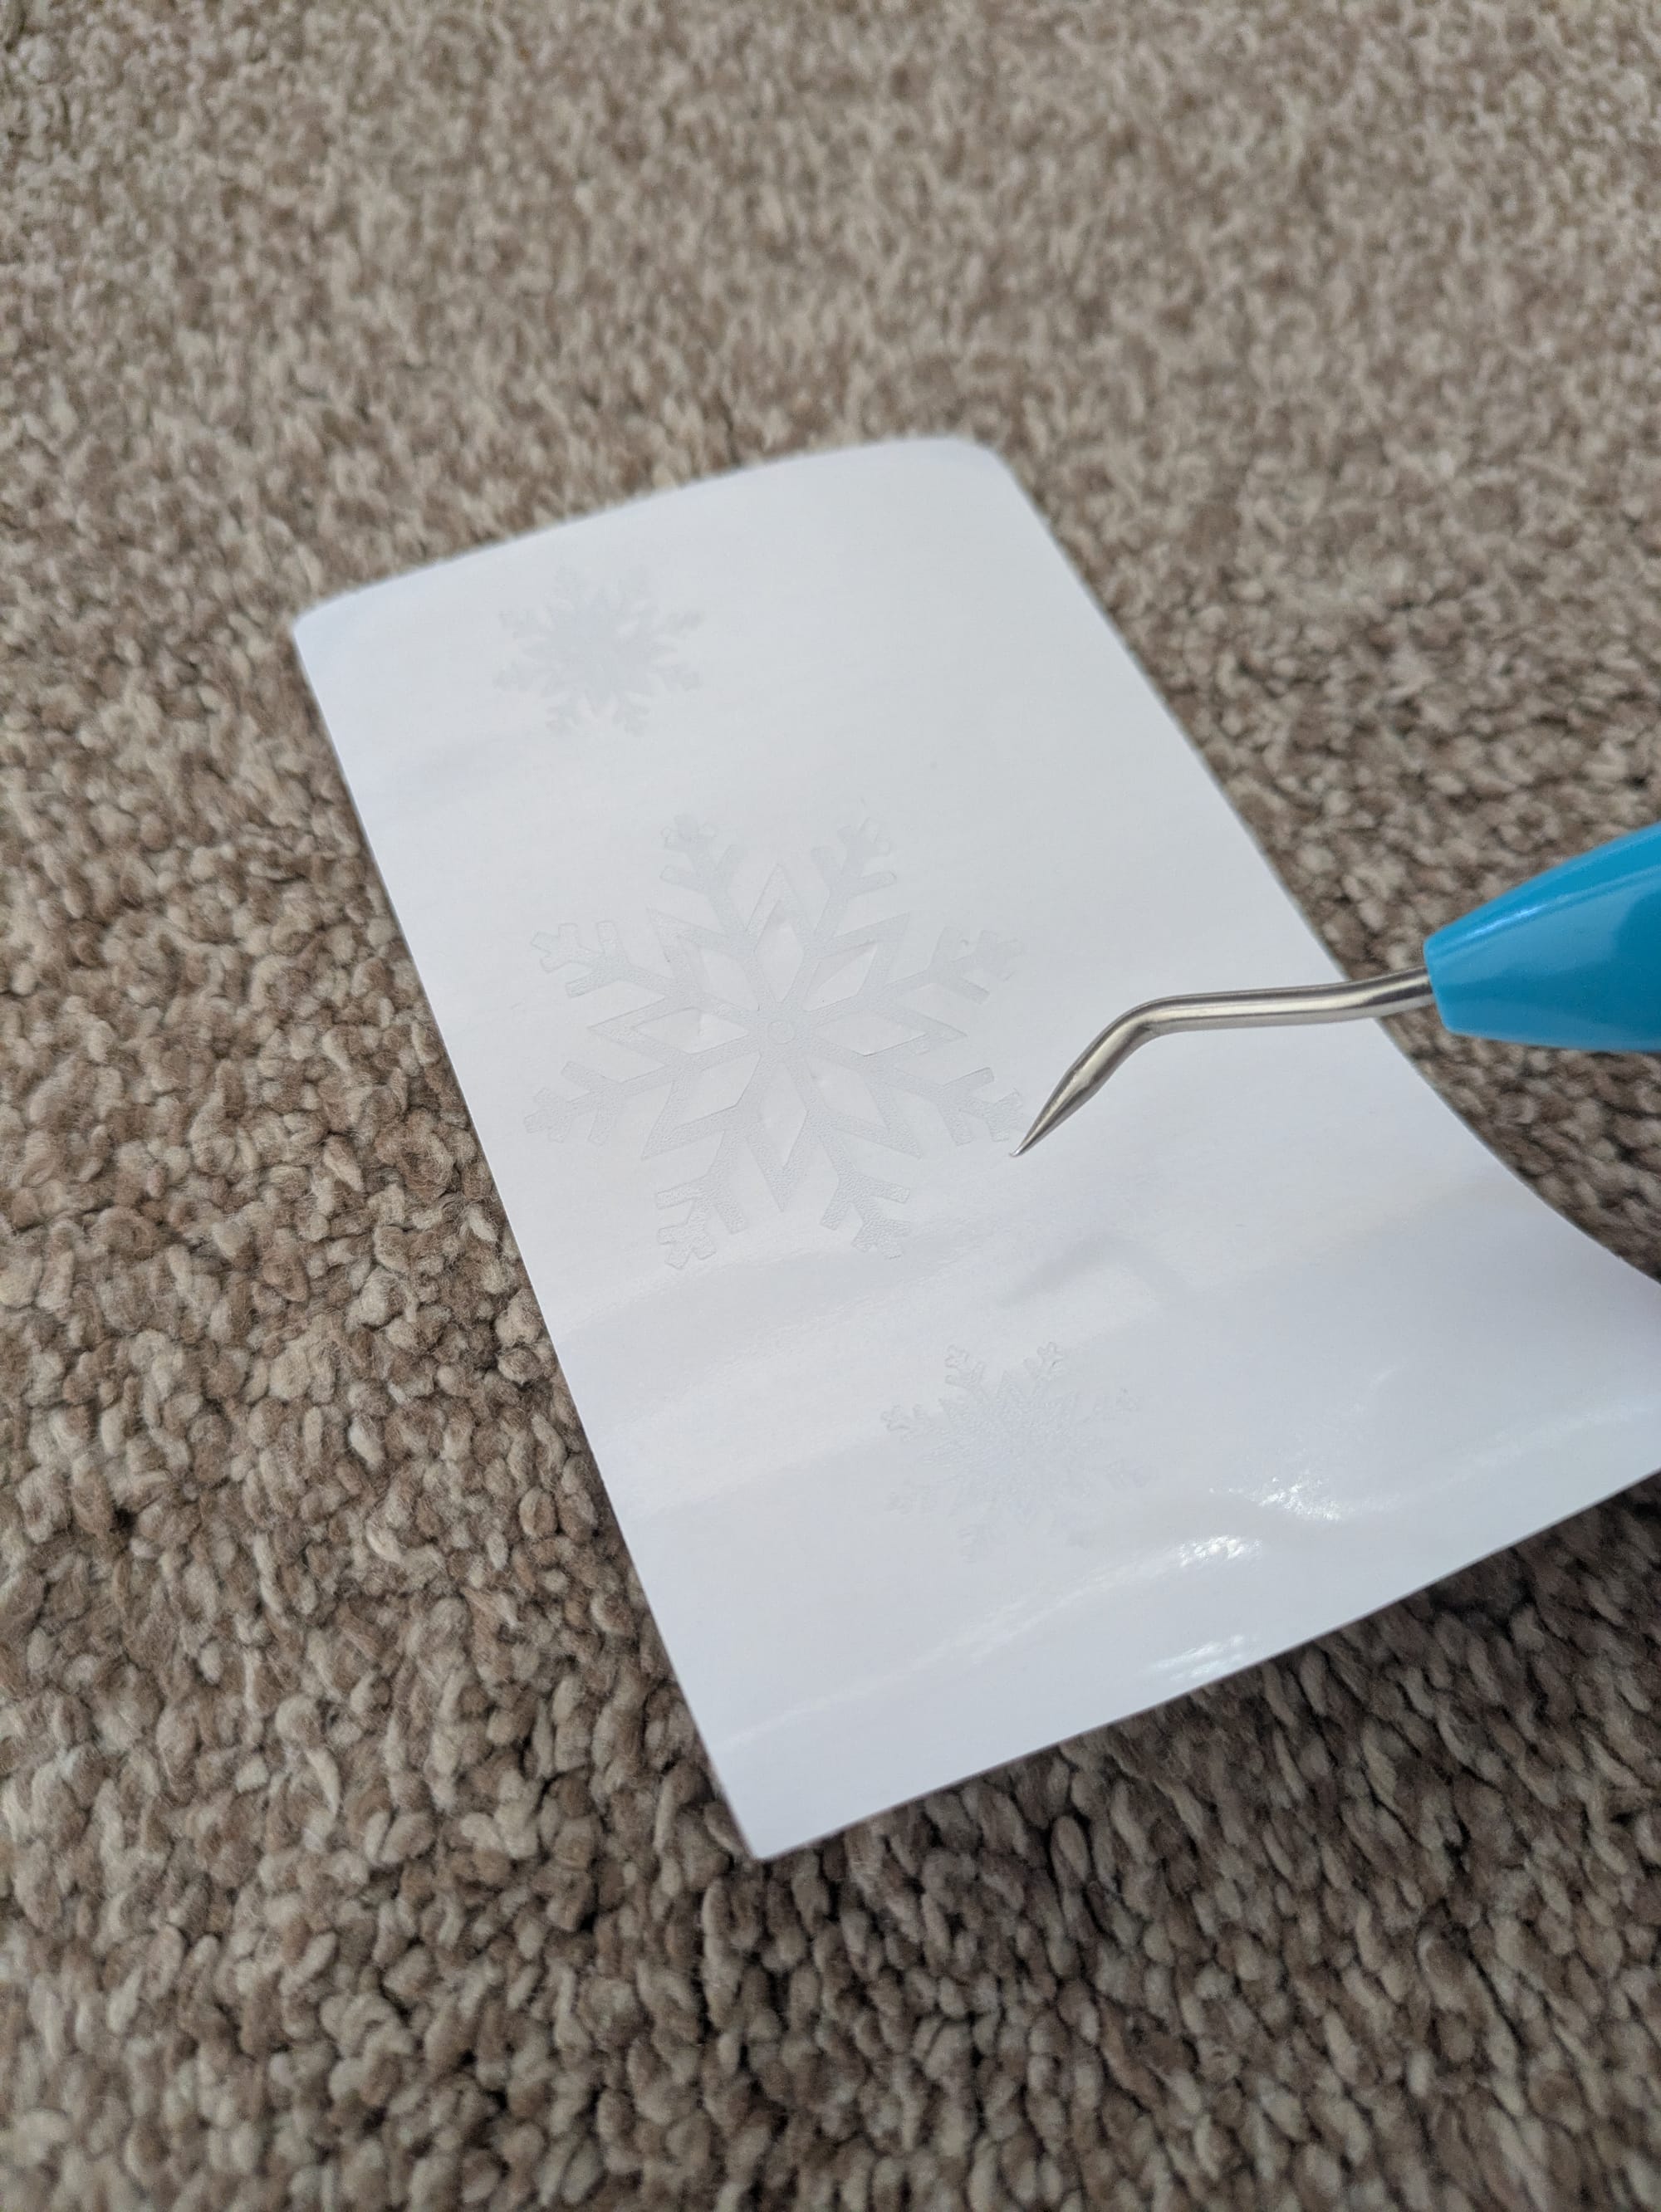
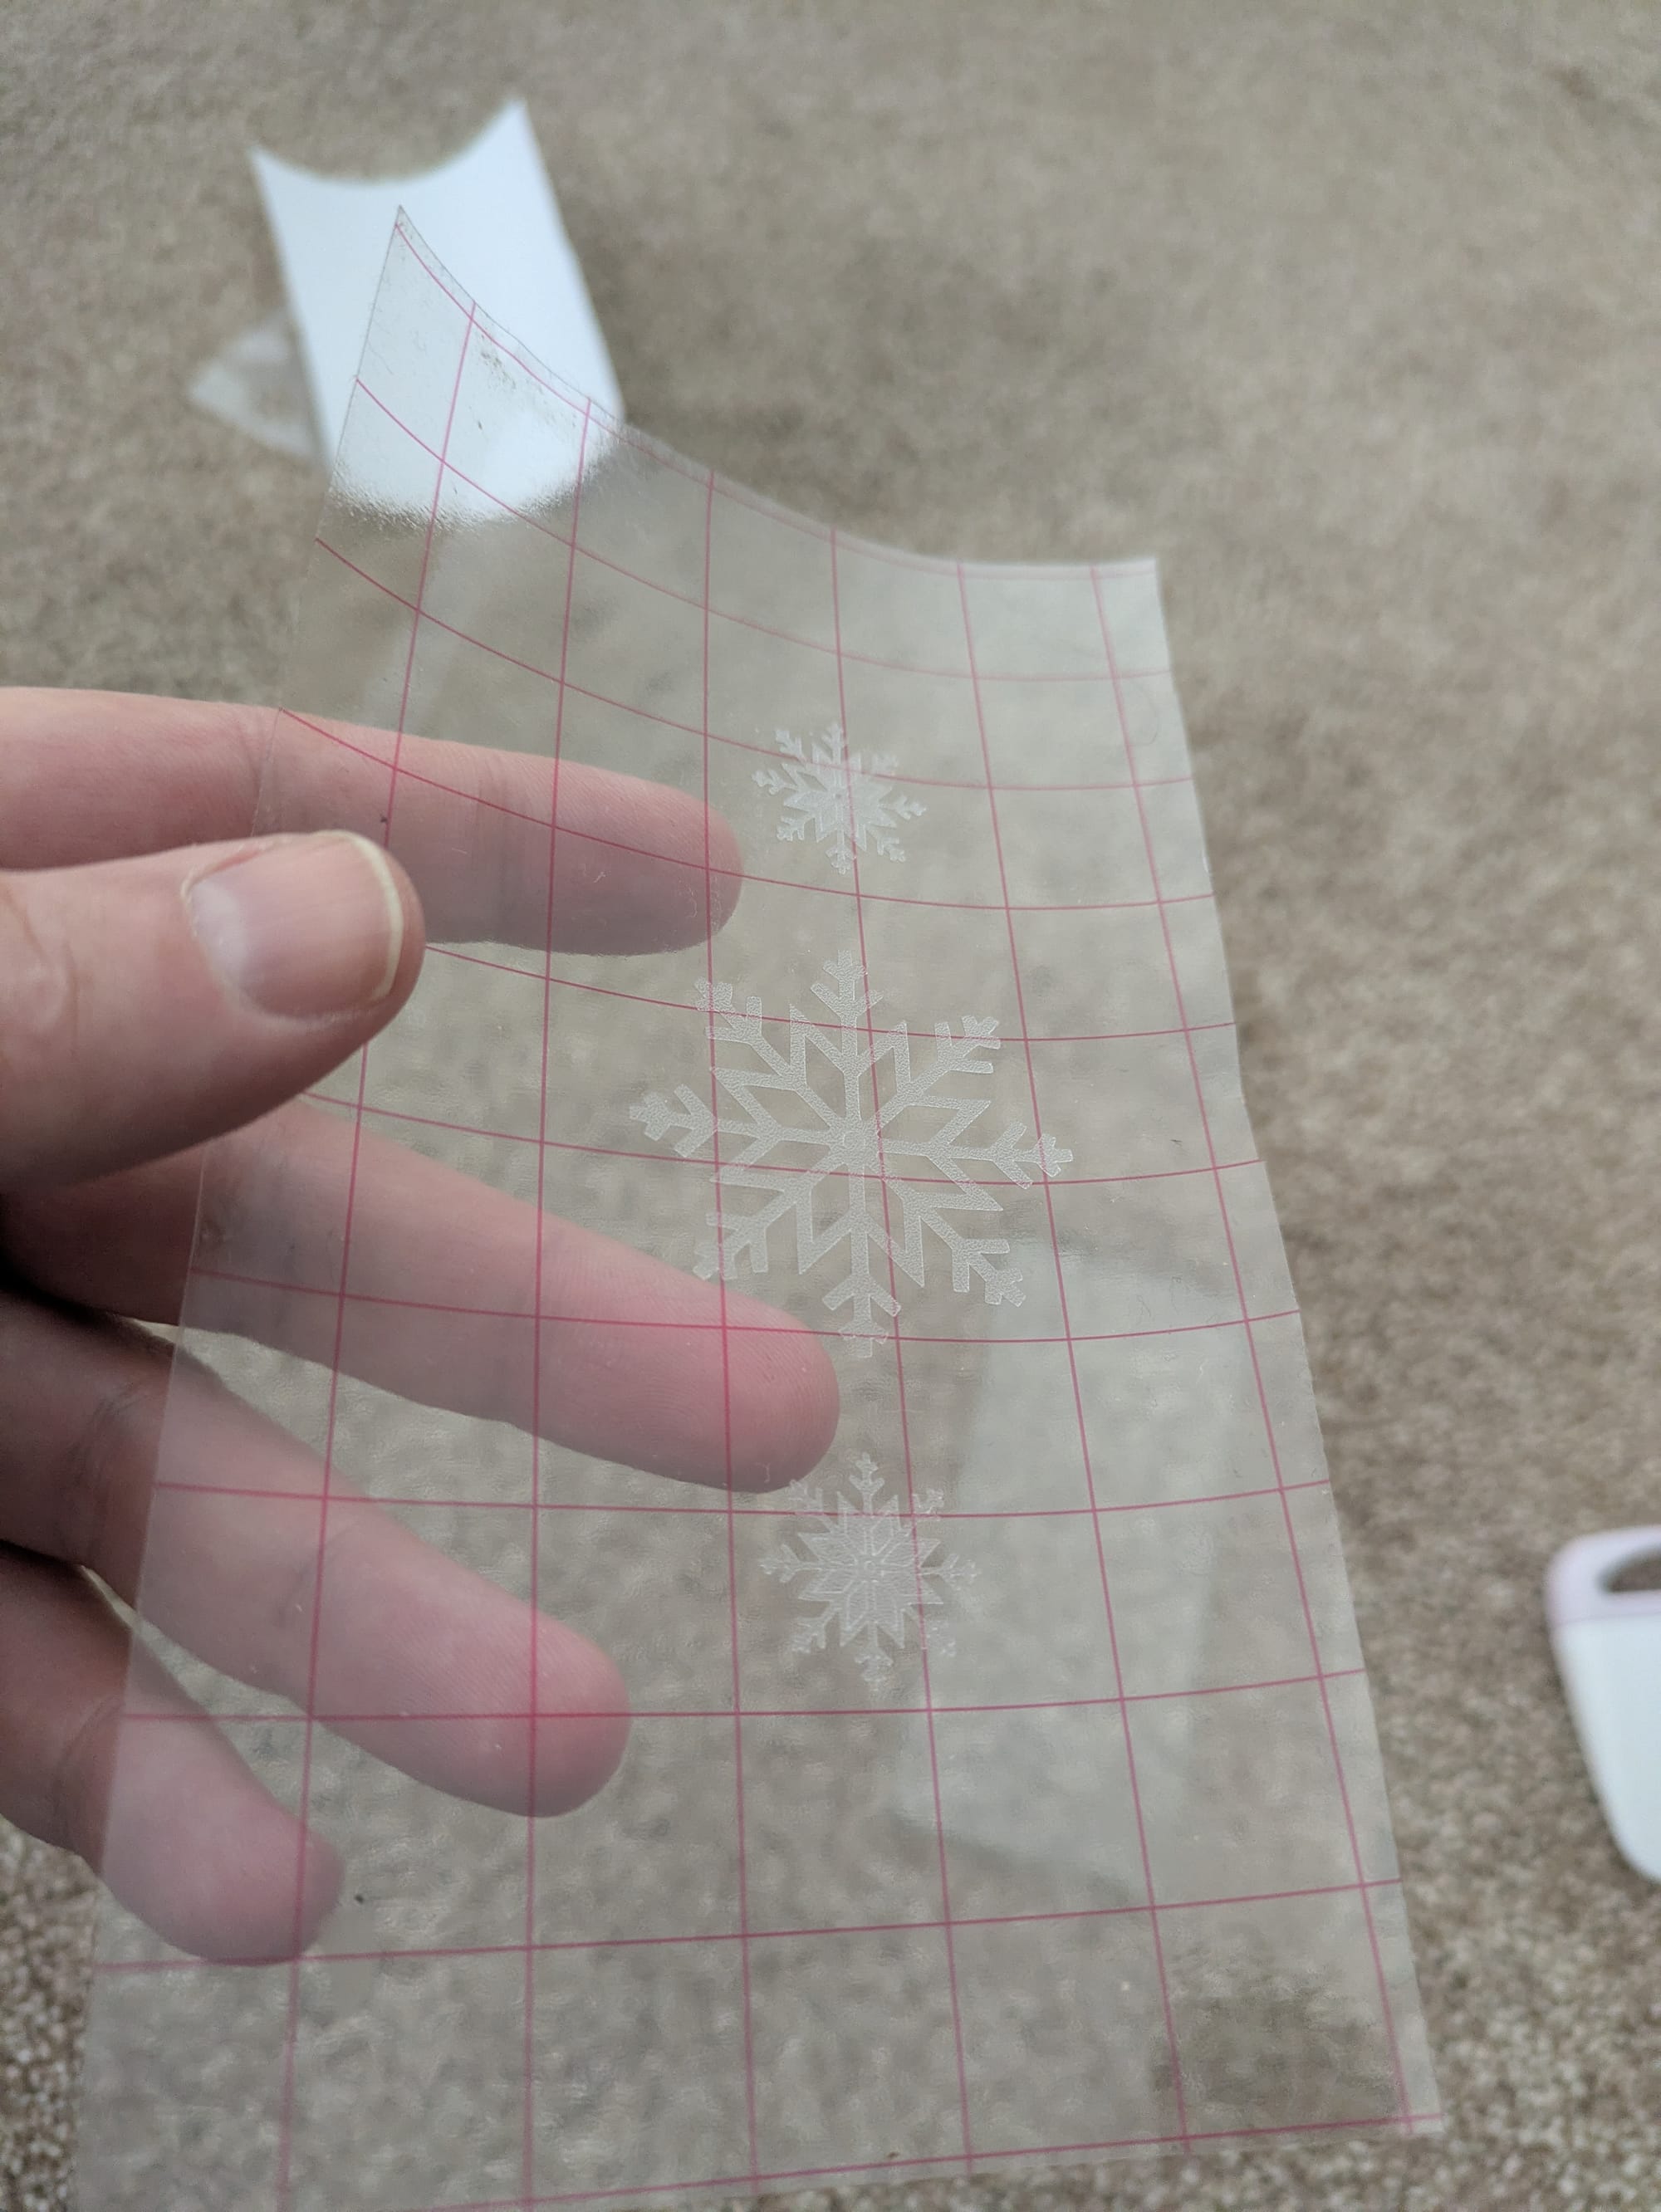
Once cut, weed the designs carefully, keeping delicate snowflake arms intact.
Tip: Leave a thin edge around your design - it’s easier to position on the glass.
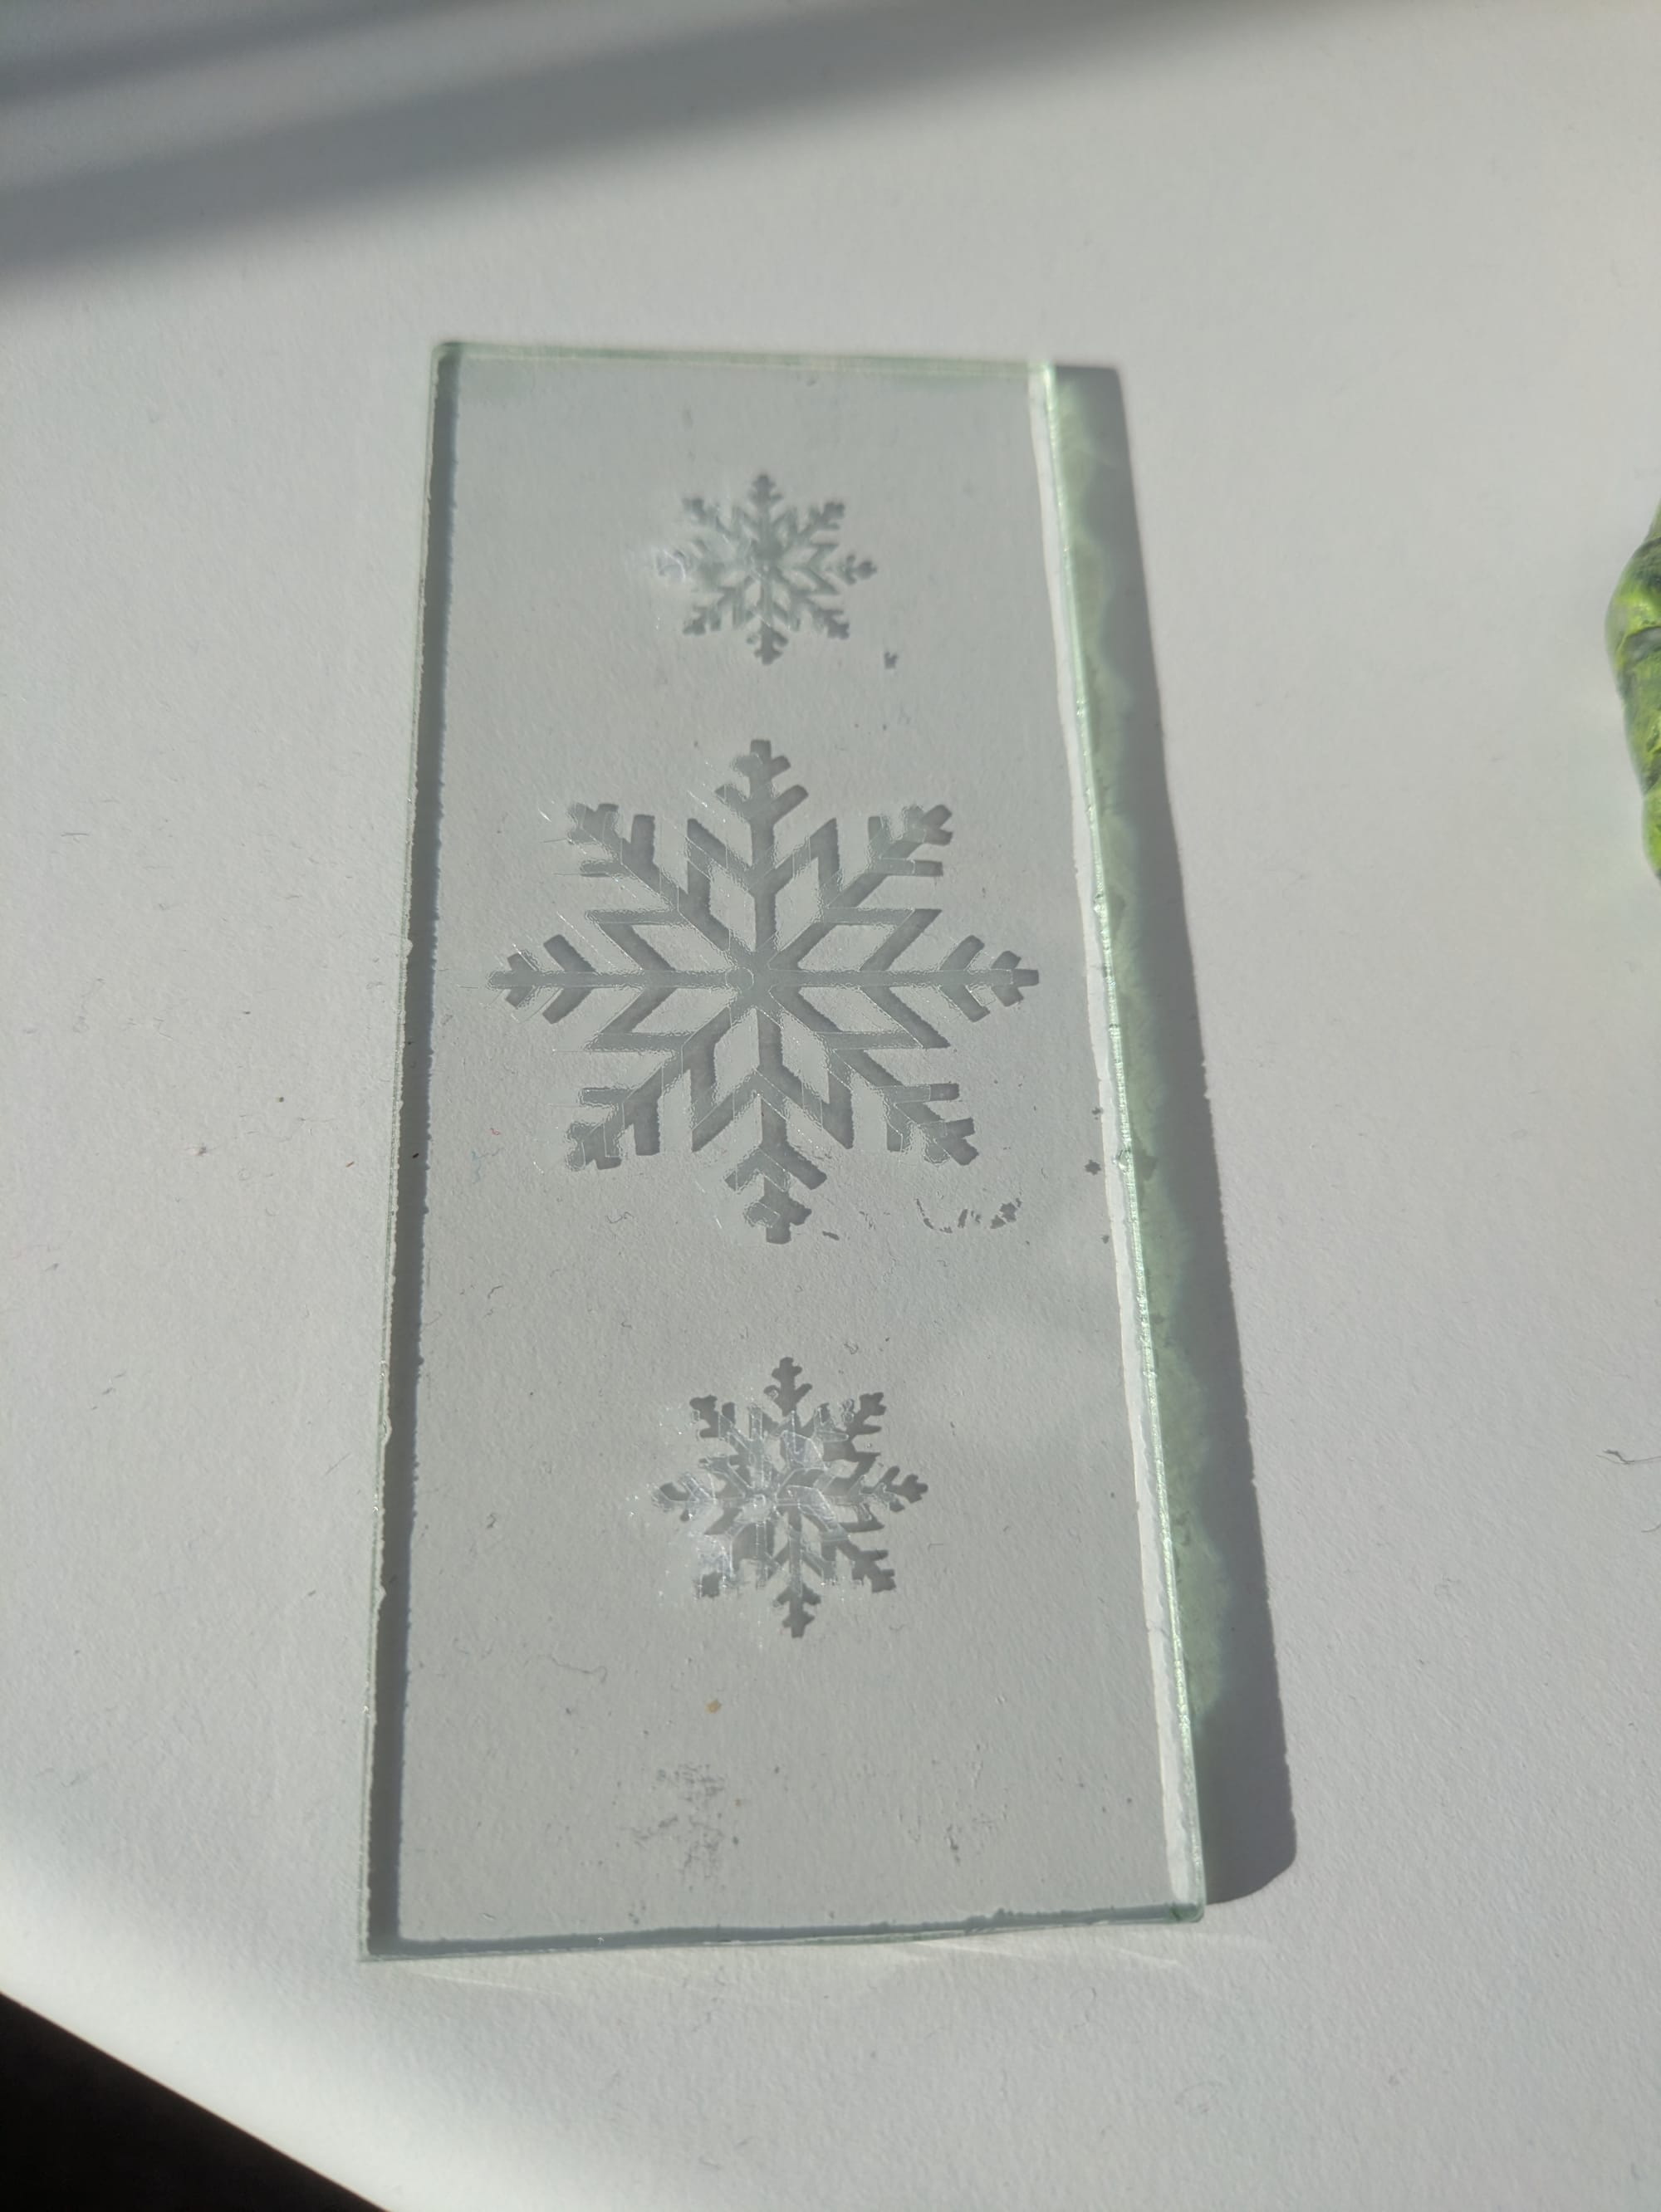
🧲 Step 3 - Apply to the Lantern
Clean the glass panels of the ENRUM lantern with isopropyl alcohol for best adhesion.
Use transfer tape to position your snowflake or scene decals on each side.
Press down firmly with the scraper and peel away slowly.
If you are using a stencil, you can use masking tape or better yet, temporary adhesive spray to hold the stencil in place while you paint in your design. if you are using a rattle can, don't forget to gently heat and shake the can first!
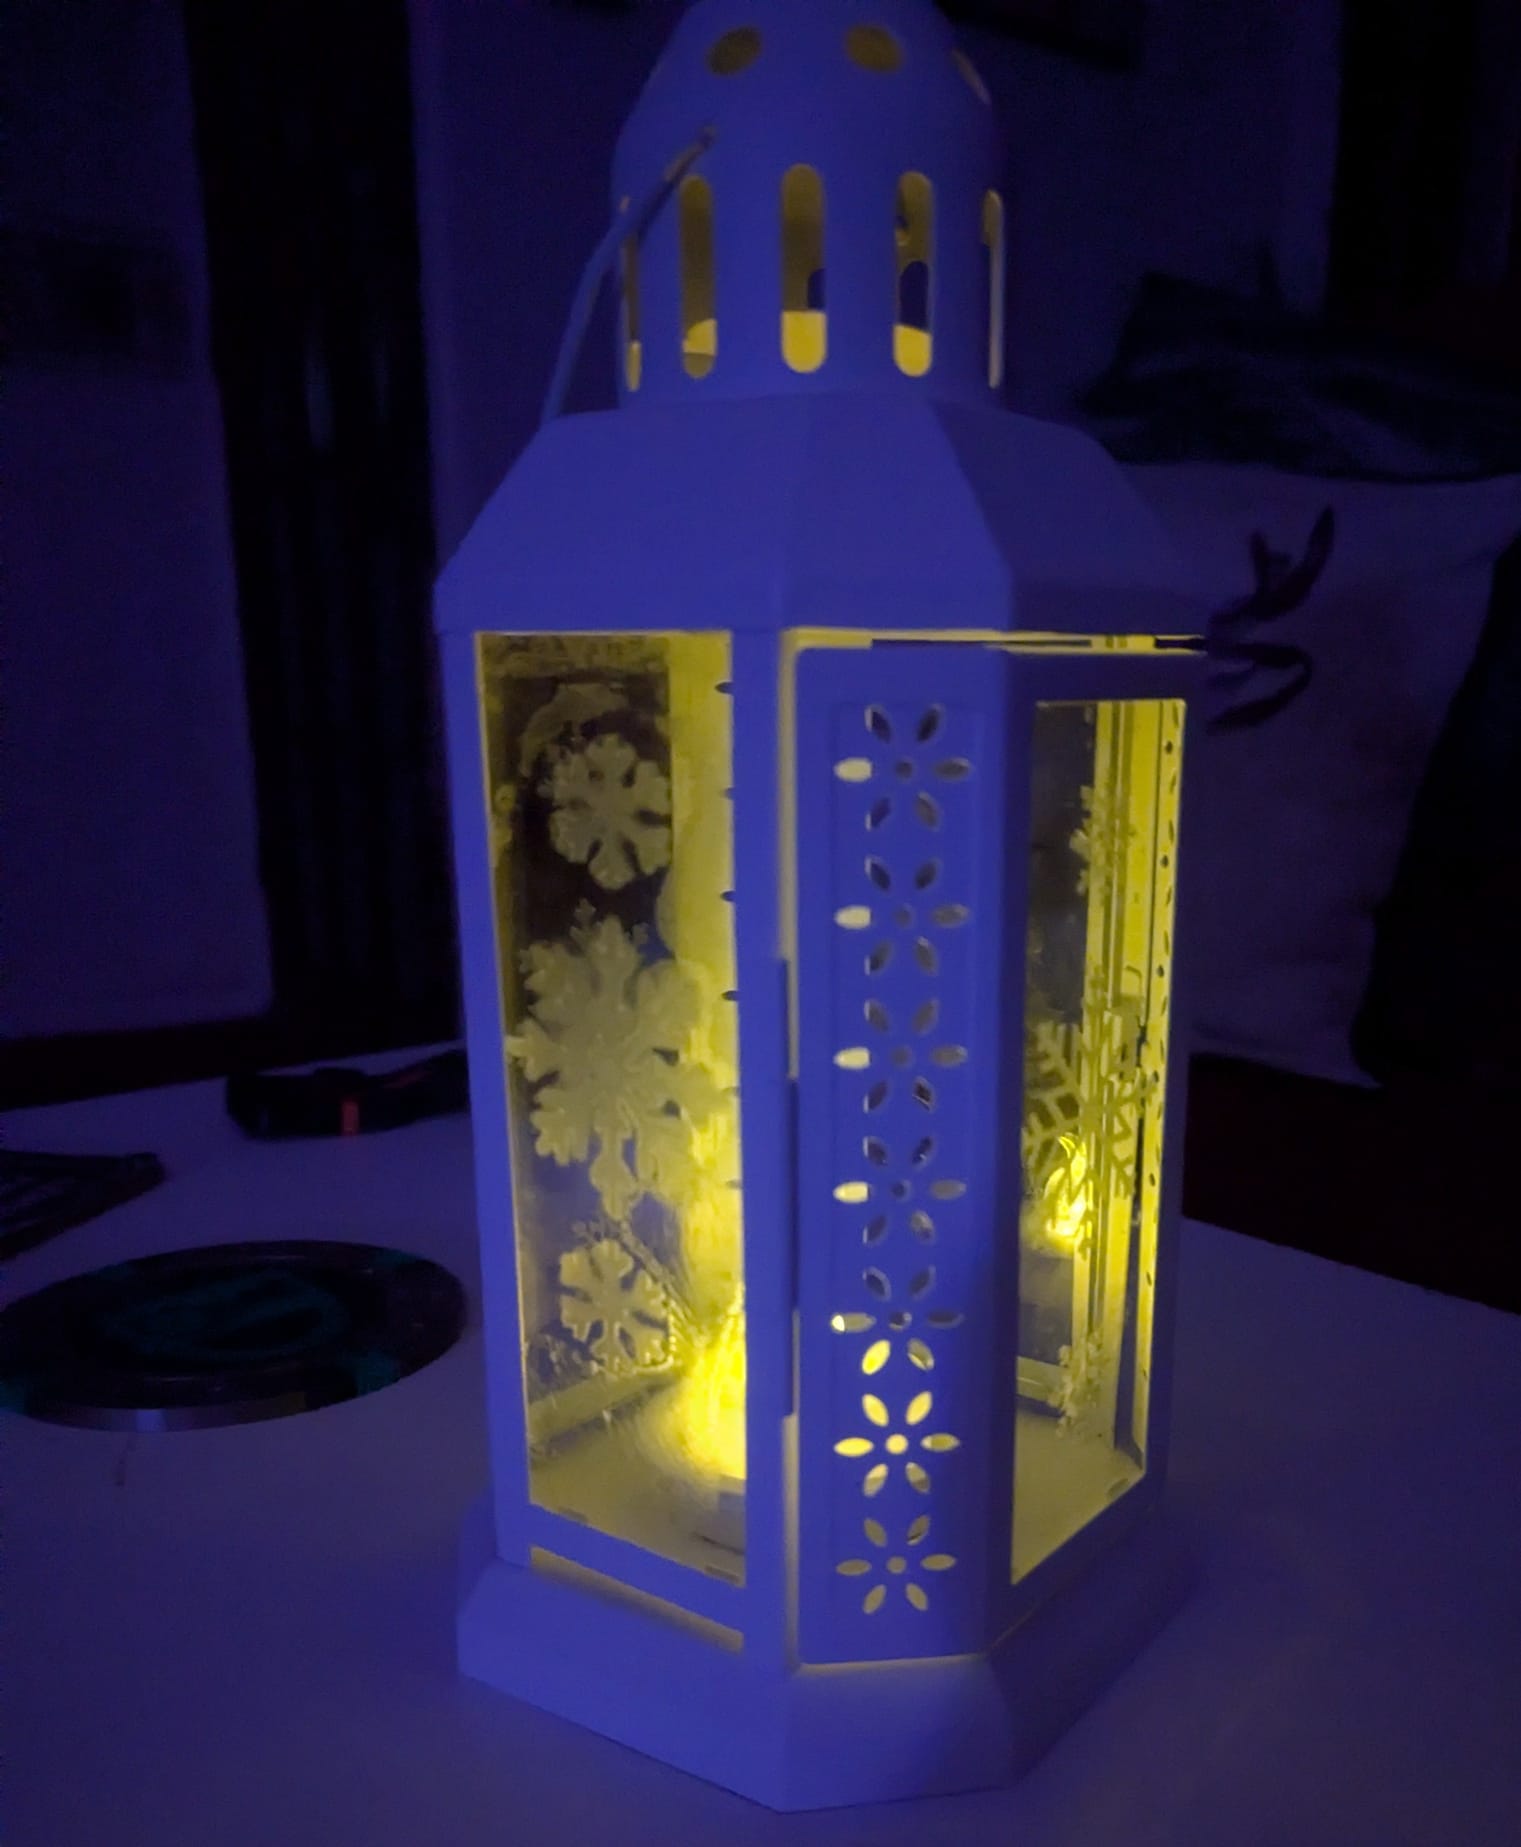
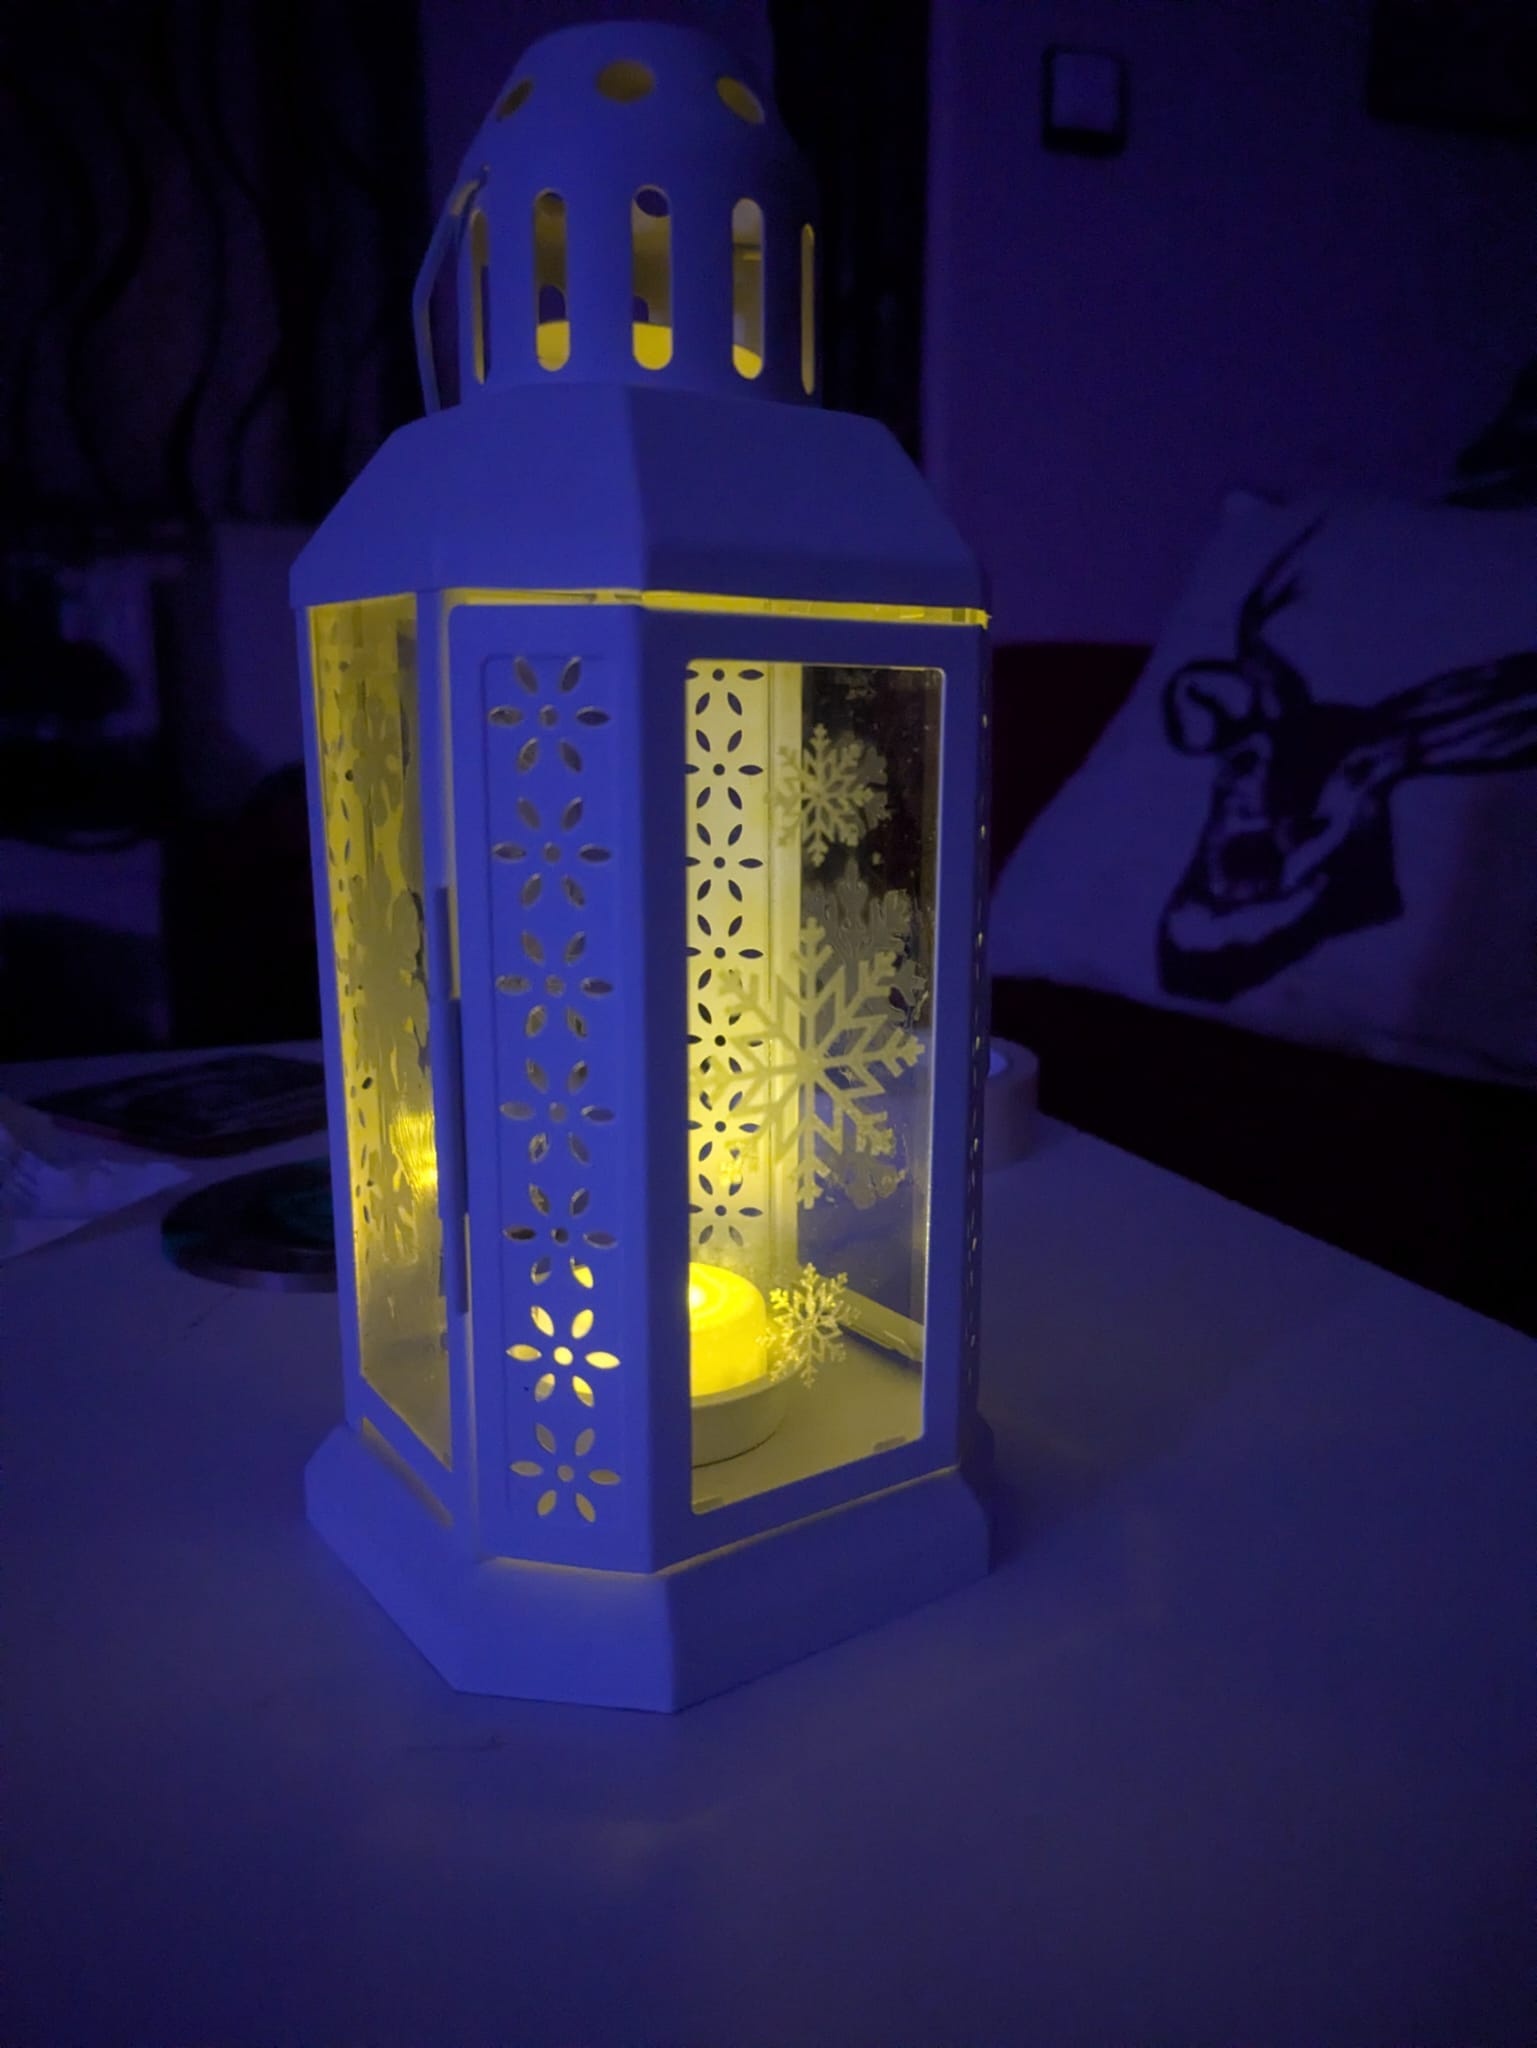
When the frosted designs catch candlelight, they create a cozy snowy-window effect that glows beautifully at night.
🌟 Step 4 - Add Light and Display
Pop in a battery-powered tealight or small LED candle for safety.
For extra sparkle, tuck a small string of fairy lights inside.
Try displaying your new lantern by the fireplace, on a windowsill, or outside on a frosty evening.
🕸️ A Little Call-Back to Halloween
If you were here for the Halloween lantern project, you’ll remember how the Cricut Joy transformed a plain lantern into something spooky.
This year, we’re using the same technique — but trading cobwebs for snowflakes, and pumpkins for pine trees.
It’s proof that with the right tools, one lantern can shine all year round.
🛍️ Shop the Tools
- 🔗 Cricut Joy Cutting Machine (Amazon)
- 🔗 Frosted Window Vinyl Roll (Amazon)
- 🔗 Battery-Powered LED Tealights (Amazon)
- 🔗 IKEA ENRUM Lantern
- 🔗 Cricut Weeding Tools (Amazon)
(Affiliate links - these help support the blog at no extra cost to you.)
🧠 Final Thoughts
The IKEA ENRUM lantern is simple, affordable, and perfect for seasonal Cricut projects. Of the 2 methods I used for the decoration, the stencils were the most disappointing. This may have been down to my technique, but the vinyl was always crystal clear.
With a bit of vinyl and creativity, you can give it a magical Christmas glow that rivals anything store-bought. In addition to putting images on the glass, a christmas tree from green vinyl on the lantern can add a touch of colour for the daylight.
And come next autumn? Maybe it’ll be pumpkins again. 🎃
About the author
Tim Wilkes is a UK-based security architect with over 15 years of experience in electronics, Linux, and Unix systems administration. Since 2021, he's been designing secure systems for a telecom company while indulging his passions for programming, automation, and 3D printing. Tim shares his projects, tinkering adventures, and tech insights here - partly as a personal log, and partly in the hopes that others will find them useful.
Want to connect or follow along?
LinkedIn: [phpsytems]
Twitter / X: [@timmehwimmy]
Mastodon: [@timmehwimmy@infosec.exchange]
If you've found a post helpful, consider supporting the blog - it's a part-time passion that your support helps keep alive.
⚠️ Disclaimer
This post may contain affiliate links. If you choose to purchase through them, I may earn a small commission at no extra cost to you. I only recommend items and services I’ve personally read or used and found valuable.
As an Amazon Associate I earn from qualifying purchases.