How I Repaired My UniFi US-8-150W PoE Switch Using a New Power Supply and 3D Printing
If you’ve ever had a UniFi switch fail outside of warranty, don’t panic - it might be fixable. My UniFi US-8-150W PoE switch died due to a failed internal power supply, and instead of tossing it, I brought it back to life using a replacement PSU and a little 3D printing magic. Here’s how I repaired it, what I learned, and what I’d do differently next time.
Why I Needed to Repair My UniFi US-8-150W
The UniFi US-8-150W is a great PoE switch, but like many electronics, the power supply can eventually fail. Mine simply refused to power on one day, and troubleshooting confirmed it wasn’t the board - it was the PSU. Since these switches are expensive to replace, repairing it made a lot more sense than buying new.
Choosing a Replacement Power Supply
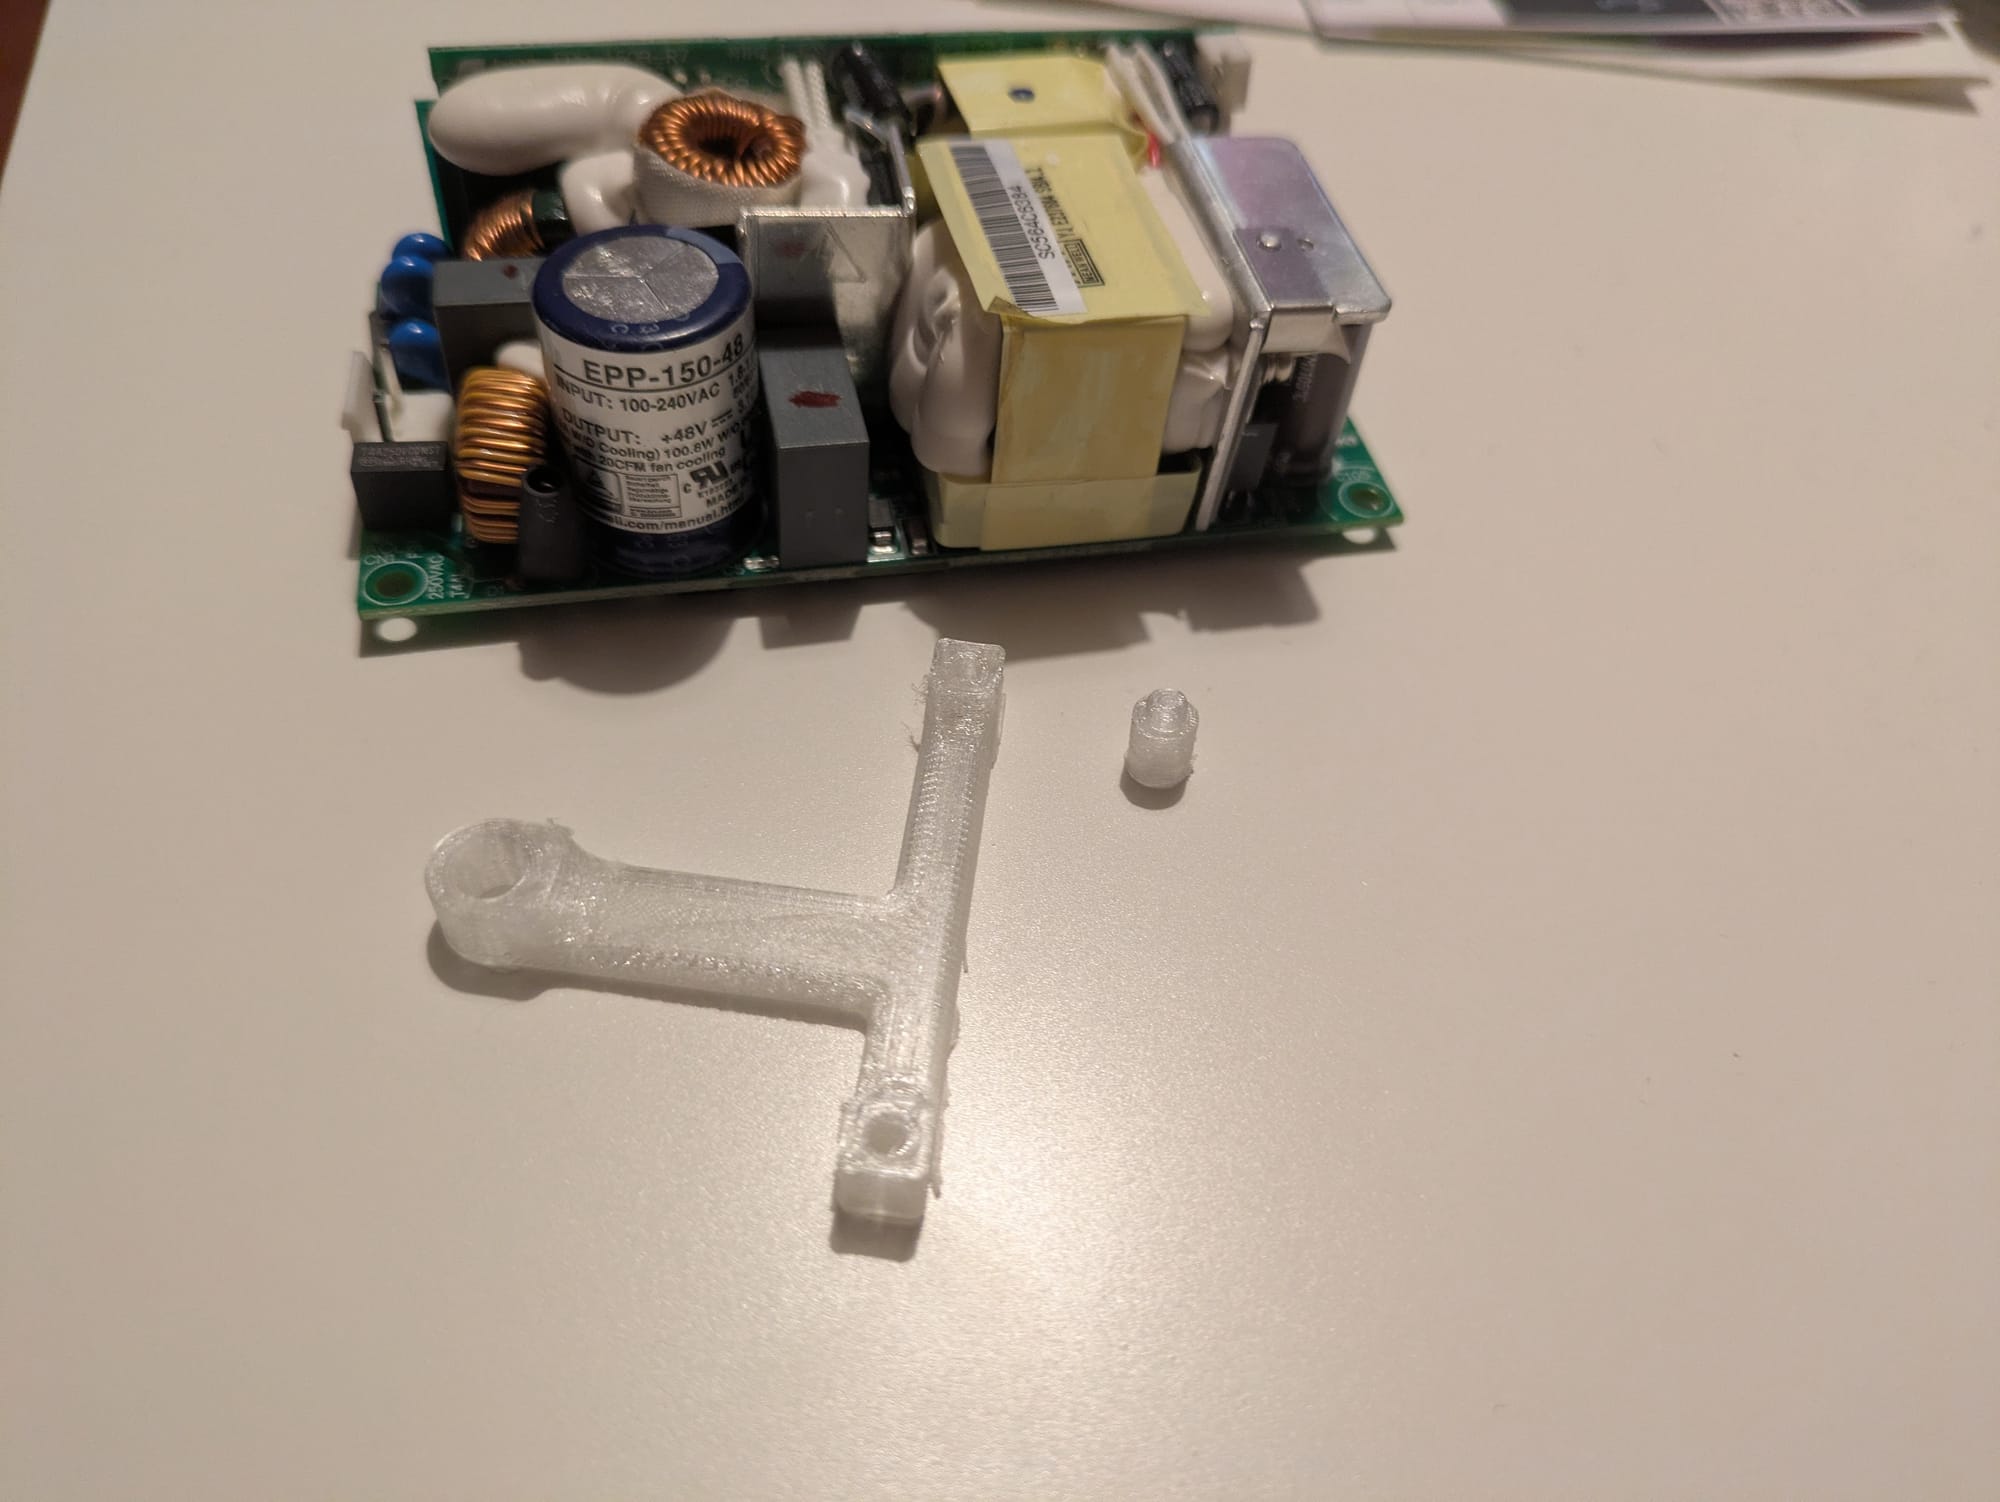
I went with the Mean Well EPP-150-48 power supply as a drop-in electrical replacement. It delivered the power the switch needed and worked reliably.
However… if you’re considering doing this repair yourself, learn from my experience:
➡️ The EPP-200-48W would have been the better choice.
It’s a closer match to the original power profile and adds more overhead for PoE load. The EPP-150-48 works, but the 200-watt unit is more ideal.
Making It Fit: 3D Printing to the Rescue
Of course, nothing is ever truly “drop-in” when it comes to DIY repairs.
To physically mount the new power supply, I grabbed an STL mount from Thingiverse. The printed bracket helped secure the PSU nicely inside the switch chassis.
The Repair Process: Opening the Case, Removing the PSU & Wiring Everything In
This is the part most people want to know - what the repair actually involved. If you’re comfortable working with electronics, it’s very doable. If not, this is where I remind you to be careful - there’s real voltage involved here.
🔌 Unplug everything first. Let it fully discharge. Respect mains power. If you aren't comfortable doing this, don't!
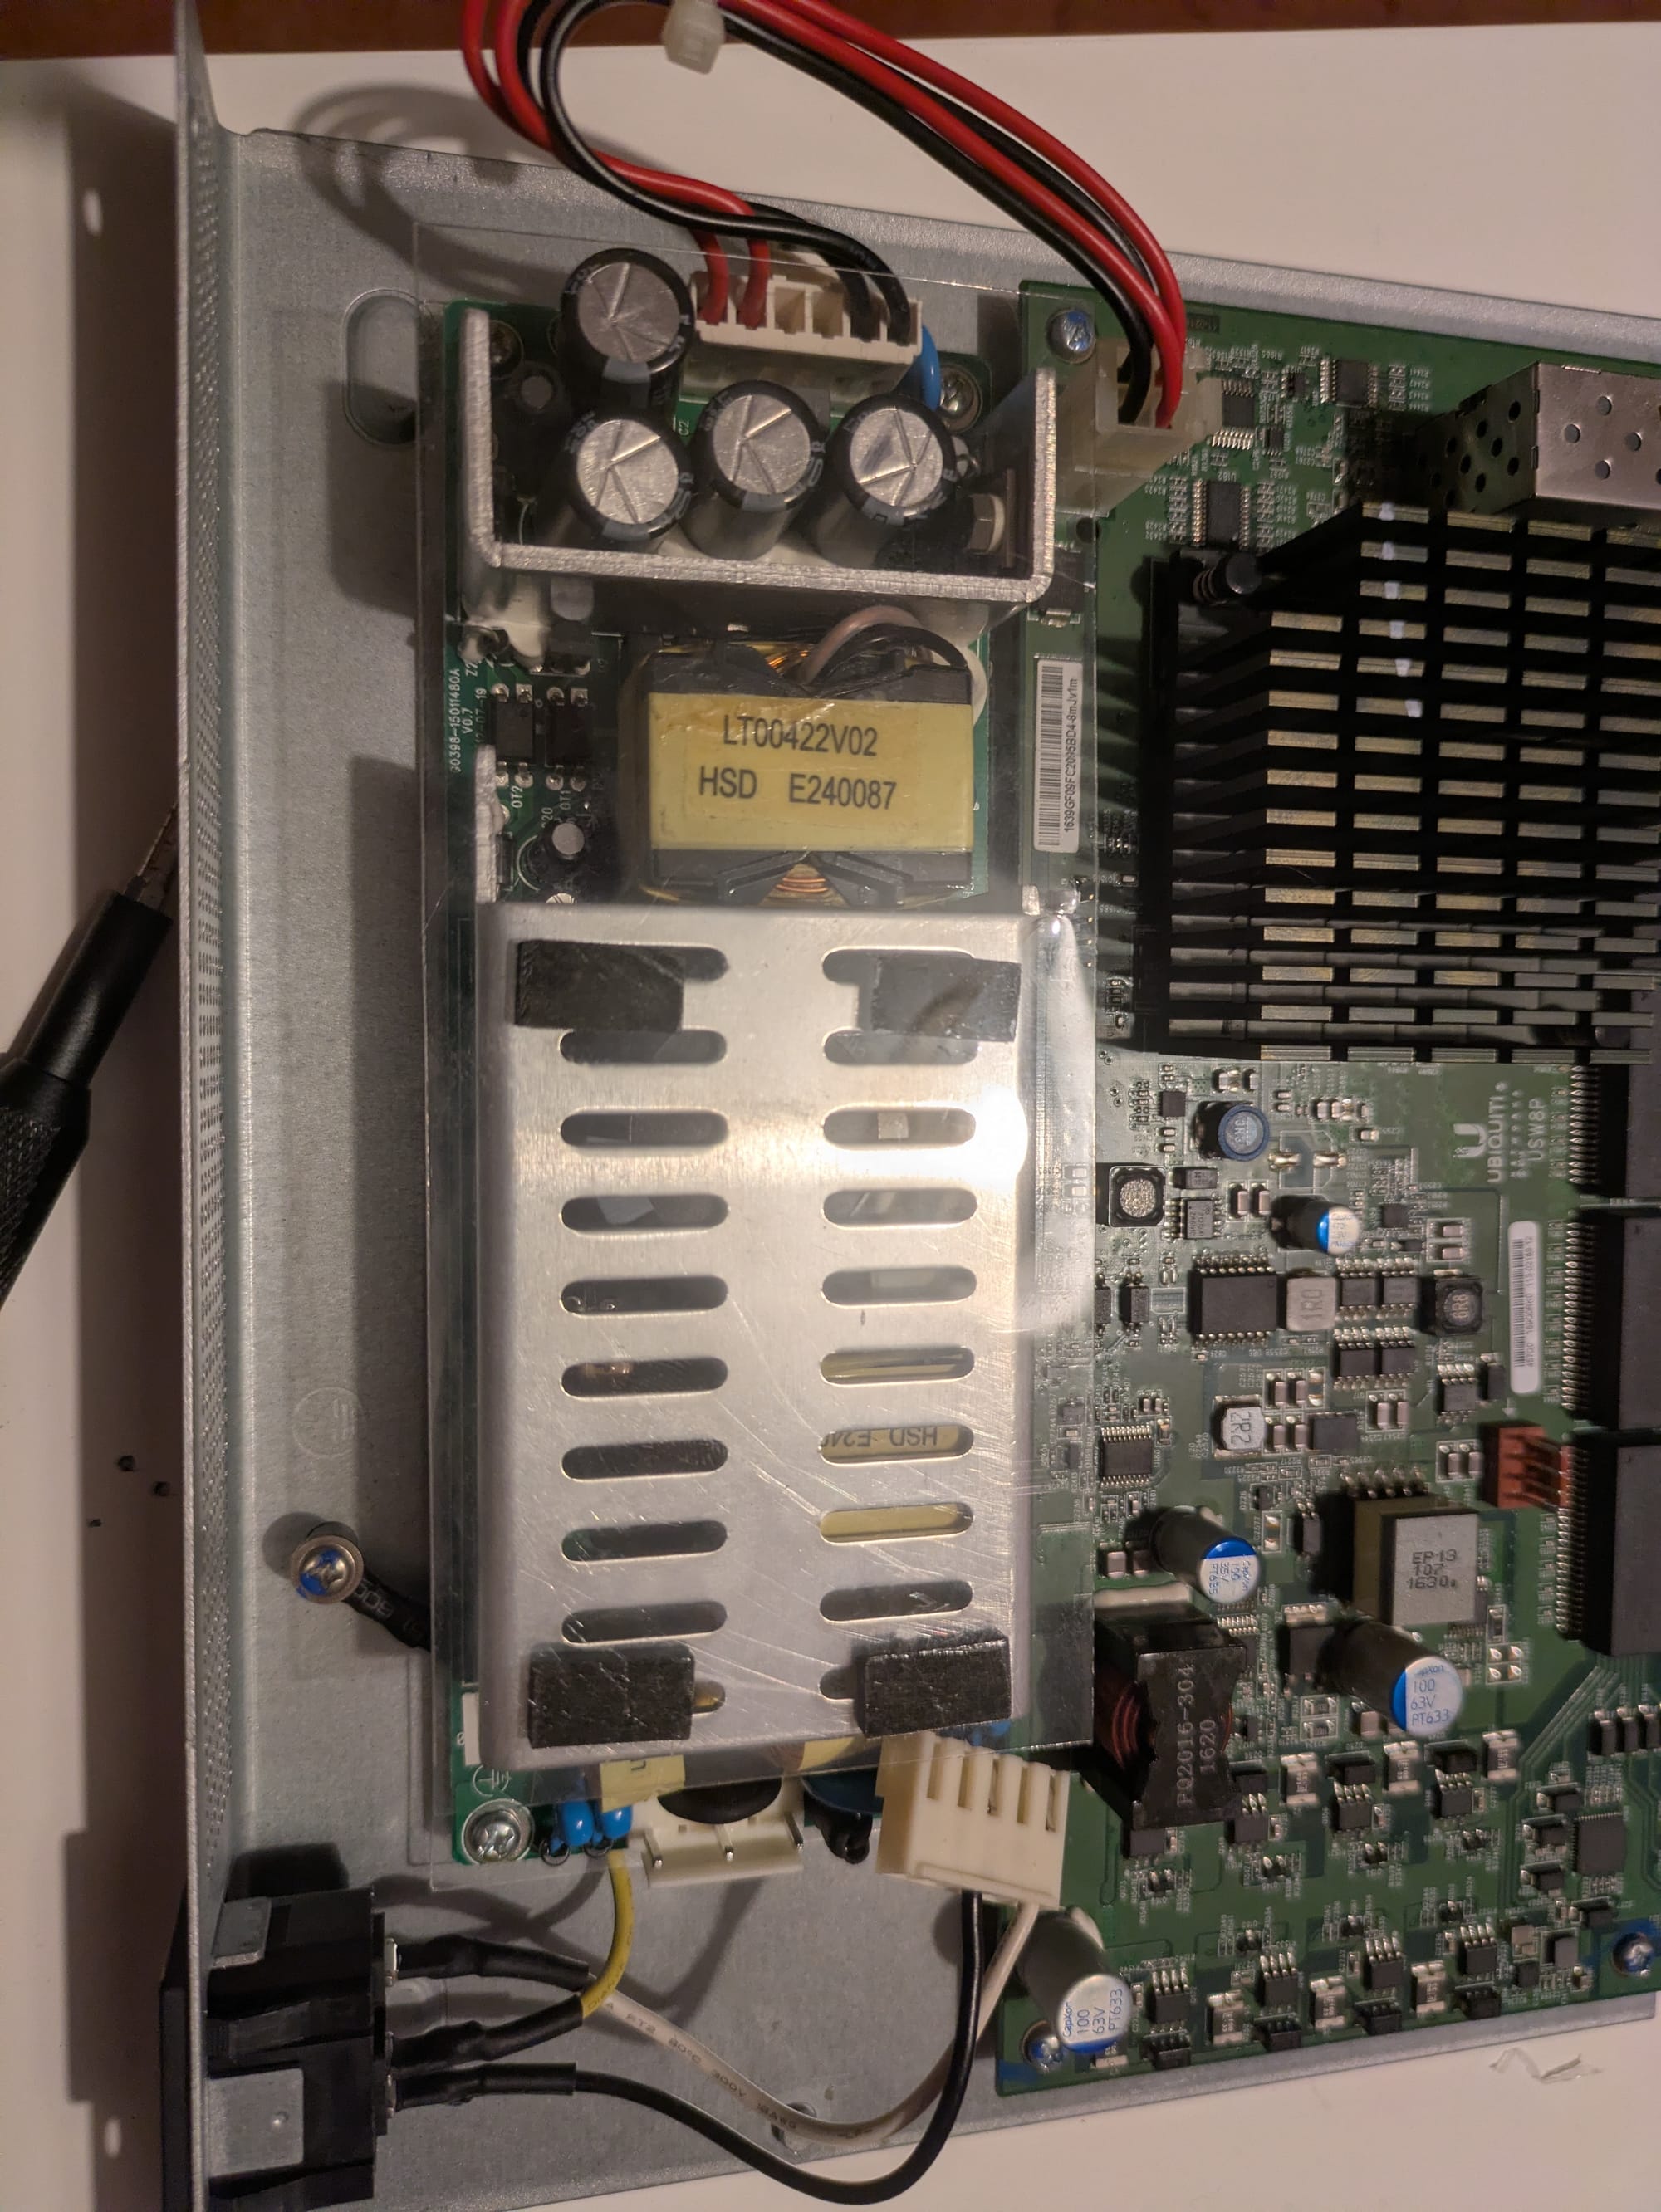
Step 1 - Removing the UniFi Switch Case
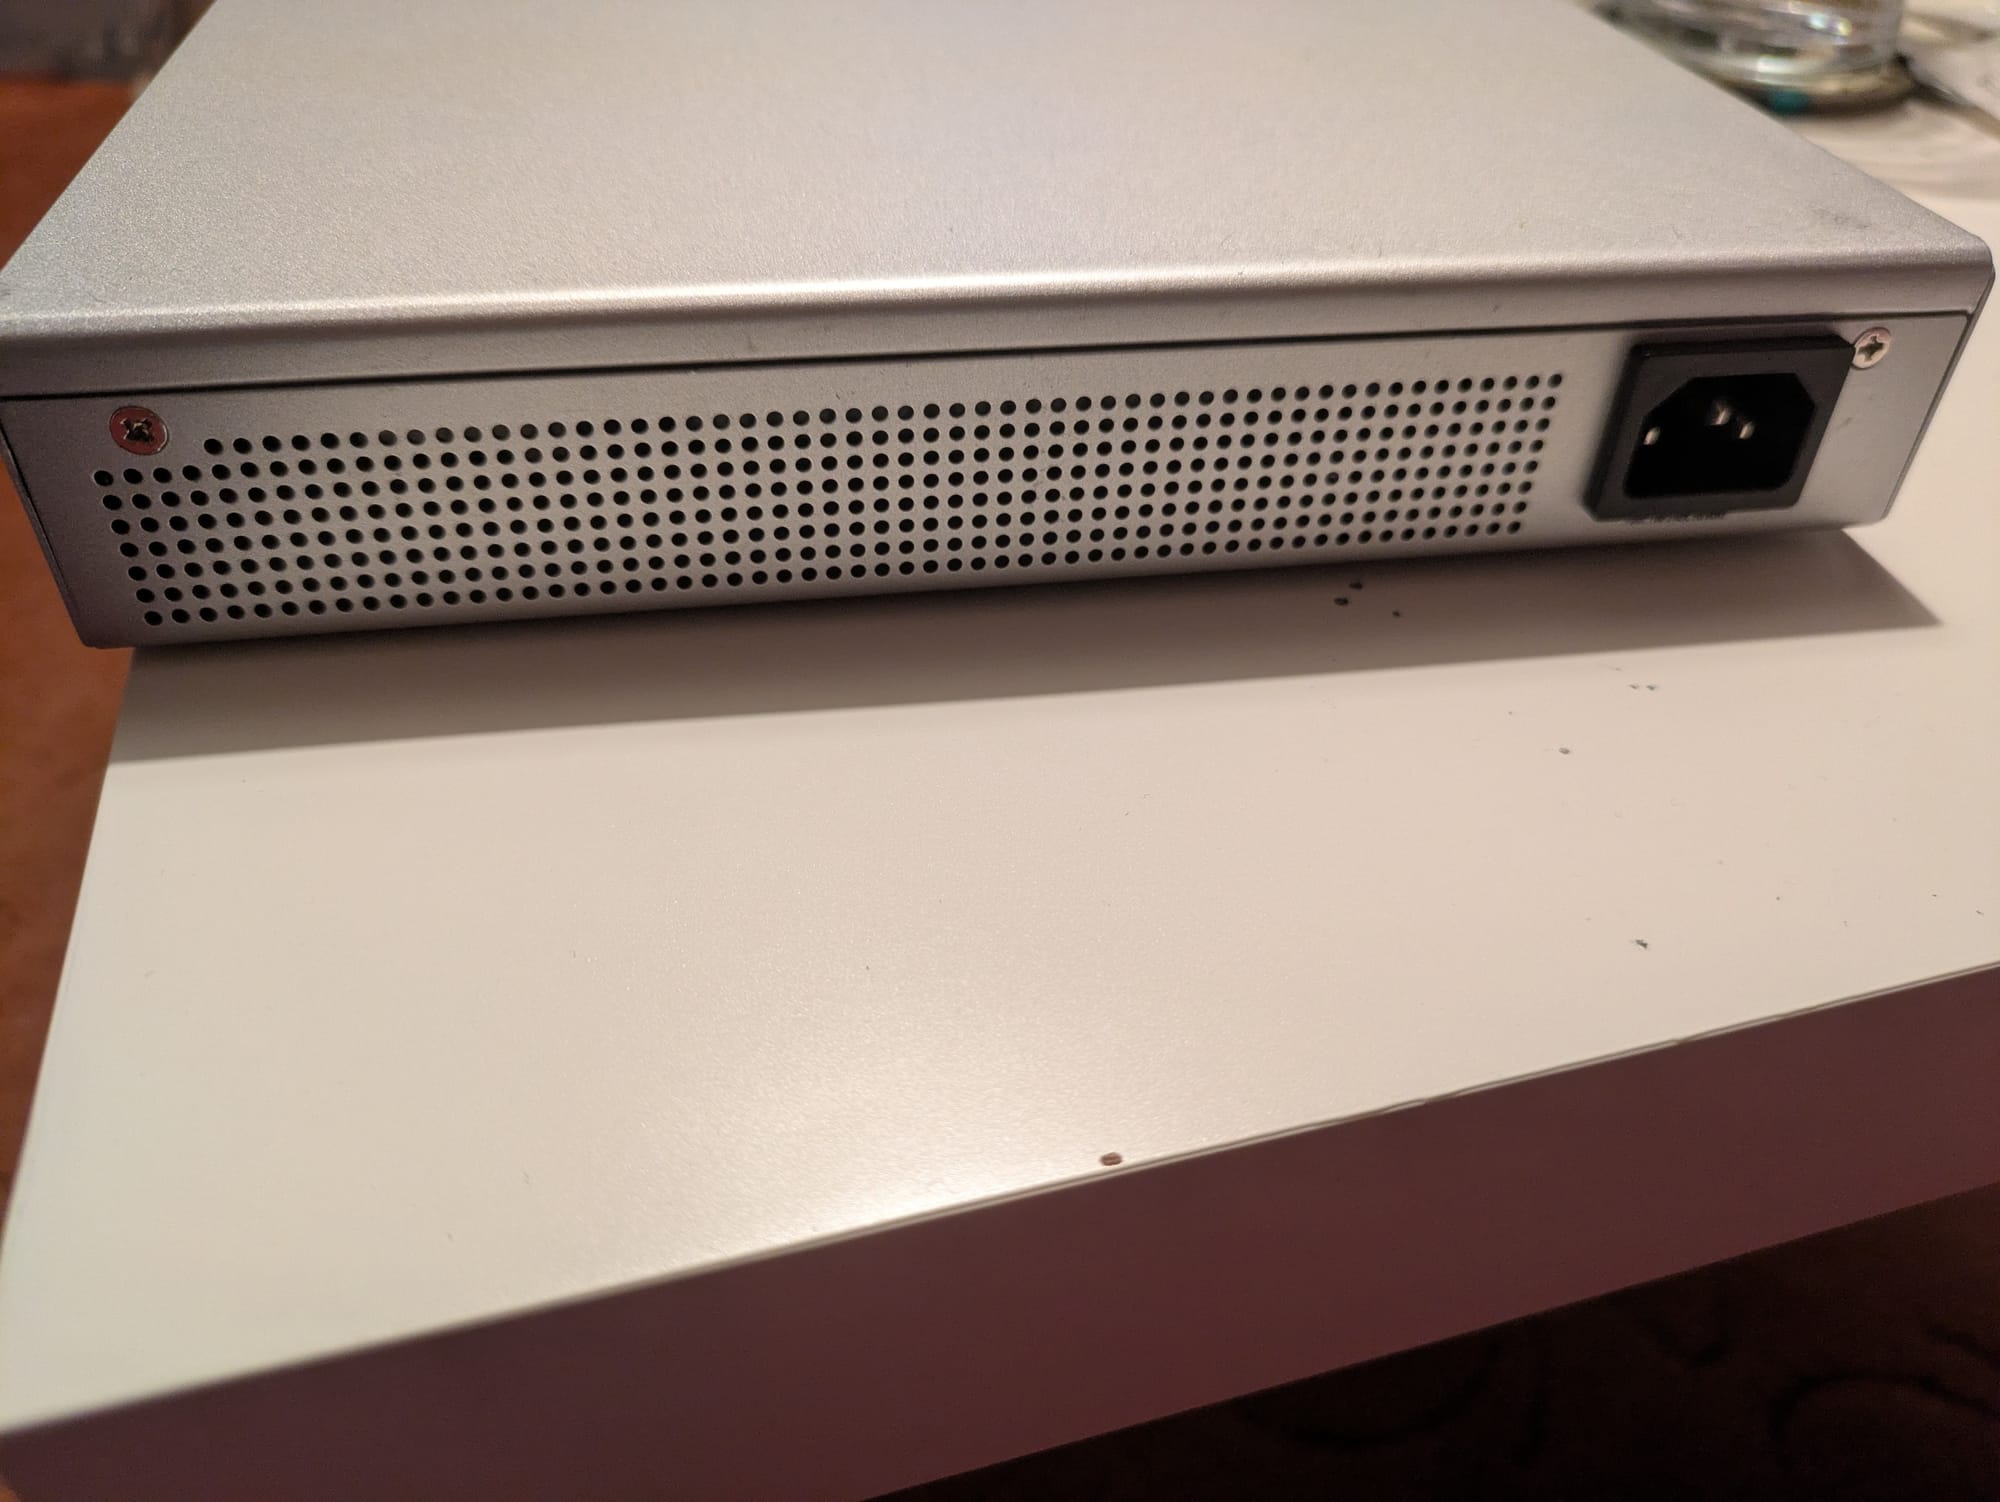
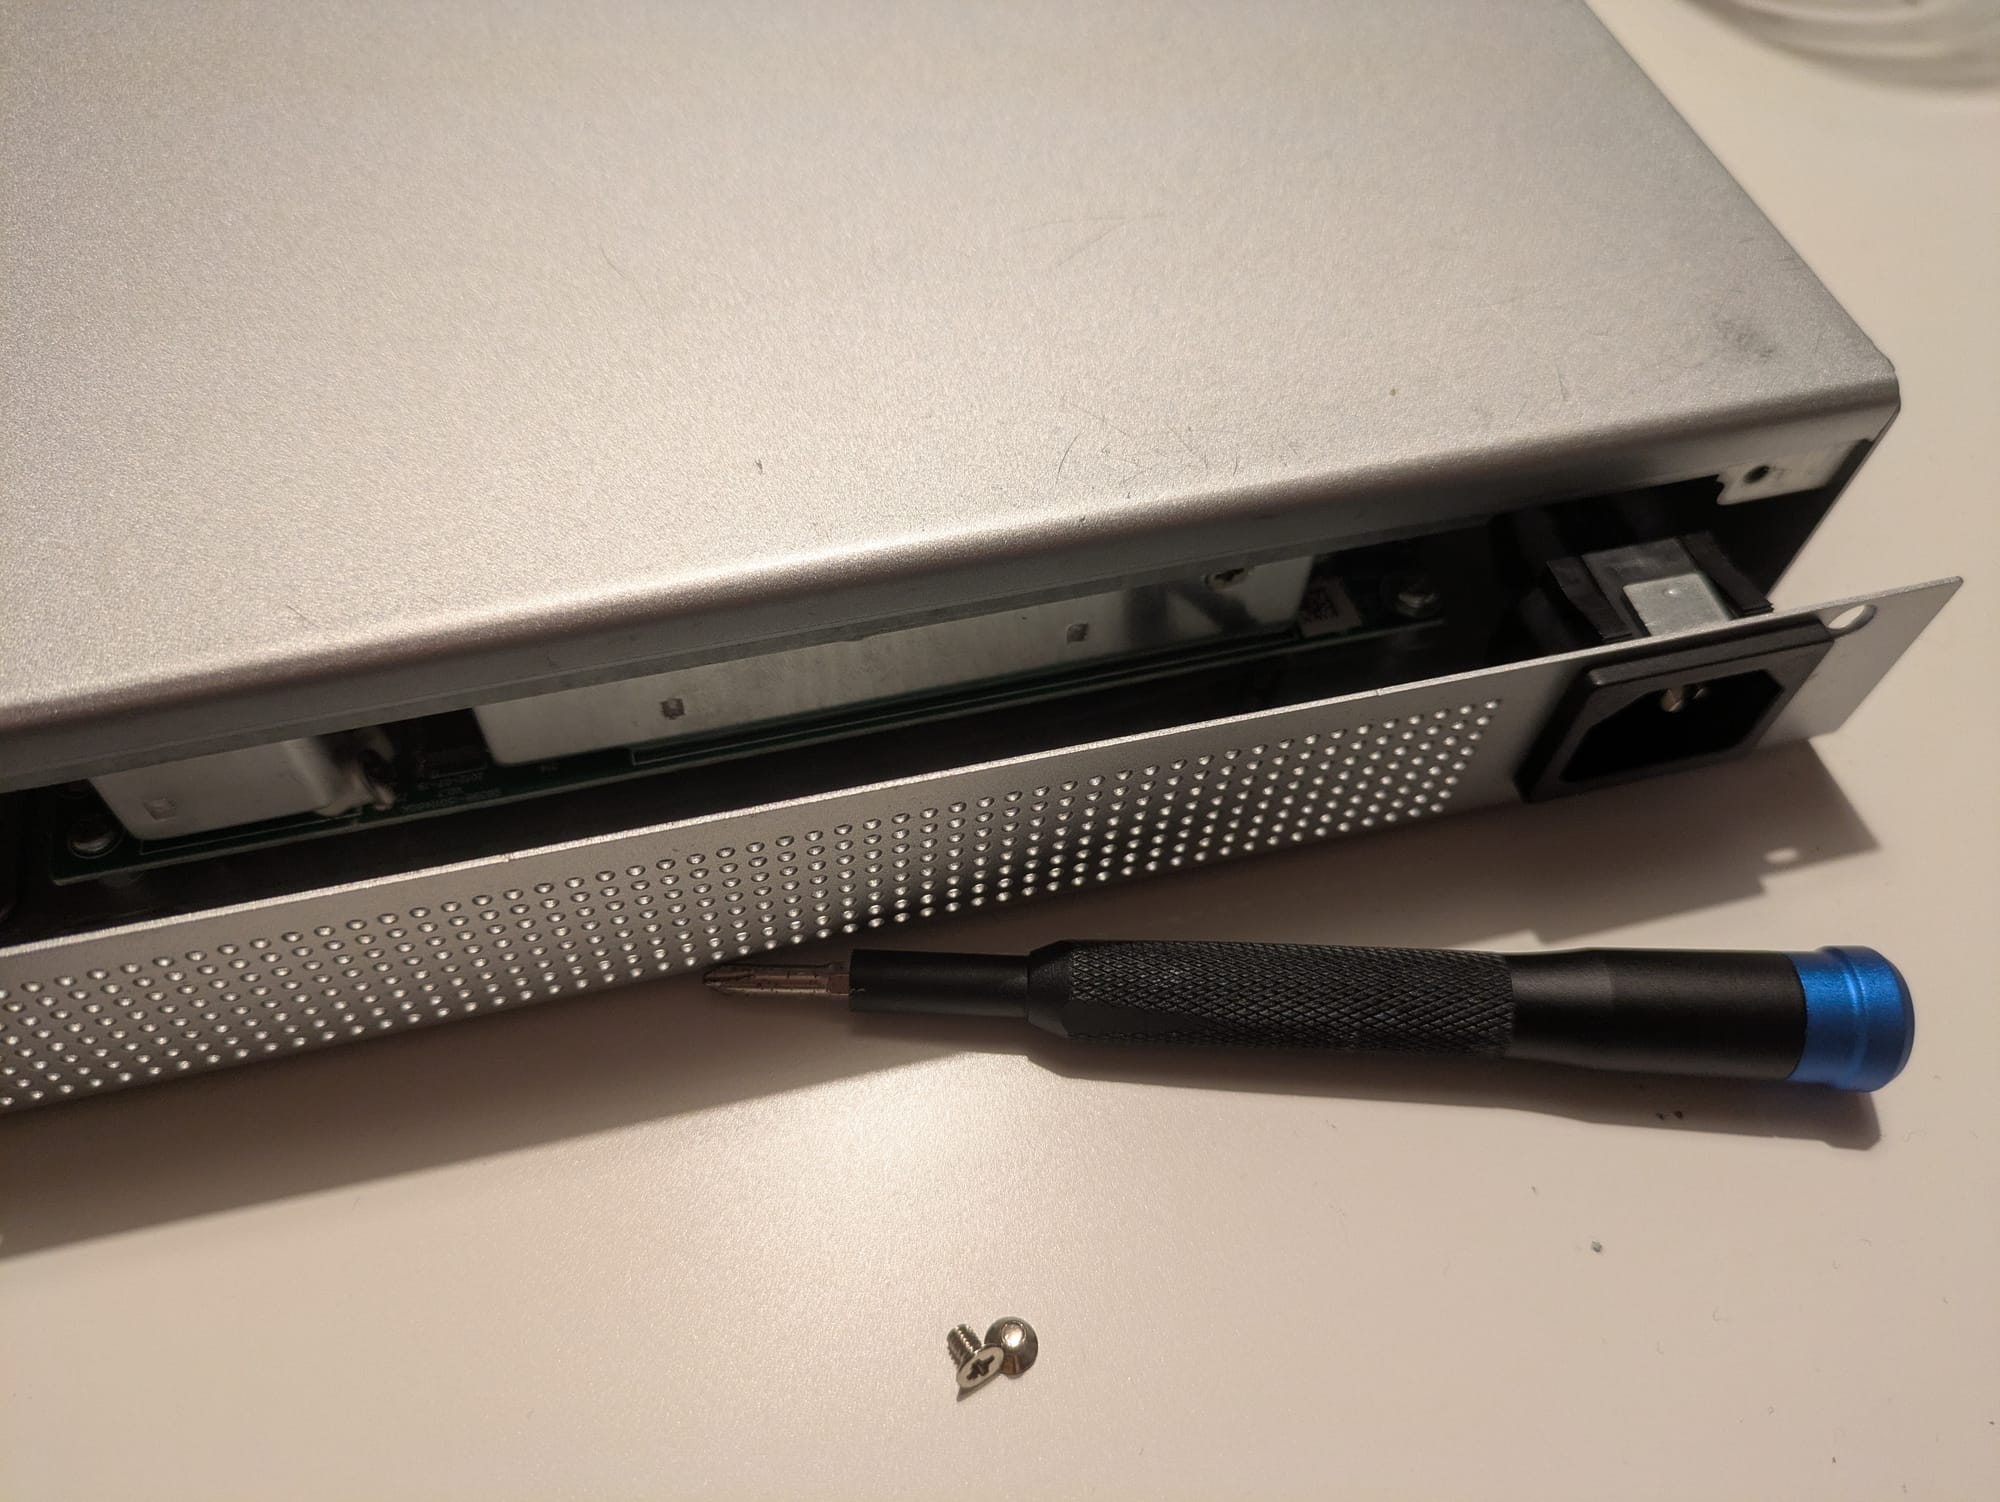
I started by removing the screws securing the metal chassis and carefully lifting the top cover off. The PSU sits neatly on one side of the case, tucked next to the main board.
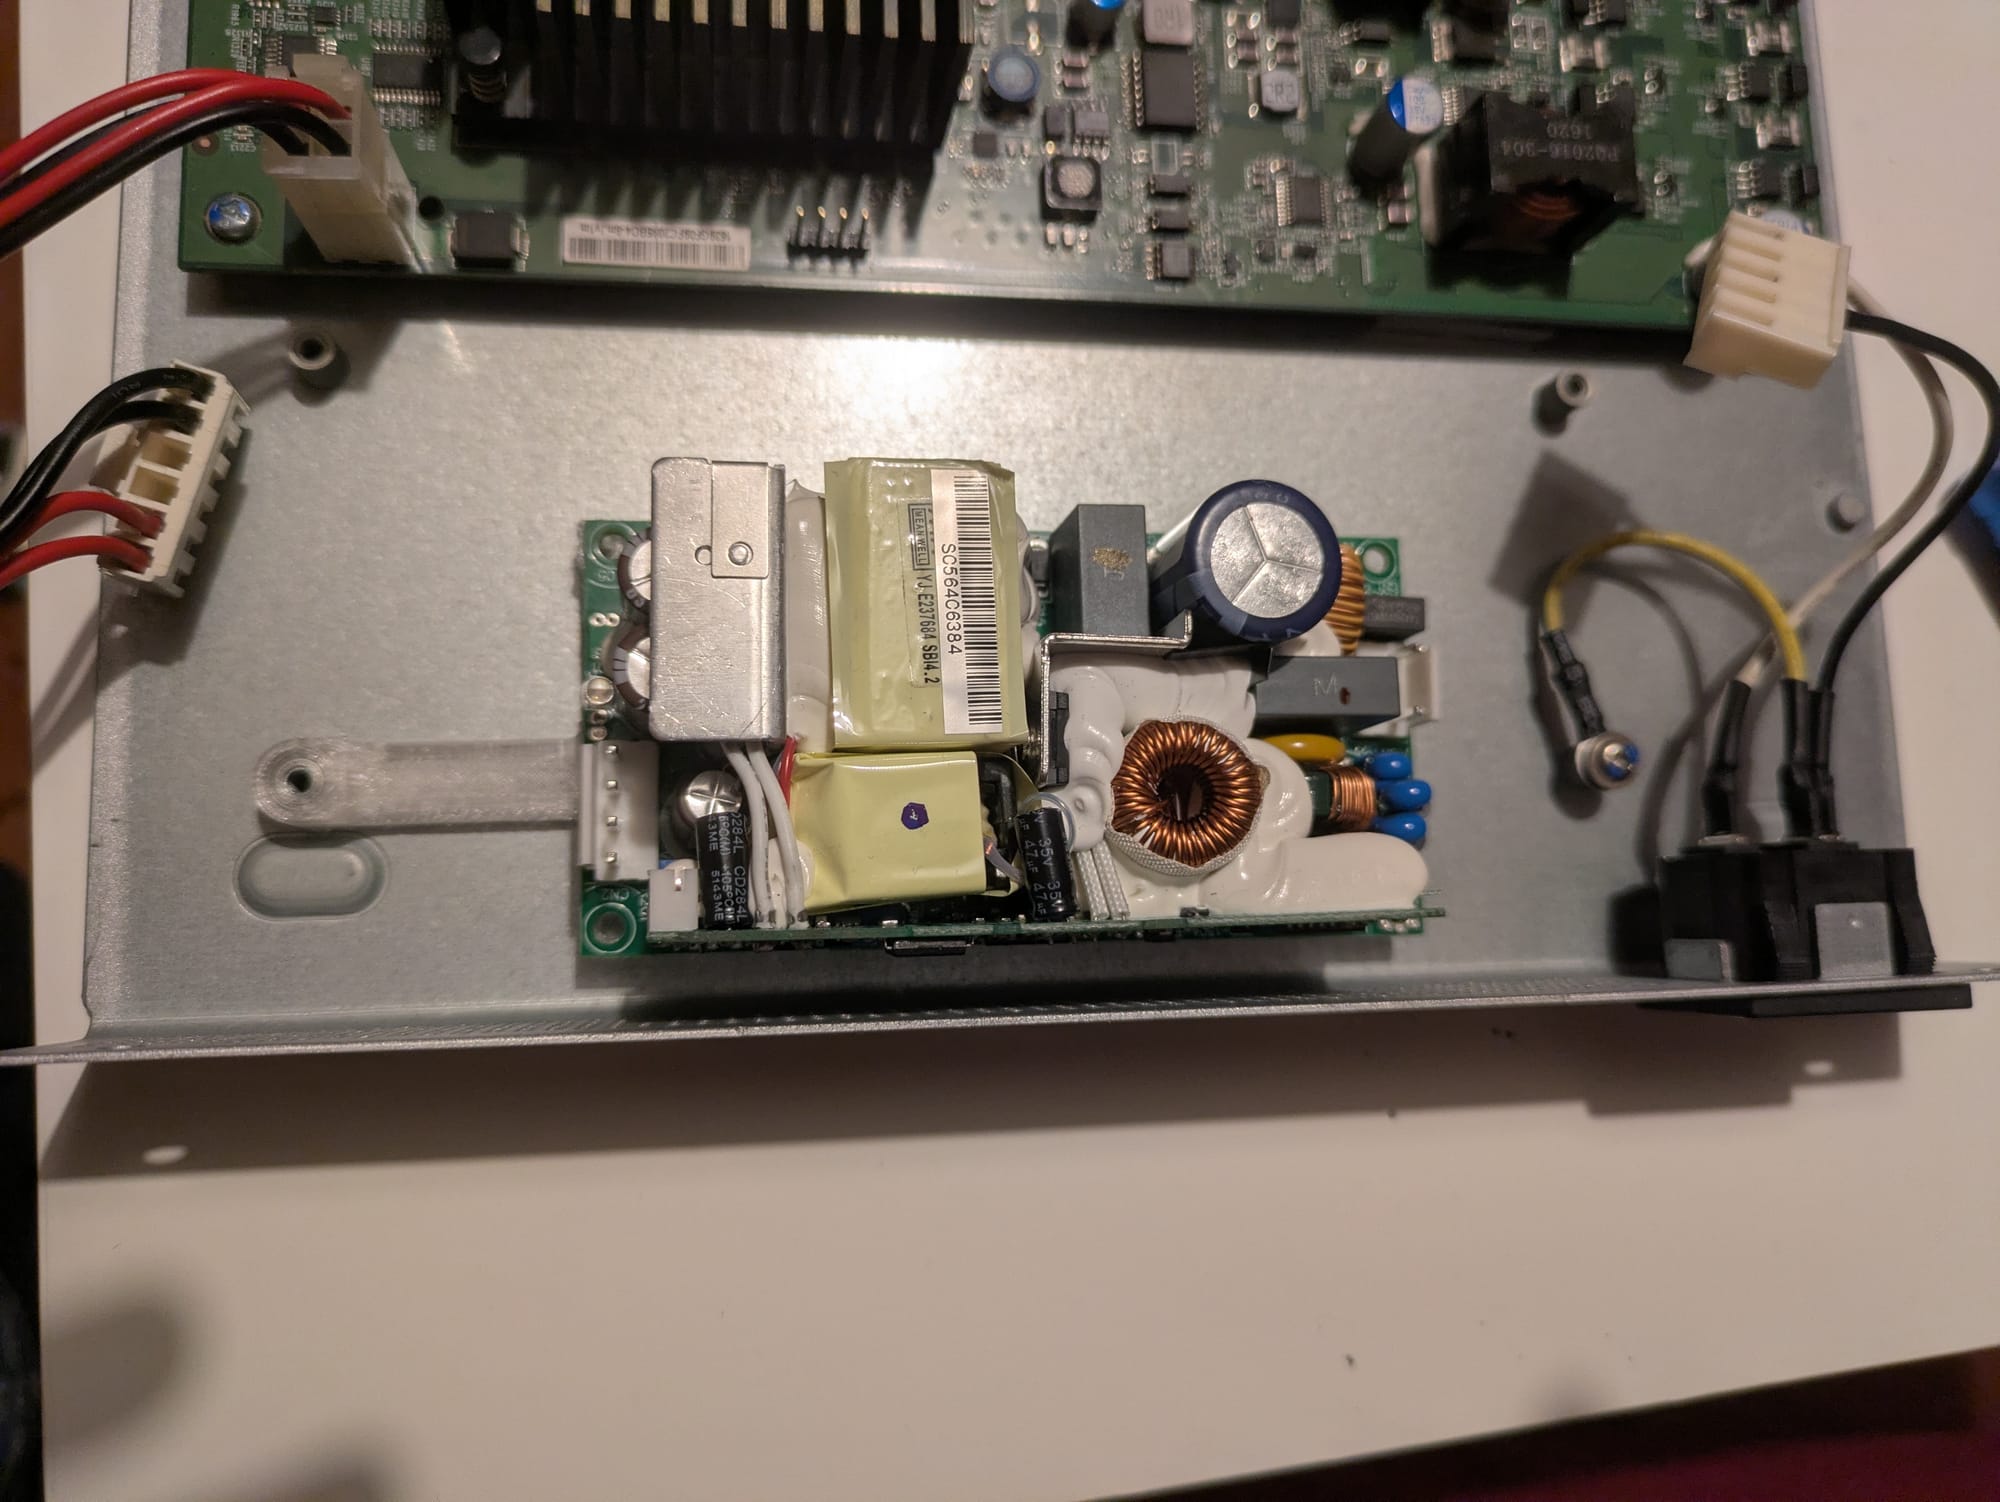
Step 2 - Removing the Dead Power Supply
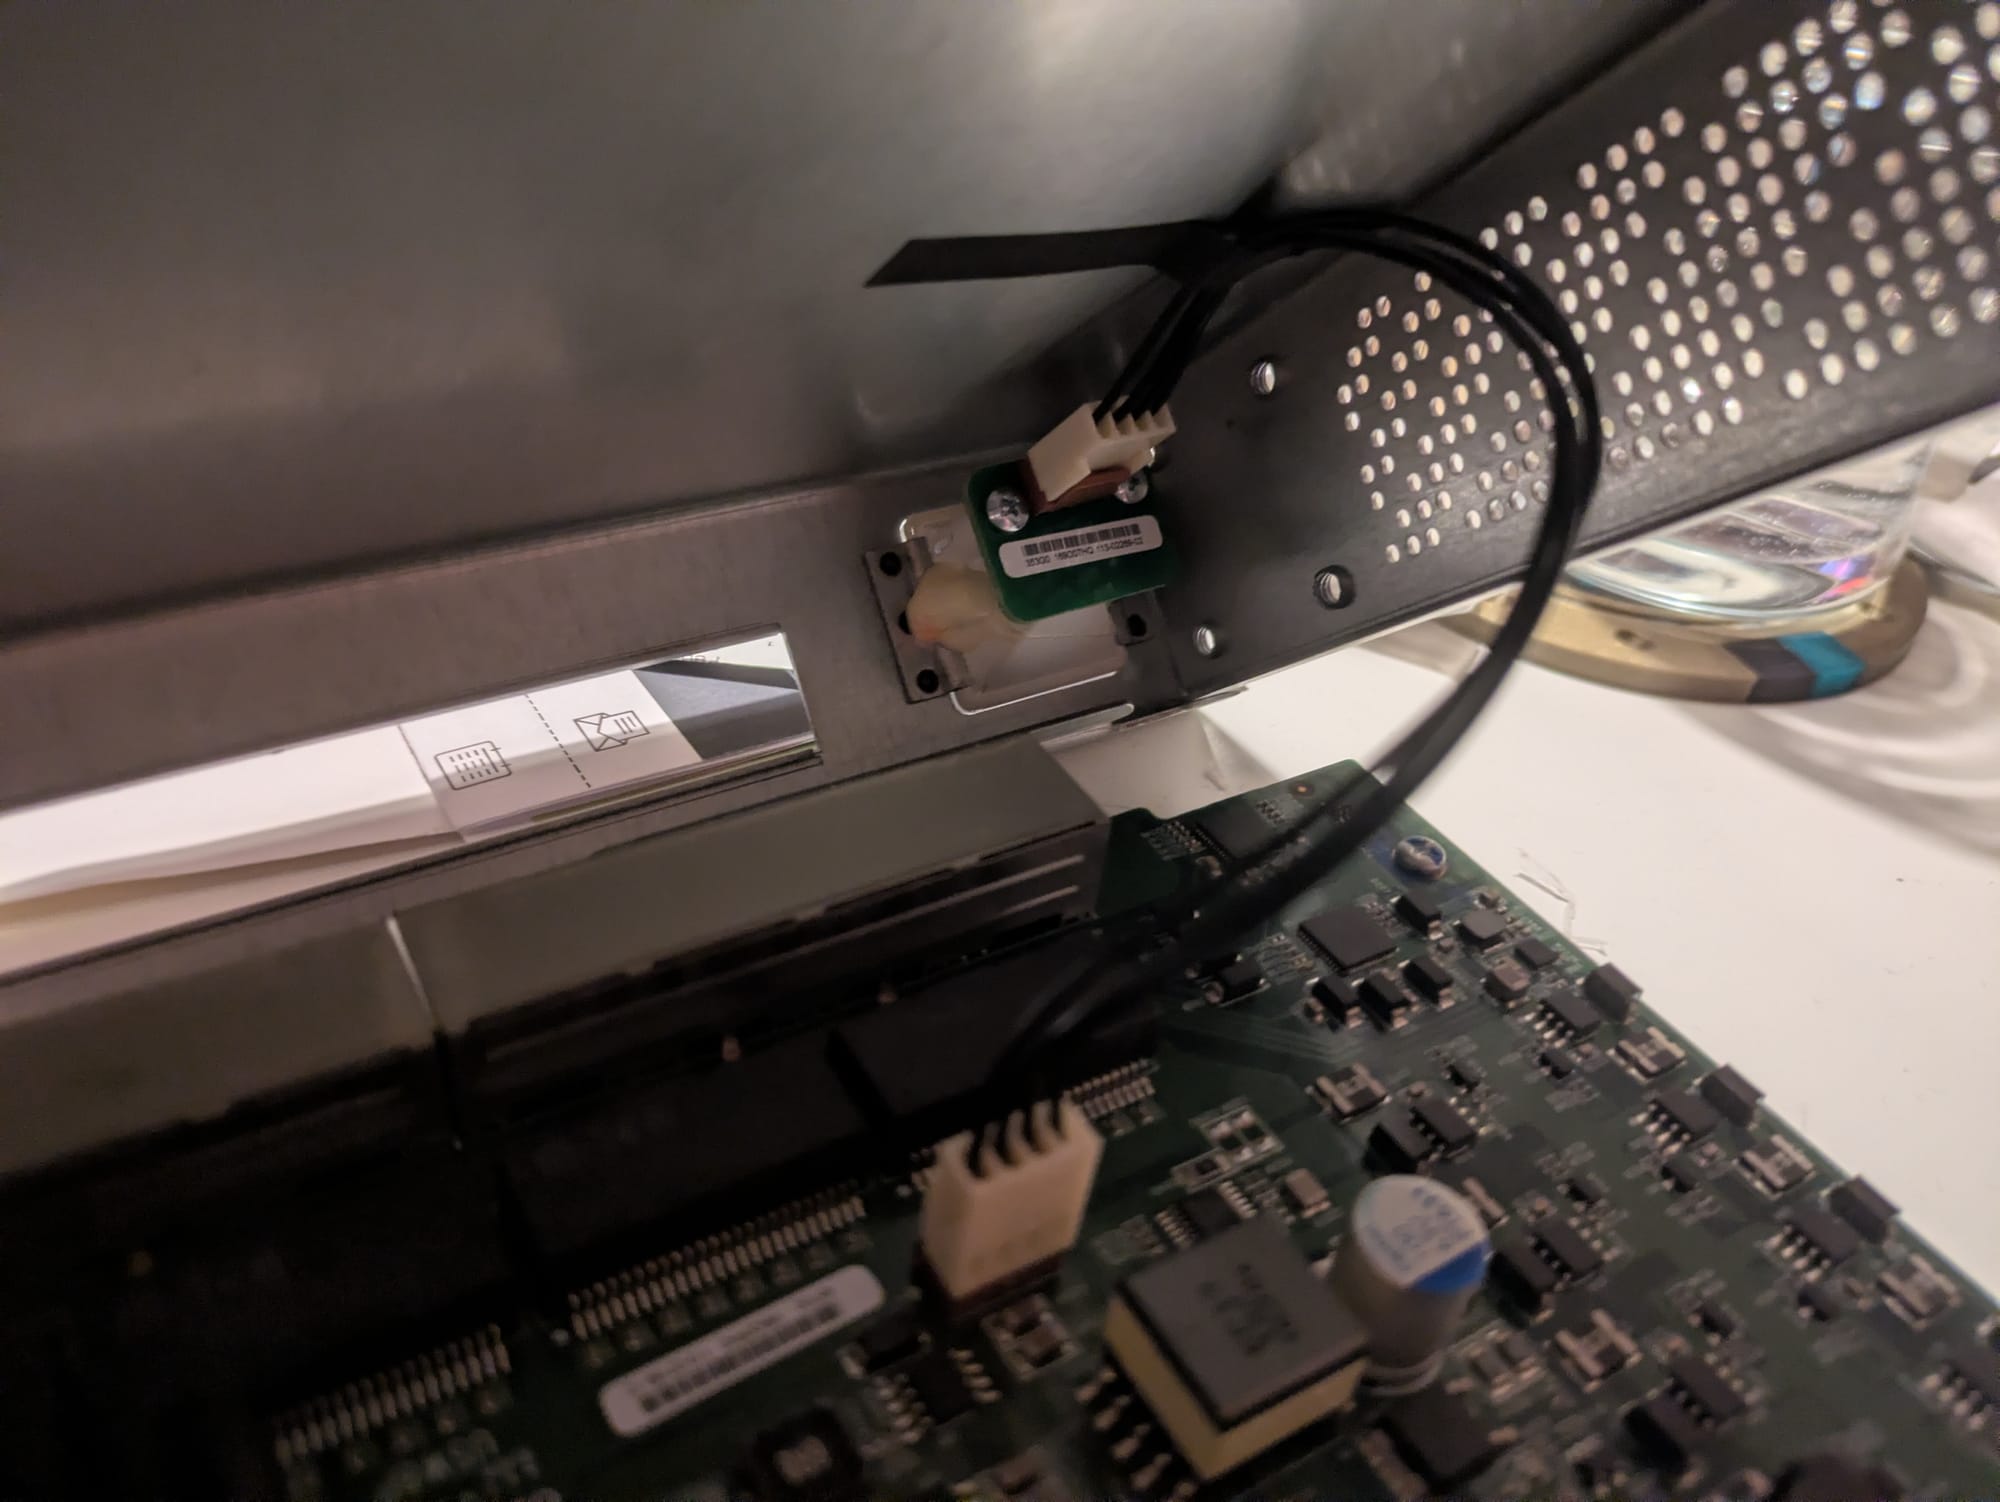
Next, I disconnected the wiring from the old power supply and unbolted it from the chassis. UniFi does a solid job with internal layout, so the PSU comes out fairly cleanly.
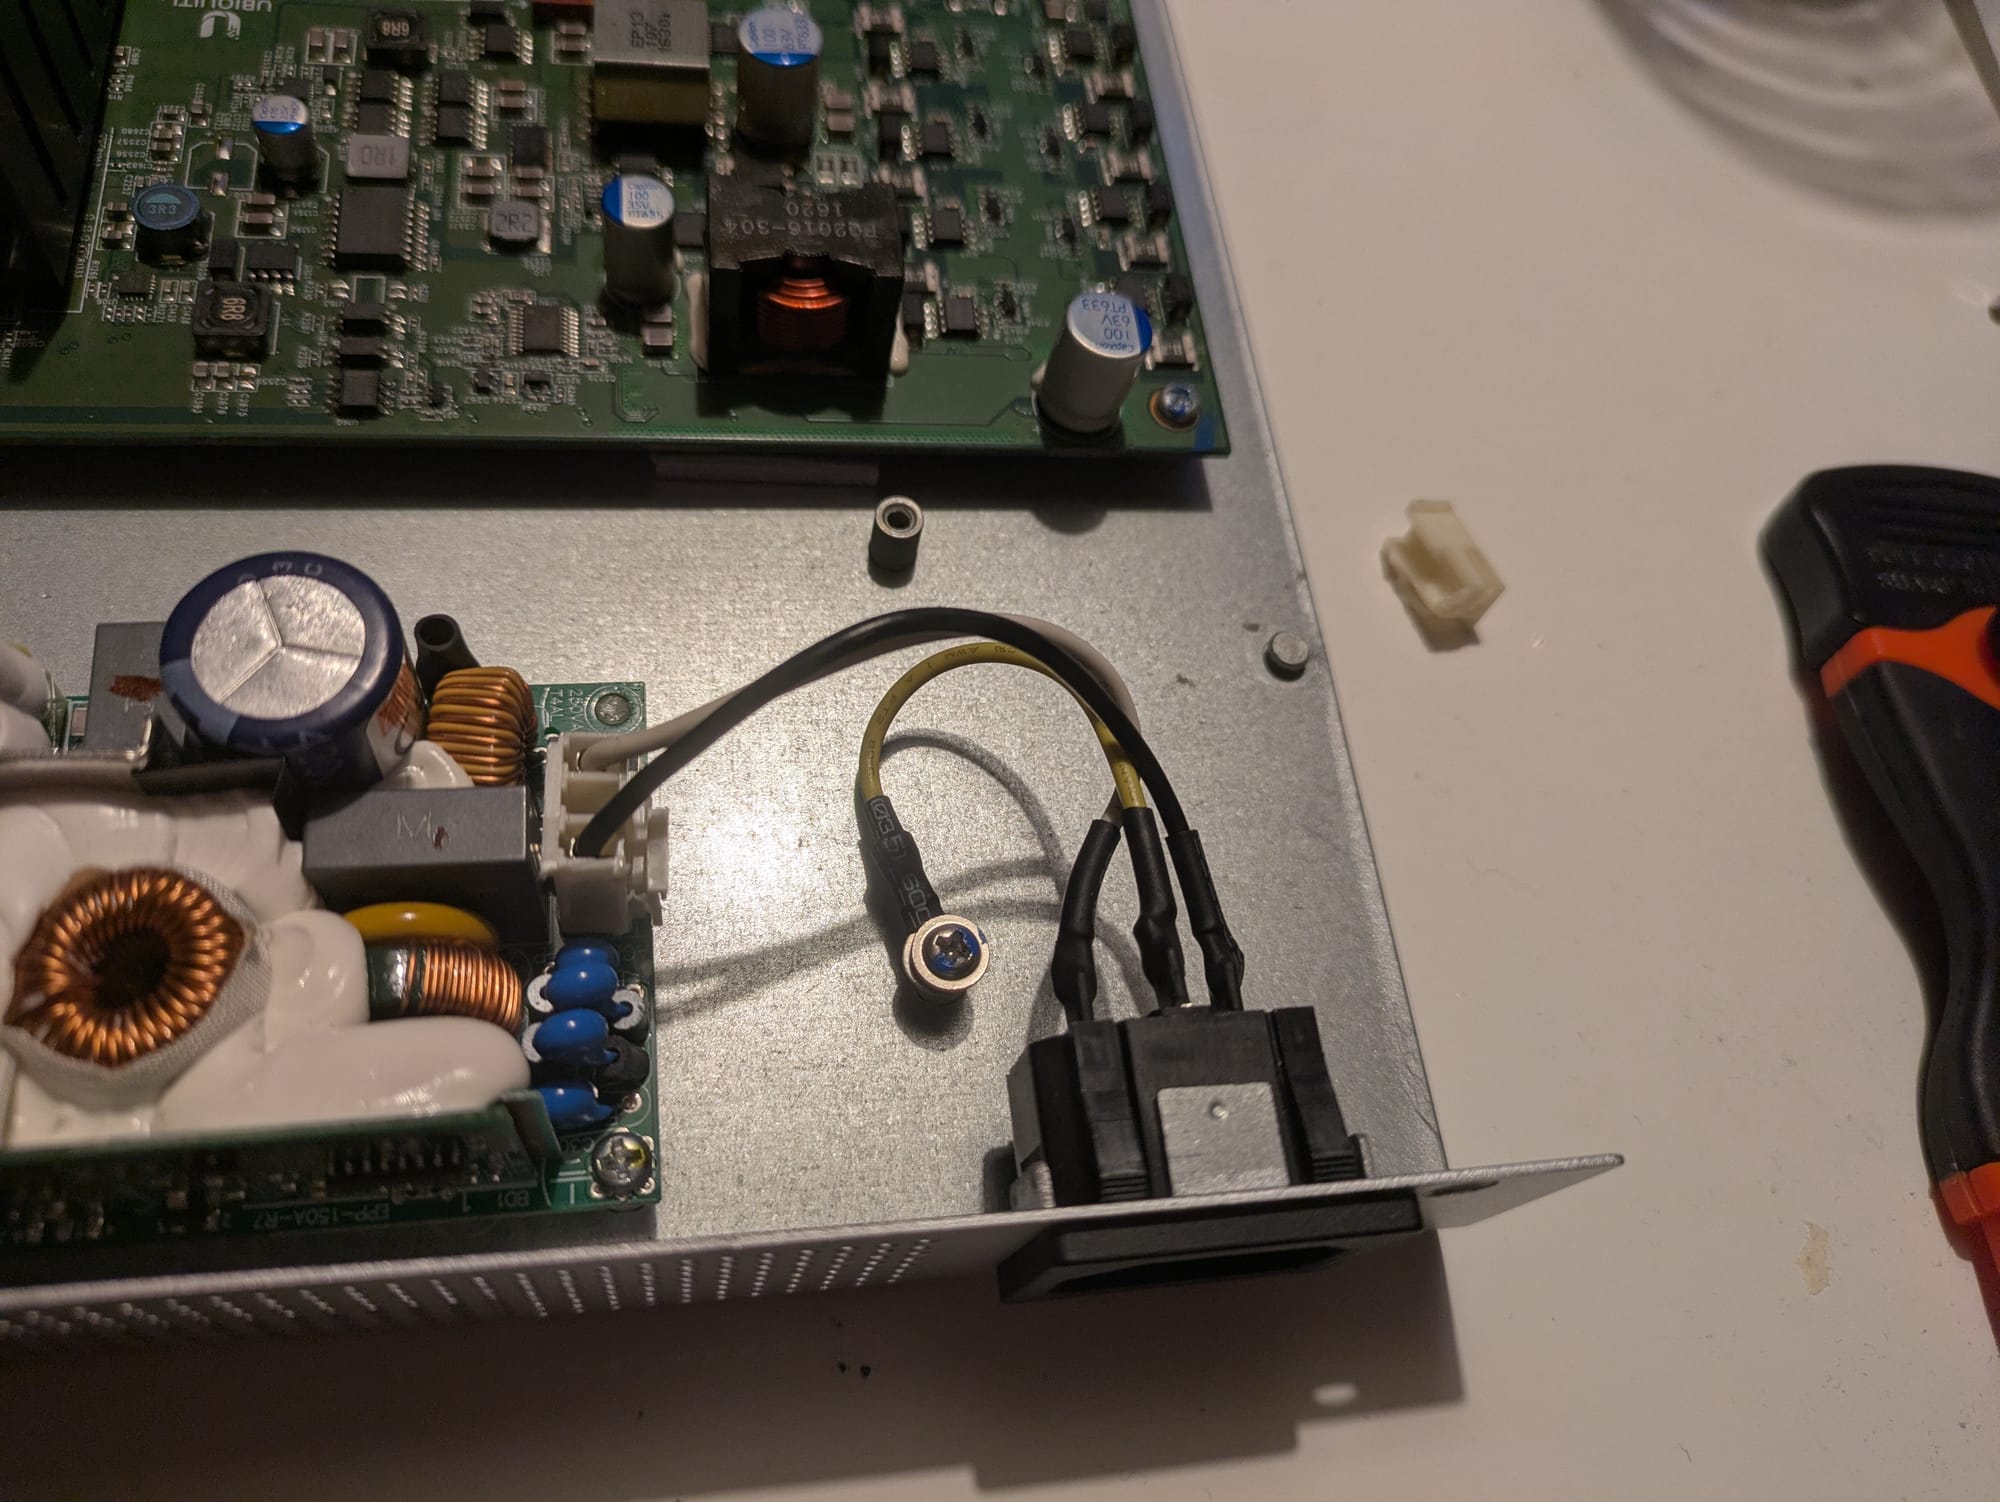
Step 3 - Wiring the New Power Supply (And Why the EPP-200-48 Would’ve Helped)
Here’s where things got interesting.
The EPP-150-48 works electrically - but the connectors weren’t an exact match. I needed to re-pin connections and cut down the existing connectors so they would fit the new PSU layout cleanly.
With the EPP-200-48W, this step wouldn’t have been necessary. So if you’re planning this repair, that alone makes the 200W version worth considering.
Step 4 - Mounting & Fitting the New PSU with 3D Printed Parts
To mount the PSU securely, I used an STL bracket from Thingiverse and printed it. The mount aligned well and held the PSU firmly in place.
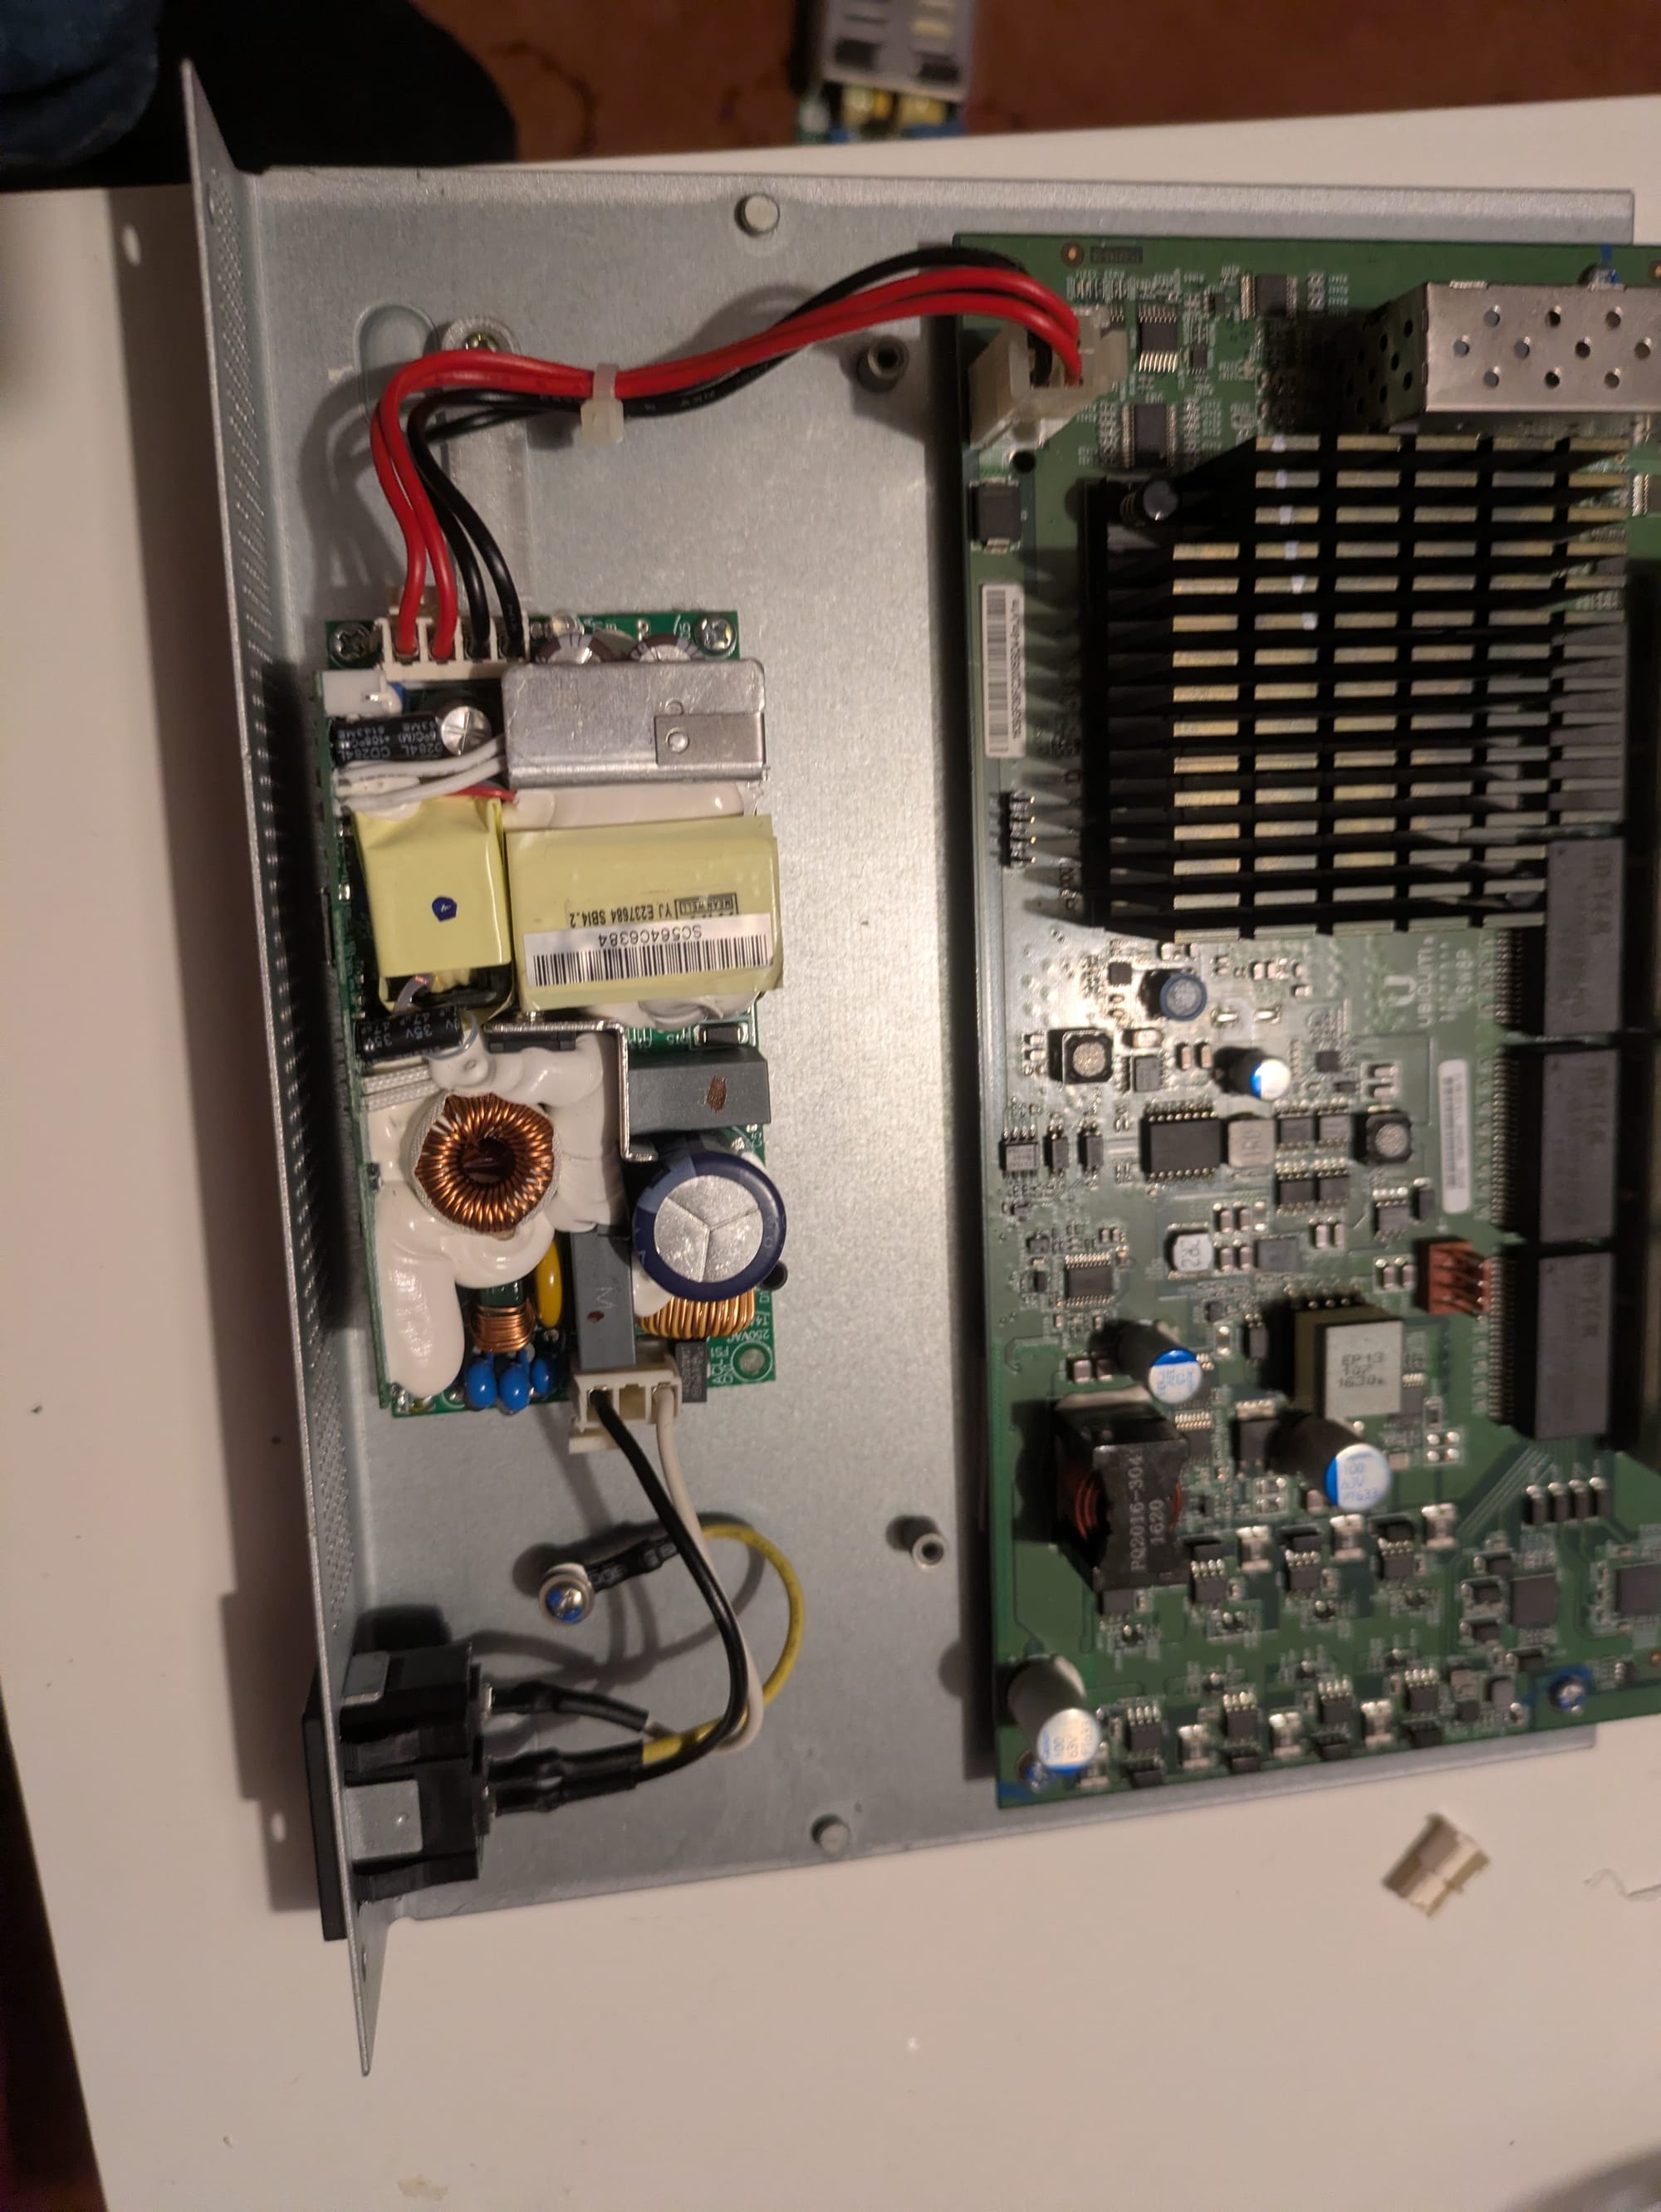
But…the PSU is slightly bulkier. Even with the printed mount, things were tight - tight enough that the switch case didn’t quite close the same way it originally did. I ended up cutting parts of the sliding pins, so that they engaged later.
It works. It’s safe. It just isn’t factory-perfect.
But here’s the part they don’t always tell you…
Still, it’s a working UniFi switch again instead of e-waste, which I count as a win.
Final Results
✔️ Switch powers on
✔️ PoE works
✔️ Stable performance
❌ Case doesn’t quite fit perfectly anymore
Overall, I’m happy with the fix. If you’re a tinkerer or a homelab builder, this kind of project is satisfying and practical.
Tools & Parts I Used (Amazon Gear List)
You can pick up the parts and tools below. Replace the links with your Amazon Affiliate URLs to monetize your post.
- Mean Well EPP-150-48 Power Supply
https://amzn.to/451btqx - (Recommended) Mean Well EPP-200-48W Power Supply
https://amzn.to/49podsq - 3D Printer Filament (PLA or PETG)
Overture PLA: https://amzn.to/49reNwu - Basic Screwdriver Set
https://amzn.to/4r0GmUH - Thingiverse STL File for Mounting Bracket
https://www.thingiverse.com/thing:4858615
Safety Disclaimer
Working on power supplies involves mains voltage, stored charge in capacitors, and the risk of electrical shock. If you’re not comfortable working with electronics, consult a qualified technician. Always unplug the device and discharge components where appropriate.
Final Thoughts
Repairing my UniFi US-8-150W PoE switch with a new EPP-150-48 power supply and a 3D-printed bracket was a fun and rewarding project. It saved money, kept hardware out of landfill, and now the switch is back online powering my network.
About the author
Tim Wilkes is a UK-based security architect with over 15 years of experience in electronics, Linux, and Unix systems administration. Since 2021, he's been designing secure systems for a telecom company while indulging his passions for programming, automation, and 3D printing. Tim shares his projects, tinkering adventures, and tech insights here - partly as a personal log, and partly in the hopes that others will find them useful.
Want to connect or follow along?
LinkedIn: [phpsytems]
Twitter / X: [@timmehwimmy]
Mastodon: [@timmehwimmy@infosec.exchange]
If you've found a post helpful, consider supporting the blog - it's a part-time passion that your support helps keep alive.
⚠️ Disclaimer
This post may contain affiliate links. If you choose to purchase through them, I may earn a small commission at no extra cost to you. I only recommend items and services I’ve personally read or used and found valuable.
As an Amazon Associate I earn from qualifying purchases.