Fallout Sign - With added Home Assistant.
If you have read a few of my articles, you will know I love messing around with my 3D printer, and possibly even that I make props from time to time.
Recently, I came across this tutorial for making a glowing fallout sign. I love the game fallout, and set about making this for myself. For reference, the original video can be found below.
It was all pretty straight forward until we got to the soldering. While I can solder, my eyes aren't what they used to be and the pads on the suggested leds strips are pretty small. I also needed to choose my microcontroller. So rather than use what was suggested, I popped over to the pimoroni website and purchased the following:
- 1x Plasma Stick 2040 W (Pico W Aboard)
- 1x LED Strip Input/Output Cable - 3-pin
- 1x Neon-like RGB LED Strip with Diffuser
The led strip was able to be coiled up inside the box, with no need to cut it down to size. Just remember to point it the right way. I drilled a hole for the cable to come out of, and I connected that to the led strip. On the other end, I wired in the Plasma stick.
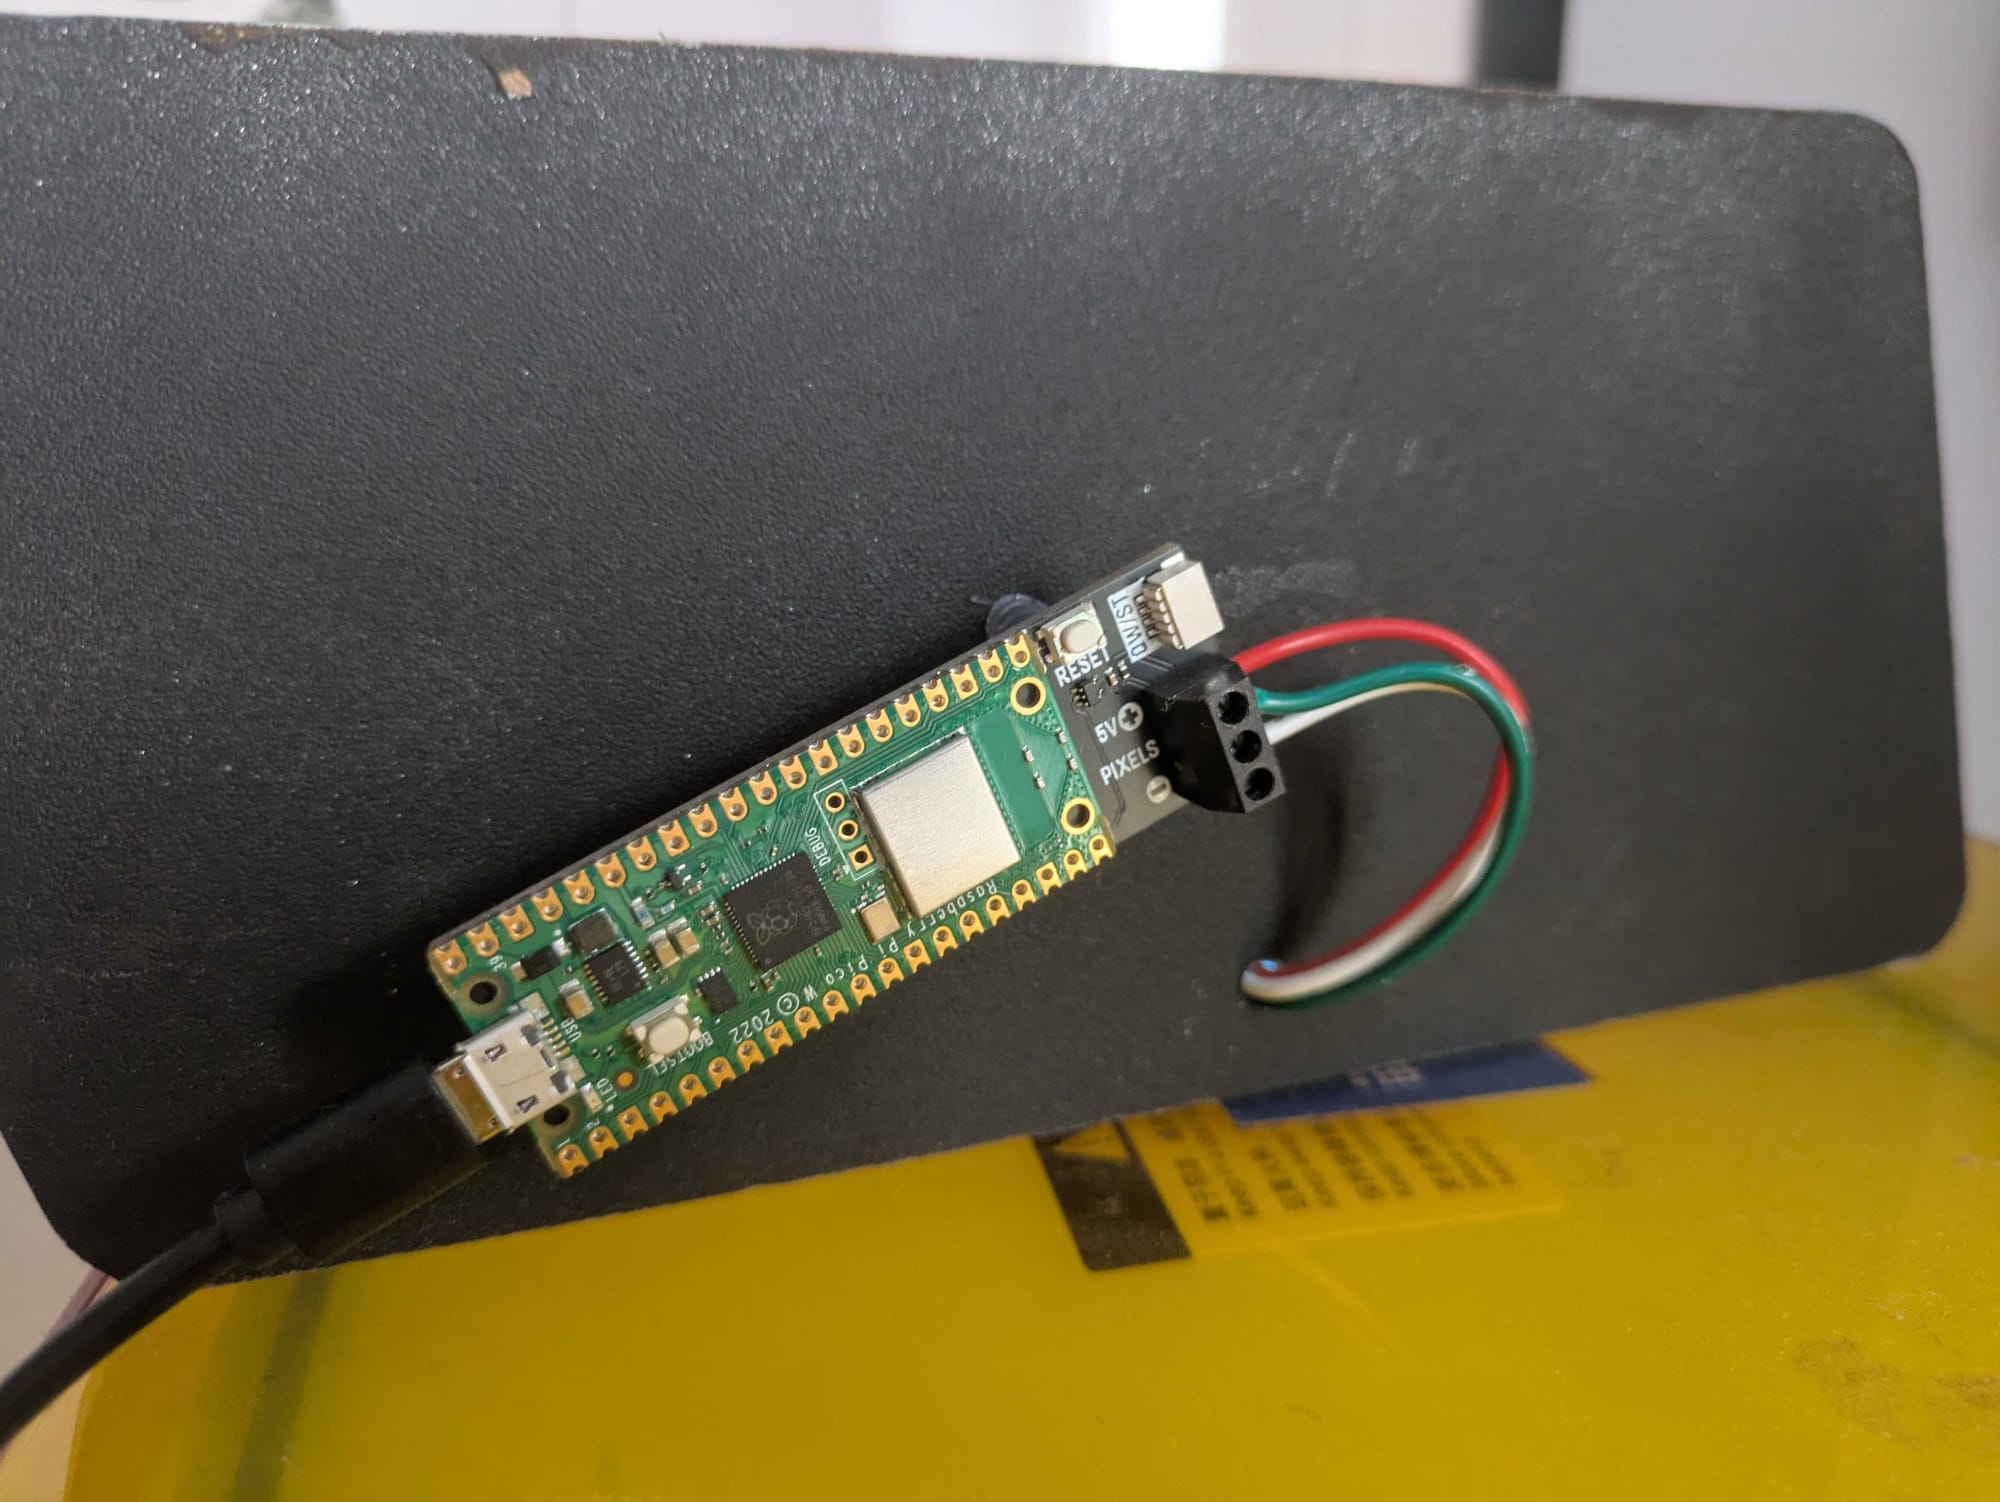
Lastly, I glued down the plasma stick to rear of the box and plugged it in.
I then proceeded to program the Plamsa stick using ESPHome for home assistant. This is my current configuration for the device:
esphome:
  name: fallout-01
  friendly_name: fallout-01
  on_boot:
    priority: 600
    then:
      - light.turn_on: led_strip
      - lambda: |-
          auto call = id(led_strip).make_call();
          call.set_effect("Rainbow2");
          call.perform();

rp2040:
  board: rpipicow
#  framework:
#    platform_version: https://github.com/maxgerhardt/platform-raspberrypi.git

# Enable logging
logger:

# Enable Home Assistant API
api:
  encryption:
    key: !secret api_key

ota:
  - platform: esphome
    password: !secret ota_pass

wifi:
  ssid: !secret wifi_ssid
  password: !secret wifi_password

  # Enable fallback hotspot (captive portal) in case wifi connection fails
  ap:
    ssid: "Fallout-01 Fallback Hotspot"
    password: !secret wifi_backup

#captive_portal:

output:
  - platform: gpio
    pin:
      number: 25
      mode: output
    id: LED

light:
  - platform: rp2040_pio_led_strip
    name: led_strip
    id: led_strip
    pin: GPIO15
    num_leds: 95
    pio: 0
    rgb_order: RGB
    chipset: WS2812
    effects:
      # Use default parameters:
      - random:
          name: "Random Effect"
      - strobe:
          name: "Strobe Effect"
      - flicker:
          name: "Flicker Effect"
      - addressable_rainbow:
          name: "Addressable Rainbow"
      - addressable_color_wipe:
          name: "Addressable Color Wipe"
      - addressable_scan:
          name: "Addressable Scan"
      - addressable_twinkle:
          name: "Addressable Twinkle"
#      - addressable_chase:
      - addressable_fireworks:
          name: Fireworks
          use_random_color: True
          spark_probability: 15%
      - addressable_flicker:
          name: Flicker2
      - addressable_rainbow:
          name: Rainbow2
          speed: 20
          width: 50
      - addressable_color_wipe:
          name: ColorWipe
          colors:
            - red: 100%
              green: 100%
              blue: 100%
              num_leds: 15
              gradient: true
            - red: 0%
              green: 0%
              blue: 0%
              num_leds: 95
          add_led_interval: 50ms
          reverse: false

# Global variable to store current effect index
globals:
  - id: effect_index
    type: int
    restore_value: yes
    initial_value: '10'

script:
  - id: cycle_effect
    mode: restart
    then:
      - lambda: |-
          static const std::vector<std::string> effects = {
            "Random Effect", "Strobe Effect", "Flicker Effect", "Addressable Rainbow",
            "Addressable Color Wipe", "Addressable Scan", "Addressable Twinkle",
            "Fireworks", "Flicker2", "Rainbow2", "ColorWipe"
          };
          id(effect_index)++;
          if (id(effect_index) >= effects.size()) {
            id(effect_index) = 0;
          }
          auto effect_name = effects[id(effect_index)];
          id(led_effect_selector).publish_state(effect_name);
          auto call = id(led_strip).make_call();
          call.set_effect(effect_name);
          call.perform();
# Virtual button to trigger the script
button:
  - platform: template
    name: "Cycle LED Effect"
    on_press:
      then:
        - script.execute: cycle_effect
  - platform: restart
    name: "Fallout Restart"

select:
  - platform: template
    name: "LED Effect Selector"
    id: led_effect_selector
    optimistic: true
    options:
      - "Random Effect"
      - "Strobe Effect"
      - "Flicker Effect"
      - "Addressable Rainbow"
      - "Addressable Color Wipe"
      - "Addressable Scan"
      - "Addressable Twinkle"
      - "Fireworks"
      - "Flicker2"
      - "Rainbow2"
      - "ColorWipe"
    initial_option: "Addressable Rainbow"
    on_value:
      then:
        - lambda: |-
            auto call = id(led_strip).make_call();
            call.set_effect(x);
            call.perform();
If you prefer, the full configuration file can be found on my github page here.
Once created, uploading the firmware is as simple as plugging the plasma stick in to your laptop with the boot button pressed, then dragging and dropping the firmware on the device. Subsequent updated can be made over wifi.
Once done, verify everything is working and place the front on over the led strip. For refence, here is my display:
About the author
Tim Wilkes is a UK-based security architect with over 15 years of experience in electronics, Linux, and Unix systems administration. Since 2021, he's been designing secure systems for a telecom company while indulging his passions for programming, automation, and 3D printing. Tim shares his projects, tinkering adventures, and tech insights here - partly as a personal log, and partly in the hopes that others will find them useful.
Want to connect or follow along?
LinkedIn: [phpsytems]
Twitter / X: [@timmehwimmy]
Mastodon: [@timmehwimmy@infosec.exchange]
If you've found a post helpful, consider supporting the blog - it's a part-time passion that your support helps keep alive.
⚠️ Disclaimer
This post may contain affiliate links. If you choose to purchase through them, I may earn a small commission at no extra cost to you. I only recommend items and services I’ve personally read or used and found valuable.
As an Amazon Associate I earn from qualifying purchases.