🧠💡 Building a Smart Ambient Sensor Skull with Pimoroni Skull Kit + BME688 + Home Assistant
👻 Introduction
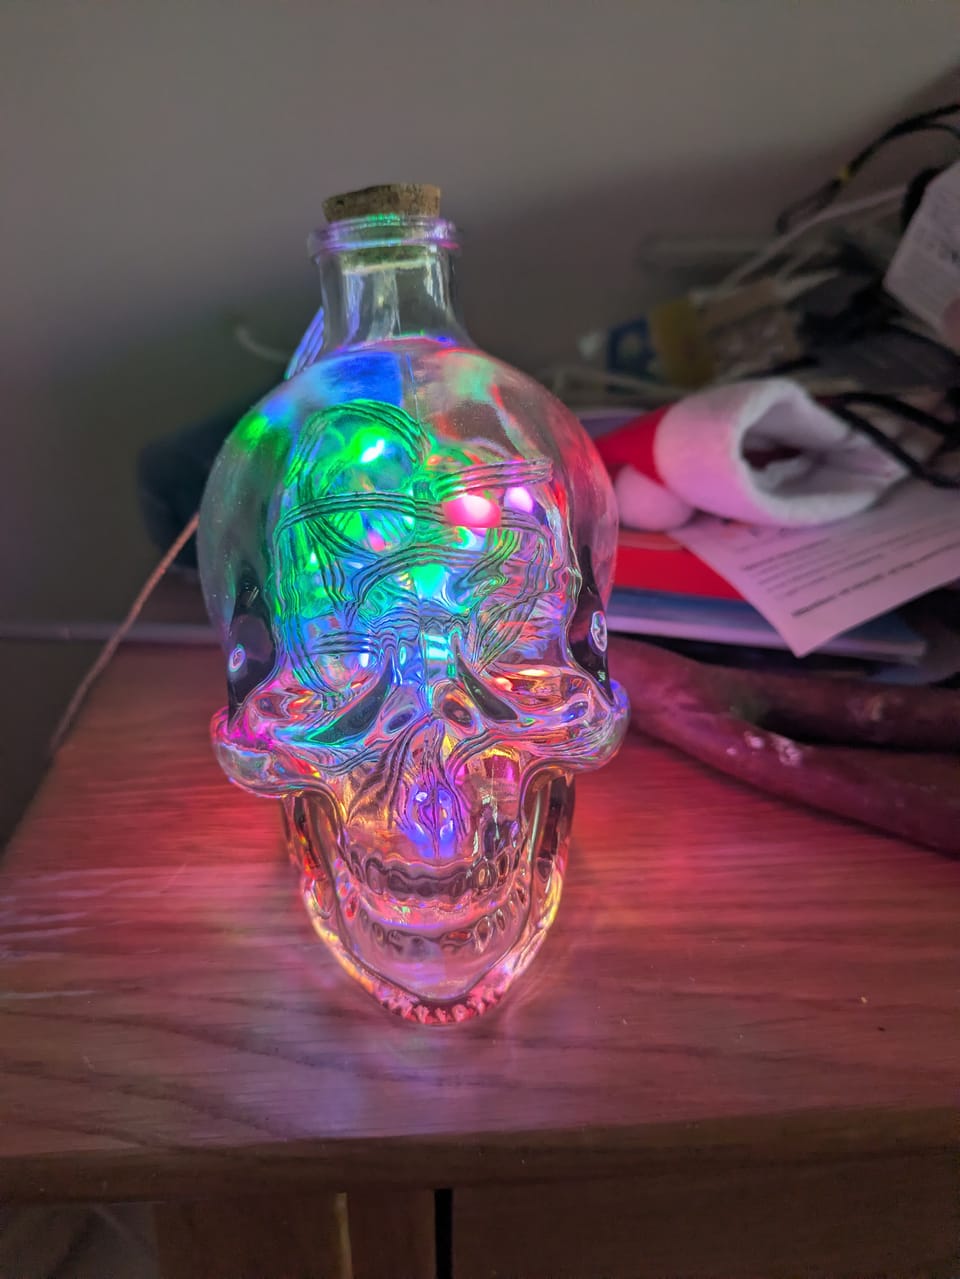
If you’re into DIY home automation and IoT gadgets, the Pimoroni Skull Kit is one of the most unique ways to add personality to your setup. It’s not just a skull-shaped LED light—it’s a programmable piece of art, and just in time for Halloween too!
In this post, I’ll show you how to connect it to Home Assistant using ESPHome, and even add a BME688 sensor for temperature, humidity, and indoor air quality monitoring.
🧩 What You’ll Need
- 🦴 Pimoroni Skull Kit / Wireless Plasma Kit
- 🌡️ Pimoroni BME688 Sensor
- 🔌 USB-micro power supply and jumper wires
- 💻 Home Assistant + ESPHome add-on installed
🔌 Wiring up the LED Strip
Connecting the LED strip to your Raspberry Pi Pico W is straightforward — once you know which wire is which!
The LED strip that comes with the Pimoroni Skull Kit has three connections, which go directly to the terminal connectors on the Pico W:
- ⚡ 5V Line: The cable with the black dots on it — this one carries 5 volts of power. (This threw me initially, so don’t worry if it does the same to you!)
- 📶 Middle Wire: This is your data line, which connects to GPIO15 (as defined in the YAML configuration).
- 🪫 Third Wire: This is ground (GND) and connects to any ground pin on the Pico W.
💡 Tip: Double-check the direction of the data arrows on your LED strip — they should point away from the Pico W, toward the LEDs. If they’re reversed, the strip won’t light up.
Once everything is wired up, feed the LED strip carefully into the skull jar. It can be a little fiddly — I actually used a chopstick to guide the strip right to the bottom and position it neatly inside.
If you’re using a different WS2812 or NeoPixel strip (like this 5V WS2812B strip on Amazon), the color coding can vary — so always verify which lead is power, data, and ground before powering up.
Once in place and connected, your Skull Kit’s LEDs will light up beautifully when you flash the ESPHome firmware — and with the pollution-based color change logic, your glowing skull will also keep an eye on your indoor air quality.
⚙️ YAML Configuration for ESPHome
Once you’ve wired up the BME688 sensor via I²C using the Qw/ST connector and connected your Pico W, flash it with ESPHome using the following YAML configuration:
# skull.yaml
esphome:
  name: skull
  friendly_name: skull
  on_boot:
    priority: 700
    then:
      - light.turn_on: led_strip
      - lambda: |-
          auto call = id(led_strip).make_call();
          call.set_effect("Rainbow2");
          call.perform();

api:
  encryption:
    key: <your key>

ota:
  - platform: esphome
    password: <your key>

rp2040:
  board: rpipicow

logger:

wifi:
  ssid: !secret wifi_ssid
  password: !secret wifi_password
  ap:
    ssid: "Skull Fallback Hotspot"
    password: "random pass"

output:
  - platform: gpio
    pin:
      number: 25
      mode: output
    id: LED

light:
  - platform: rp2040_pio_led_strip
    name: led_strip
    id: led_strip
    pin: GPIO15
    num_leds: 50
    pio: 0
    rgb_order: RGB
    chipset: WS2812
    effects:
      - random:
          name: "Random Effect"
      - addressable_rainbow:
          name: "Rainbow2"
          speed: 20
          width: 50
(The full configuration includes LED effects, buttons, BME688 sensor readings, and IAQ classification—see GitHub link below for the complete file.)
🌈 Adding Smart Light Effects
With this setup, your Skull Kit can cycle through effects like Rainbow, Twinkle, Fireworks, and Color Wipe—all controllable from your Home Assistant dashboard.
You can even add a virtual “Cycle LED Effect” button that lets you change the lighting mode with a single tap.
🛠️ Tip: Adjust the number of LEDs and GPIO pins in the YAML to match your setup.
🌬️ Integrating the BME688 Air Quality Sensor
The BME688 adds powerful environmental sensing to your project:
- 🌡️ Temperature
- 💧 Humidity
- 🧪 Air Quality Index (IAQ)
- 💨 CO₂ Equivalent
- 🫁 VOC Levels
This makes the Skull not just decorative—but functional, giving you real-time data on indoor air quality right from your Home Assistant dashboard.
You can classify air quality in Home Assistant using this logic:
text_sensor:
  - platform: template
    name: "BME68x IAQ Classification"
    lambda: |-
      if (int(id(iaq).state) <= 50) return {"Excellent"};
      else if (int(id(iaq).state) <= 100) return {"Good"};
      else if (int(id(iaq).state) <= 150) return {"Lightly polluted"};
      else return {"Moderately polluted"};
🏠 Home Assistant Integration
Once your ESPHome node is flashed, it’ll automatically appear in Home Assistant. From there, you can:
- View IAQ, CO₂, temperature, and humidity in real-time
- Trigger lighting effects based on air quality
- Automate light color changes (e.g., red for poor air quality)
💡 Ideas for Automation
Here are a few fun ways to use your smart skull:
- “Party Mode”: When music is playing, activate Rainbow2 effect.
- “Air Alert”: If IAQ > 150, set lights to red and send a mobile alert. In my case, this also switches on my airfilter.
- “Good Night”: Turn off LEDs when no motion is detected.
🛍️ Recommended Accessories
If you’re building your own smart desk ornament or air monitor, consider:
These are inexpensive and perfect for expanding your ESPHome ecosystem.
📈 Final Thoughts
The Pimoroni Skull Kit becomes so much more than a light when paired with ESPHome and Home Assistant—it’s a living piece of tech art. With the addition of the BME688 sensor, you’ll not only impress guests but also keep tabs on your indoor environment.
👉 Ready to Build Your Own?
Grab your Pimoroni Skull Kit and BME688 sensor today and start glowing smarter!
The full github code can be found here.
💬 Have questions or want to show your build?
Drop a comment below or tag #SmartSkull on social media!
About the author
Tim Wilkes is a UK-based security architect with over 15 years of experience in electronics, Linux, and Unix systems administration. Since 2021, he's been designing secure systems for a telecom company while indulging his passions for programming, automation, and 3D printing. Tim shares his projects, tinkering adventures, and tech insights here - partly as a personal log, and partly in the hopes that others will find them useful.
Want to connect or follow along?
LinkedIn: [phpsytems]
Twitter / X: [@timmehwimmy]
Mastodon: [@timmehwimmy@infosec.exchange]
If you've found a post helpful, consider supporting the blog - it's a part-time passion that your support helps keep alive.
⚠️ Disclaimer
This post may contain affiliate links. If you choose to purchase through them, I may earn a small commission at no extra cost to you. I only recommend items and services I’ve personally read or used and found valuable.
As an Amazon Associate I earn from qualifying purchases.